跳转到主内容
加入维修社区 - 创建账户

ABXY/D-pad Conductive Sticker Replacement

你所需要的

    1. ABXY/D-pad Conductive Sticker Replacement, Prepare for disassembly: 步骤 1 中的图像 1,1
      • Before you begin, power off the console and remove:

      • The stylus

      • Any game cartridge

      • The microSD card

      添加评论

    2. ABXY/D-pad Conductive Sticker Replacement, Remove the back cover screws: 步骤 2 中的图像 1,1
      • Use a tri‑point Y00 screwdriver to remove the four 6 mm‑long screws located at the four corners of the bottom panel.

      添加评论

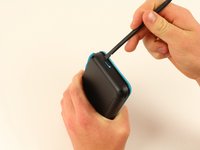
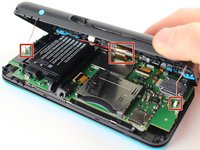
    3. ABXY/D-pad Conductive Sticker Replacement, Release the back cover clips: 步骤 3 中的图像 1,2 ABXY/D-pad Conductive Sticker Replacement, Release the back cover clips: 步骤 3 中的图像 2,2
      • Use a spudger to gently pry around the two short edges and front edge (with the stylus cut‑out) to release the clips securing the back cover.

      • Swing the back cover open from its front edge to release the clips along the hinge edge. Don't remove it fully—three cables are connecting it to the motherboard (two on each side and one in the rear).

      添加评论

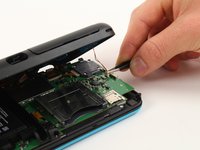
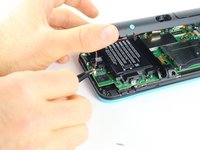
    4. ABXY/D-pad Conductive Sticker Replacement, Disconnect the back cover: 步骤 4 中的图像 1,3 ABXY/D-pad Conductive Sticker Replacement, Disconnect the back cover: 步骤 4 中的图像 2,3 ABXY/D-pad Conductive Sticker Replacement, Disconnect the back cover: 步骤 4 中的图像 3,3
      在这个步骤中使用的工具:
      Tweezers
      $4.99
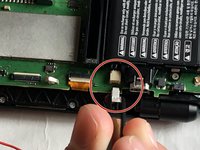
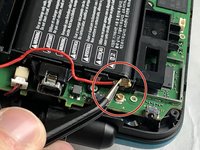
      • Use tweezers to disconnect the two cables that connect the rear buttons on either side to the motherboard by gently pulling them upwards.

      • Fold the back cover over the hinge edge, keeping the cable connected. Don't strain the cable.

      添加评论

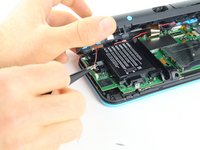
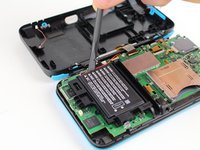
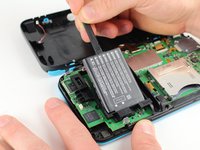
    5. ABXY/D-pad Conductive Sticker Replacement, Battery Removal: 步骤 5 中的图像 1,2 ABXY/D-pad Conductive Sticker Replacement, Battery Removal: 步骤 5 中的图像 2,2
      • The battery is lightly adhered to its enclosure.

      • Use the flat end of a spudger to gently pry the battery out of its plastic enclosure.

      添加评论

    1. ABXY/D-pad Conductive Sticker Replacement, Motherboard: 步骤 6 中的图像 1,2 ABXY/D-pad Conductive Sticker Replacement, Motherboard: 步骤 6 中的图像 2,2
      在这个步骤中使用的工具:
      Tweezers
      $4.99
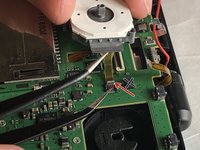
      • There are 8 ribbon cables that need to be removed as shown in the picture.

      • 2 of connectors (in green) are friction fit, unlike the rest of the connectors. Remove the cable by pulling it out gently flat in the arrow direction. Do not attempt to open or unlatch these connectors in any way. Doing so will break them.

      • For the remaining 6 (in red), use a pair of tweezers to flip the latches up and pull the ribbon cable out.

      • Note that the second picture shows a broken ribbon connector next to the joystick ribbon connector (to the right of the red arrow). Do not attempt to unlatch this connector as shown in the picture!

      添加评论

    2. ABXY/D-pad Conductive Sticker Replacement: 步骤 7 中的图像 1,2 ABXY/D-pad Conductive Sticker Replacement: 步骤 7 中的图像 2,2
      • Unplug the following wires from the motherboard using a pair of tweezers.

      询问修复机器人

      添加评论

    3. ABXY/D-pad Conductive Sticker Replacement: 步骤 8 中的图像 1,2 ABXY/D-pad Conductive Sticker Replacement: 步骤 8 中的图像 2,2
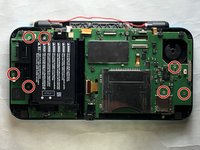
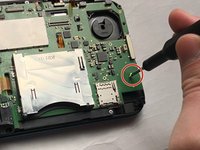
      • Remove the seven 4.4 mm screws using a J00 (or iFixit's Phillips #00) screwdriver bit.

      • Remove the motherboard from the device.

      添加评论

    1. ABXY/D-pad Conductive Sticker Replacement, ABXY/D-pad Conductive Sticker: 步骤 9 中的图像 1,1
      • Flip the board over so the cartridge slot is on the bottom

      • Peel off the damaged sticker and replace it with the new one

      • ABXY buttons

      • D-pad

      • If the new sticker doesn't fit properly, you can cut it apart and stick each pad down separately. As long as they're properly aligned and secure, the buttons will still work normally

      询问修复机器人

      添加评论

结论

To reassemble your device, follow these instructions in reverse order.

取消:我没有完成这个指南。

2等其他人完成本指南。

darth mango

于03/13/23注册

3,820 声望

创作了3篇指南

0指南评论

添加评论

浏览统计数据:

过去 24 小时: 5

过去 7 天: 49

过去 30 天: 246

总计 5,727