你所需要的
视频概述
-
-
一如既往地,我们的拆解始于机器的规格数据
-
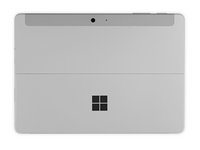
3:2比例,10英寸IPS屏幕,支持多点触控,分辨率1800X1200(217PPI)
-
双核1.6GHz英特尔®奔腾®金牌处理器 4415Y,带有英特尔 HD 615核芯显卡
-
4GB内存(可选8GB版本)
-
64GB eMMC存储(可选128GB NVMe SSD),支持MicroSDXC的外部存储
-
8MP后置摄像头,支持1080P高清视频,前置5MP摄像头,支持1080P Skype高清视频
-
-
-
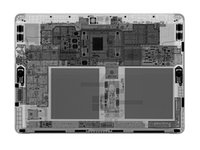
拆解的方式不只有一种,我们的拆解方式需要一定的时间,所以先来看看我们的伙伴,来自Creative Electron的X光版本拆解吧。
-
最基础的英特尔处理器、两块电池、大量的电路板,但没有可见的热管!这看起来sueface最近一直坚持不用铜管散热。
-
-
-
在这个步骤中使用的工具:iFixit Adhesive Remover$19.99
-
-
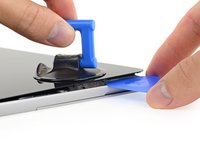
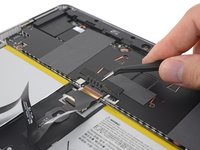
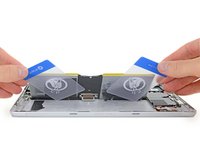
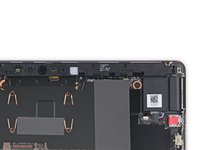
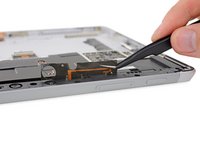
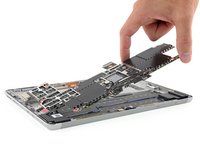
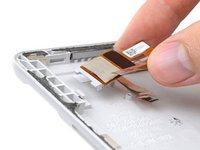
现在,注意力转向Wi-Fi天线,我们早已预料到撕开胶水拆除屏幕会对它们造成损坏。
-
将显示屏用胶水黏在Wi-Fi天线上让许多Surface Pro的维修造成严重破坏,在多数情况下,移除屏幕意味着天线损坏。
-
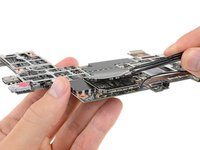
现在我们对其进行观察,细致地观察。
-
这些天线实际上很难观察,但看起来其并未损坏,这是我们拆解的第五代Surface Pro天线,你可以进行对比观察。
-
这些天线绝对被重新设计过,或许这能减少一点让你烦恼到咬指甲的维修经历。
-
-
-
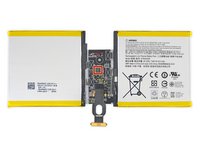
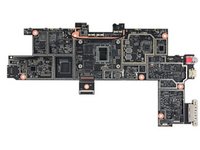
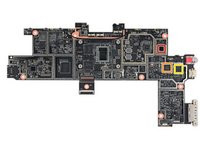
最后,我们辛苦劳作换来的成果
-
英特尔奔腾(Intel Pentium)4415Y 处理器
-
SK海力士(SK hynix)H26M74002HMR 64 GB eMMC5.1 NAND闪存
-
两颗SK海力士(SK hynix)H9CCNNNBKTAL 16 Gb LPDDR3 SDRAM(总4GB)
-
德州仪器(Texas Instruments)BQ25700A 电池升降压式充电控制单元
-
安森美半导体(ON Semiconductor) NCP81216 相位控制器
-
高通(Qualcomm)QCA6174A Wi-Fi/蓝牙 Soc
-
谱瑞科技(Parade Technologies) PS87430(可能是USB host 开关)
-
-
-
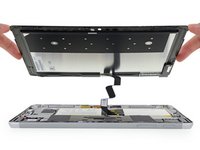
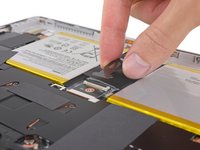
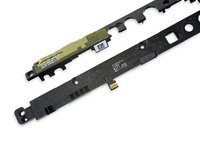
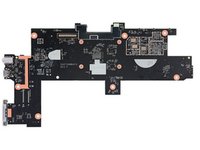
所有的芯片,或者说这台Surface Go本身没有配备风扇或是热管,这种铜制薄屏蔽罩和一些导热膏为这台也许算是电脑的设备进行散热工作。(或许,你可以在冰箱里运行这台设备···)
-
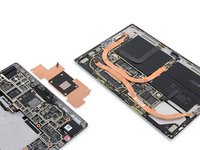
和右侧我们在第五代Surface Pro上发现的铜制触手相比,Surface Go上的设计明显相当激进,希望对于Go上这颗不超频的CPU功耗来说已经足够使用了。
-
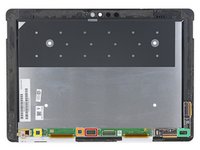
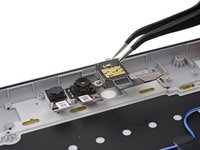
现在进行拆解的最后步骤,拆除支持Windows Hello的摄像头、前置5MP 摄像头和后置8MP 摄像头(背部带有LED指示灯),它们排列成一排。
-
最后,模块化的MicroSDXC读卡器和瑞昱(Realtek)5227S读卡器主控——这便是 理论上 可升级的存储空间。
-


30条评论
Do you think the Surface go 128gb uses a different motherboard? This 64gb model has the eMMC ssd chip, but I don’t know if there are any pin compatible nvme ssd single-chips packages that feature the same pcb footprint and signaling as an eMMC part. I’m pretty sure an NVME ssd has to have a separate controller and nand at this point in time. I have not seen any one-chip packages yet. Even the new MacBook Pro 15" Touch Bar 2018 teardown revealed a multi-package configuration (controller + 2 nand packages) for the integrated nvme ssd. It doesn’t look like there’s room for a m.2 nvme drive in the surface go either, so I think the 128gb/256gb model uses a different motherboard. Let me know what you think! :D
I looked into mainboard’s picture and found many blank area on the top left. Probably it was designed for SSD and will be used on 128GB model. I don’t think Microsoft will spent too much money to design and manufacture another type of mainboard.
Looks like the empty solder pads on the back of the main board between the USB-c and charge connector have space to solder a NVMe connector. May also need controller though as Al2Me6 mentioned on 08/04/2018. I would like to know if an NVMe drive can be added to the EMMc version I have.
Bran Man -
I own this product and it is not that great. All you can do is search the internet and its so slow, my phone works faster! I had to re-install windows 10 Pro just to get some speed out of the unit that ships in windows 10 S mode, The S is for slow lol… The S is for secure and locked down to windows store apps, which is not much. You can opt out of S-Mode but then you get windows 10 Home. you can not even CMD or run a simple bash command in S mode. Expect a ton of returns from uneducated general public. There is no fan, but there is no vent, the back becomes extremely hot. the 9 hour battery life must have been conduced by someone who does not know how to tell time or possibly the “watchman” cause I’ve had a number of test and im getting around 3 hours.
There is no reason for the 4GB 64GB $399 table to exist, Windows is around 30GB storage after all updates needed. Its a shame that truly for a okay slow Surface is $760 with a keyboard after tax for the 8GB configuration.
My keyboard stopped working, it bent.
I agree that on Windows 10, as with all reviewers, this product is pretty much useless. That said, for me, it is incredibly useful only because, as a few other people have done, I wiped the drive of Windows and installed Linux (Ubuntu). This gets around all of the performance issues and it works great for general programming tasks and even low-end gaming.