简介
使用本指南更换小米 Mi 9 中损坏的 AMOLED 和数字转换器。由于手机的设计原因,你必须卸下锂离子电池才能使用显示屏电缆。在强行拔出变形或弯曲的电池后,重新使用旧电池有潜在的安全隐患。在这种情况下,请更换新电池。
'''在拆卸手机之前,请将电池放电至25%以下”'。如果电池被意外刺穿,可能会着火和/或爆炸,但如果放电,则发生的可能性要低得多。
注意:本指南指导你仅更换屏幕,而将原始框架和主板留在原处。但是,此手机的某些更换屏幕已预先安装在新的框架(又称为机架)中,这是非常不同的过程。在开始本指南之前,请确保零件正确。
重新组装设备时,你需要使用“更换粘合剂”来重新连接组件。
你所需要的
-
-
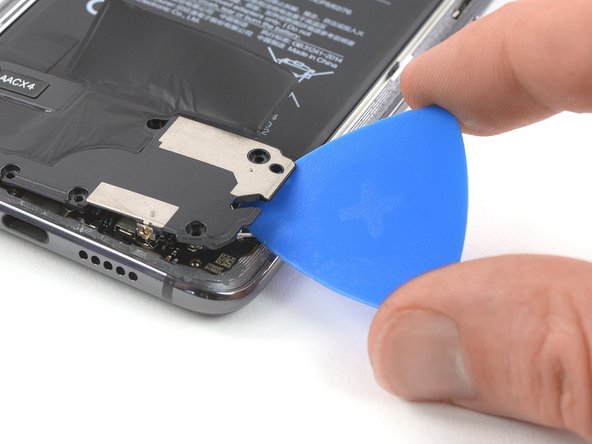
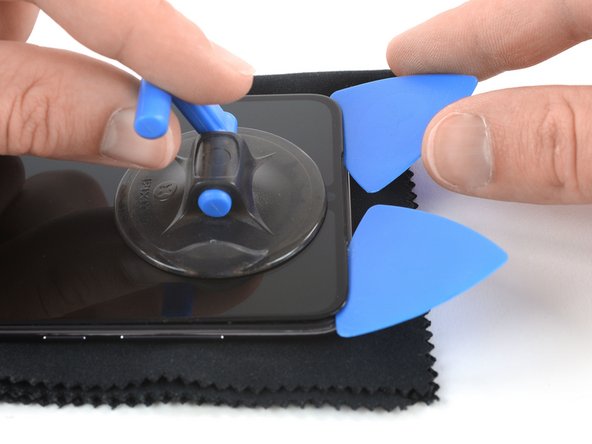
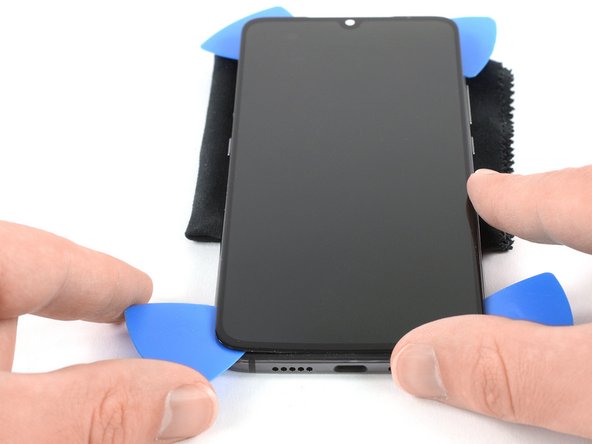
在后玻璃的左上角下方插入第四个三角撬片。
-
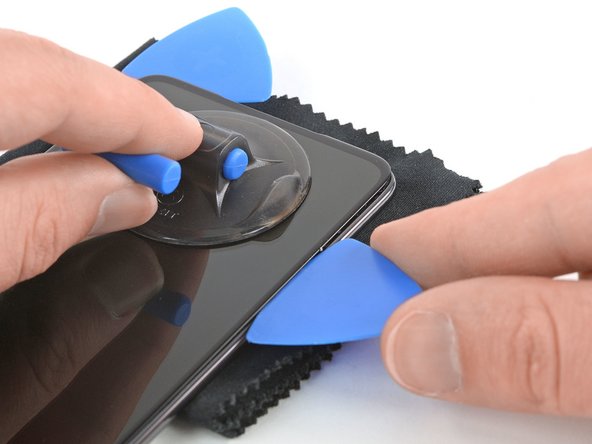
沿顶部滑动三角撬片以切割粘合剂。
-
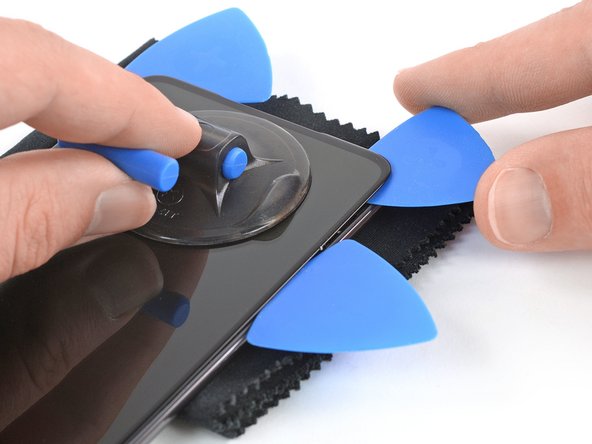
将三角撬片留在右上角,以防止胶粘剂重新密封。
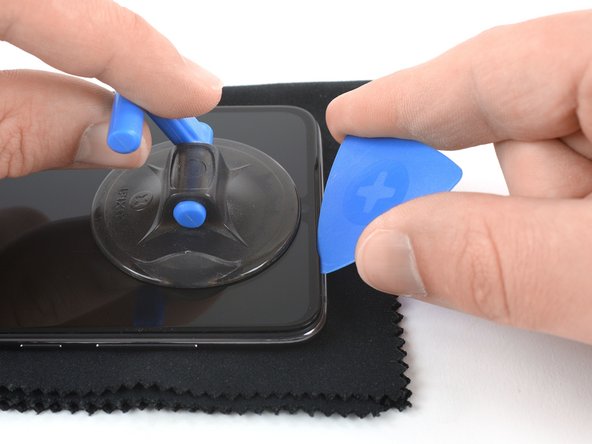
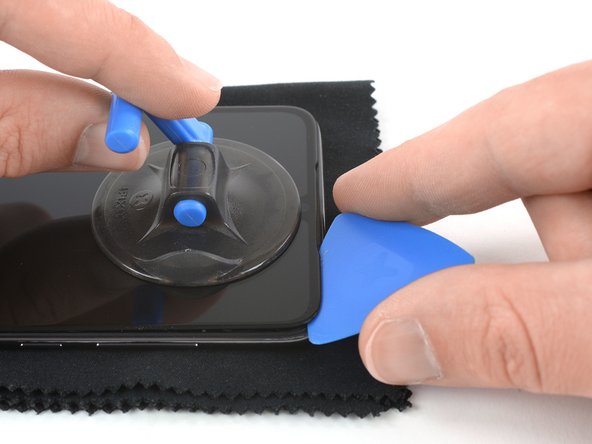
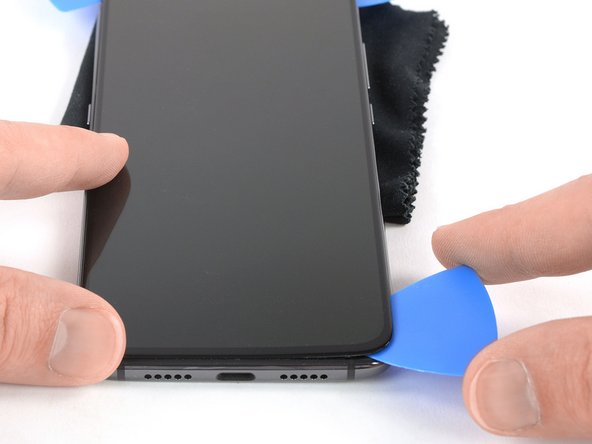
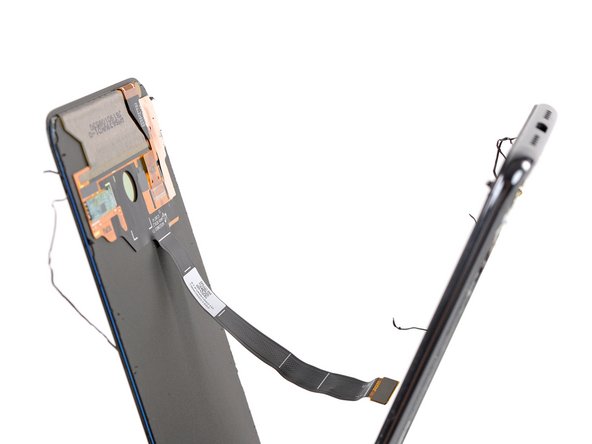
Be very careful at this point not to raise the cover too much, at the slightest bending the glass shatters. It just happened to me :(
-
-
-
拧下固定主板盖的十颗菲利普斯#00 螺丝(3 mm 长)。
Note, the Explorer/Transparent edition does not use phillips #00 screws.
It uses 0.8mm star screws(P2 Pentalobe in the iFixIt store)
Thanks for mentioning Jason!
-
-
-
-
拧下固定扬声器单元的七颗菲利普斯#00螺丝:
-
四颗银色的3.2 mm 长螺丝
-
两颗浅黄色3.8 mm 长螺丝
-
一颗2.8mm 长的黑色螺丝
I found that there was no need to remove the loudspeaker assembly at all. The battery adhesive was easy to pull out (by rolling it up on a screwdriver) without needing to remove the loudspeaker.
I can confirm this. Worked like a charm without taking the loudspeaker assembly out.
Ich stellte fest, dass es überhaupt nicht nötig war, die Lautsprecherbaugruppe zu entfernen. Der Batteriekleber ließ sich leicht herausziehen (durch Aufrollen mit einem Schraubenzieher), ohne dass der Lautsprecher entfernt werden musste.
Gegenteilig sogar! Das Antennenkabel löste sich und hat dann außerordentlich viel Zeit gekostet den Stecker zu reparieren!! -


如果可能,打开你的手机,在涂抹新的粘合剂重新封合你的手机之前, 测试你的维修 。
固定新屏幕的最佳方法是使用一张客制化的双面胶带。将胶带粘贴到屏幕背面,然后小心地将显示屏电缆穿过框架。对准屏幕,然后将其按入到位。
请按逆序重组你的设备。
请把你的电子废料带到 R2 或 e-Stewards 认证的回收商。
维修没有按计划进行?请查阅我们的论坛 寻求帮助。
如果可能,打开你的手机,在涂抹新的粘合剂重新封合你的手机之前, 测试你的维修 。
固定新屏幕的最佳方法是使用一张客制化的双面胶带。将胶带粘贴到屏幕背面,然后小心地将显示屏电缆穿过框架。对准屏幕,然后将其按入到位。
请按逆序重组你的设备。
请把你的电子废料带到 R2 或 e-Stewards 认证的回收商。
维修没有按计划进行?请查阅我们的论坛 寻求帮助。
21等其他人完成本指南。


13条评论
Doppeltes Klebeband. Gibts auch amazon passgenau oder du bastelt dir selbst wad
il manque la partie ou on enlève la batterie (via les petit scotch. de plus la première étape devait être d’enlever le tiroir pour la carte sim
Bonjour Mathieu, merci de votre attention et de votre remarque. La partie du retrait de la batterie a été ajoutée. Par contre, la carte SIM qui se trouve derrière la carte mère ne dérange pas la procédure. Il n’est donc pas nécessaire de commencer par la retirer. J’espère que vous avez à présent toutes les infos pour effectuer la réparation. Bonne continuation !
Bonjour
est ce que les écrans des MI9 Standard / lite et SE sont les mêmes (ou compatible) ?
Merci
Yohann
Hi Yohann,
the Xiaomi Mi 9 SE has a 5.97 inch screen while the Mi 9 and the Mi 9 lite have 6.39 inches. So there’s no compatibility here. Regarding the Mi 9 and the Mi 9 lite all I can say is, that the Glass Protection is different between them (Corning Gorilla Glass 5 respectively 6). Besides that the screen specs look kind of the same but I can’t guarantee that they are interchangeable.
Hi Dominik
this is a very accurate and helpful answer. I’ll need to be carefull when choosing the vendor because they don’t always indicate clearly the destination of glass.
Thank you very much
Regards
Yohann
Wie kann ich die gesplitterte Frontscheibe ersetzen.
Das Frontglas ist gesplittert
Was muss
Wenn wirklich nur das Frontglas gesplittert ist, das Display aber funktioniert, kannst du es laut diesem Video allein ersetzen: https://youtu.be/i3lJQ7z1cy8?t=527 Du musst das Display trotzdem ausbauen, dann erhitzen und dann das Glas vom Display lösen. Und natürlich brauchst du das Glas als Ersatzteil.
Was hier vielleicht noch wichtig zu erwähnen ist: Nach dem Displaytausch muss man höchstwahrscheinlich den Fingerabdrucksensor neu kalibireren, zumindest wenn einem auffällt, dass dieser nicht mehr richtig funktioniert. Dafür nimmt man am besten ein spezielles Tool (z.B. RELIFE RL 071B). Bevor man sich jetzt aber direkt das (oder ein ähnliches) Ding bestellt, vorher vielleicht einmal das Entsperrmuster entfernen (was auch alle Fingerabdrücke löscht), das Ensperrmuster wieder aktivieren und dann versuchen neue Fingerabdrücke hinzuzufügen. Wenn das klappt, kann man sich die Kalibration natürlich sparen ;)
Über den USSD-Code " *#*#64663#*#* " kommt man in das QC-Menü. Dort über das Kebap-Menü oben rechts auf "Additional tools" und den Punkt "12. fod fingerprint calibration" auswählen. Hier muss man dann die verschiedenen Pads des Kalibrations-Tools auflegen, einfach den Anweisungen auf dem Screen folgen.
Great guide, my phone (Mi9) decided to die 2 days ago, where can i buy the entire front screen from a thrusty place and good price?