简介
使用本指南更换小米红米 Note 7 中磨损或没电的电池。
如果你的电池膨胀,采取适当的预防措施。为了你的安全,在拆卸手机之前,请“将电池电量放电到 25% 以下”。如果电池在维修过程中意外损坏,这会降低发生危险热事件的风险。
重新组装设备时,你需要更换粘合剂来重新连接组件。
你所需要的
-
-
-
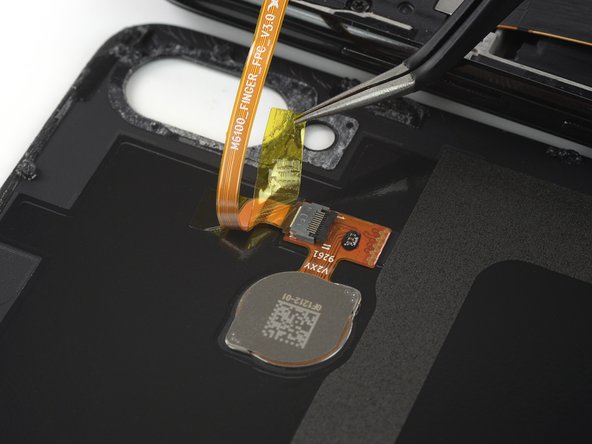
使用一对钝头镊子将左侧拉片的黑色端从电池上剥下。
-
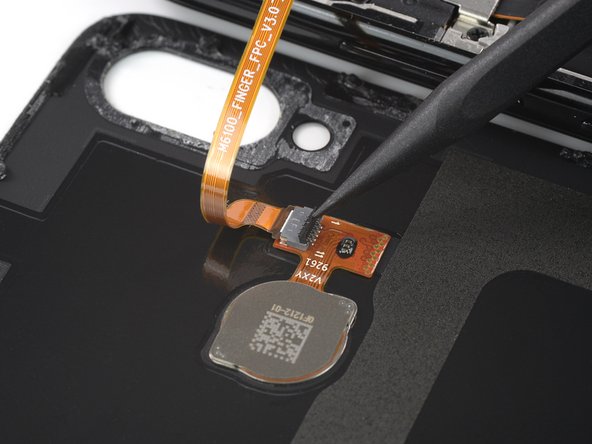
用镊子抓住拉片,然后将其从电池中慢慢拉向 Redmi Note 7 的底部。
-
拉得足够用力以保持条带上的张力,但不要用力。给它足够的时间来伸展和脱离电池。
-
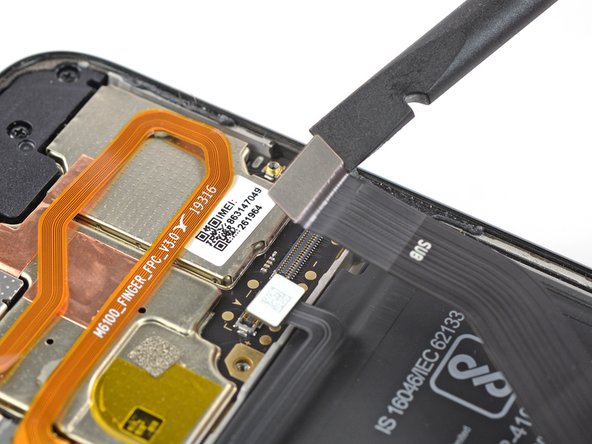
不要按下电池。牢牢握住红米 Note 7 的两侧。
-
以低角度拉动,使条带不会挂在电池的边缘。
-
如果胶带断裂,请尝试用手指或钝镊子取回它,然后继续拉动,但不要撬动电池下方。
-


如果可能,请在安装新粘合剂和重新密封之前打开你的设备并测试你的维修情况。
用预切胶 或双面胶带固定新电池。为了正确定位,请将新粘合剂涂在旧粘合剂所在的位置,而不是直接涂在电池上。将新电池用力按入到位。
要重新组装你的设备,请按照逆序执行上述步骤。 用异丙醇 (>90%) 清洁相关区域后,在必要时涂抹新的粘合剂。
为获得最佳性能,完成本指南后,校准 新安装的电池。
将您的电子垃圾送到 R2 或 e-Stewards 认证回收商。
如果可能,请在安装新粘合剂和重新密封之前打开你的设备并测试你的维修情况。
用预切胶 或双面胶带固定新电池。为了正确定位,请将新粘合剂涂在旧粘合剂所在的位置,而不是直接涂在电池上。将新电池用力按入到位。
要重新组装你的设备,请按照逆序执行上述步骤。 用异丙醇 (>90%) 清洁相关区域后,在必要时涂抹新的粘合剂。
为获得最佳性能,完成本指南后,校准 新安装的电池。
将您的电子垃圾送到 R2 或 e-Stewards 认证回收商。
22等其他人完成本指南。


6条评论
Thanks for the guide. Do you think it's possible to use the phone without gluing the back on again? But instead using a case to hold the back on. My rubber case reaches around to the front of the phone, and seems like it would hold the flat back glass on quite well, while also keeping out dust. Or is this just a bad idea?
Hi Evocativekitsune,
I wouldn't advise to do that. It happens often that dust finds its way underneath the phone case and therefore straight into your phone. I suggest to use at least some regular double sided tape (you can cut it in small strips by yourself) to glue the back cover selectively back onto the midframe. It's still not the best protection however it's better than a completely loose cover. Don't forget to remove the old adhesive backings before applying new adhesive!
Thanks for the detailed guide!
Unfortunately I wasn't carefully enough when wedging the first opening pick below the glass back cover, and it cracked. I was still able to follow the guide and replace the battery successfully. I will order a new back, which does not cost a lot and should hopefully come with new adhesives as well.
One thing to note though when reassembling the device:
The main flex cable has the same connector on both sides and can therefore be plugged in incorrectly. I didn't pay close enough attention to the orientation and after reassembling, the phone didn't turn on, as something seemed to short out. Fortunately nothing got damaged, but be careful to connect the cable the right way round.
The flex cable has printed markings "MB" and "SUB". Connect the side marked with "MB" to the Motherboard on top of the phone and the side marked with "SUB" to the daughterboard below with the charging circuitry.
I did this exercise today with my redmi 7. But the internal anatomy looks different.
1. Xiomi has been very liberal with the glue. Just to make repair hell?
2. There is no need to remove the speaker assembly. Just fold back the two fat cables.
3. Use rubber cement to seal back. Apply a very thin layer on the body and let it dry for 5 mins. The press the back firmly and keep it under several books to apply pressure evenly.