跳转到主内容

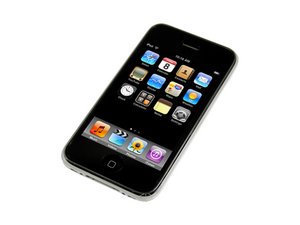
iPhone 3G是第二代iPhone。型号A1241,有8或16 GB容量,和炫酷的黑色或洁白的白色塑料背面。修复比第一款iPhone更简单。需要螺丝刀、撬撬工具和吸尘工具。

1158 个问题 查看全部

I dissembled my iPhone 3G without keeping track of screws!

I could clearly seperate the two first screws to open up the iPhone, cause they look so different. Then I managed to seperate all logic board screws, those half threaded ones, and the additional two that has the same length and then the one with the sticker on, though after this I'm clueless. I don't know where to put which screws ... One more, I know the longest one that fits in the headphone thing. Please help me out, where can I find some guide or something that gives me an overview?

Thank you
已回答! 显示答案 我也有这个问题

这是一个好问题吗?

得分 -1
添加一条评论

5个答案

已选择的解决方案

You should be able to review the teardown and identify your screws: iPhone 3G

这个答案有帮助吗?

得分 0

4条评论:

Some of them lacks information about screws.

"Remove the two Phillips #00 screws securing the on/off switch to the front bezel."

完成的

That is the information, #00 is a Phillips screw head size. http://ifixit.com/pdf/guide_583_en.pdf

完成的

I figured that out, thanks. I'm wondering how many mm it is?

完成的

I did the same thing. I wish the guides would have had a tip to keep track of the sizes and mark them.

完成的

添加一条评论
最有帮助的答案

All screws are #00, so the information on the dissasembly is useless.

There are only changes in the lenght and minimal changes in the tread width.

Also, there's one with a nut that is never mentioned in the dissasembly.

I took mine apart thinking on just using the screen and battery, but then when i found out it's impossible, i'm trying to put it togheter after getting a new connector for the proprietary cable. Will use it as a Pandora receiver in my audio receiver.

To help someone with the same problem in the future, here's the list of screws.

  • 9x short one (1mm x 1.5mm)
  • 2x short and thin ones (0.95mm x 2mm)
  • 8x medium (1.25mm x 3mm)
  • 1x 3mm
  • 1x 4mm
  • 1x brass nut

The short ones are to attach buttons and vibrating motor to the chorme trim

the 8x medium ones are to attach the logic board (incl one on top left to secure mother board AND silent switch)

这个答案有帮助吗?

得分 1
添加一条评论

You should notice when a screw really doesn't fit. Also, if you lose a screw here or there depending on where it is it doesn't really matter, functionality should still be restored.

这个答案有帮助吗?

得分 0

2条评论:

I'm not saying that this is true for all screws, but there are screws where it doesn't really matter. Also, the bezel might not perfectly align again anyway, but not due to screws, and if the home button is not really working anymore it is likely due to something else, not because of any screws.

完成的

Well not really, If there are missing screws or not the right size, the I-phone will not be "leveled" and the metal bezel would not be flat. If something doesnt fix perfectly there would be gaps between the bezel and the front cover and then things like, the home button not working or needing to press hard to make it work etc would start occurring. Not good

完成的

添加一条评论

Try to put your screws in order of when you took them out ... ie. if you took the outside screws off first, put them at the top. Then whatever screw you took out next, put that just underneath, etc. Also, use a fridge magnet to hold your screws so you don't knock them or they don't roll away somewhere.

Also:

http://www.ebay.com.au/itm/MAG-MAT-magne...

This will help in the future.

这个答案有帮助吗?

得分 0
添加一条评论

I always draw a diagram of the device on a piece of paper with a circle to indicate where the screws go. An old magnetic sign makes a great screw template.

这个答案有帮助吗?

得分 0
添加一条评论

添加你的答案

Henrik 将永远感激不已
浏览统计数据:

过去 24 小时: 0

过去 7 天: 0

过去 30 天: 0

总计 17,756