跳转到主内容

why! WDi7SSD Replace processor (CPU)

你所需要的

  1. why! WDi7SSD Replace processor (CPU), why! WDi7SSD Opening procedure: 步骤 1 中的图像 1,3 why! WDi7SSD Replace processor (CPU), why! WDi7SSD Opening procedure: 步骤 1 中的图像 2,3 why! WDi7SSD Replace processor (CPU), why! WDi7SSD Opening procedure: 步骤 1 中的图像 3,3
    • Make sure the computer is disconnected from the power source.

    • Flip the computer over.

    • Remove the six screws with a 2 mm Allen key.

    • Carefully remove the back panel, as well the left and right panel.

  2. why! WDi7SSD Replace processor (CPU): 步骤 2 中的图像 1,1
    • Now flip up the base panel to which all components are attached.

  3. why! WDi7SSD Replace processor (CPU), Processor (CPU): 步骤 3 中的图像 1,3 why! WDi7SSD Replace processor (CPU), Processor (CPU): 步骤 3 中的图像 2,3 why! WDi7SSD Replace processor (CPU), Processor (CPU): 步骤 3 中的图像 3,3
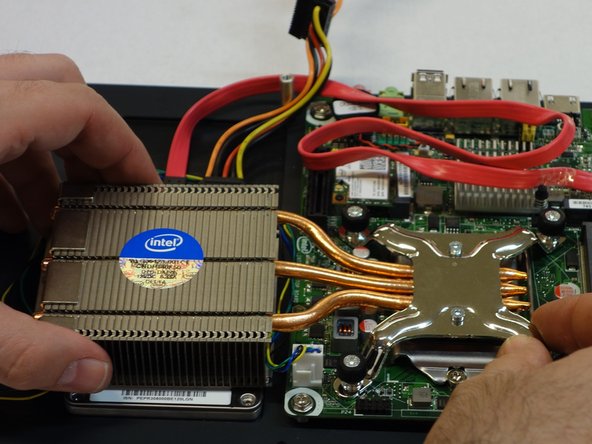
    • Loosen the 4 PH2 Phillips screws of the heat sink.

    • Now remove the heat sink.

  4. why! WDi7SSD Replace processor (CPU): 步骤 4 中的图像 1,2 why! WDi7SSD Replace processor (CPU): 步骤 4 中的图像 2,2
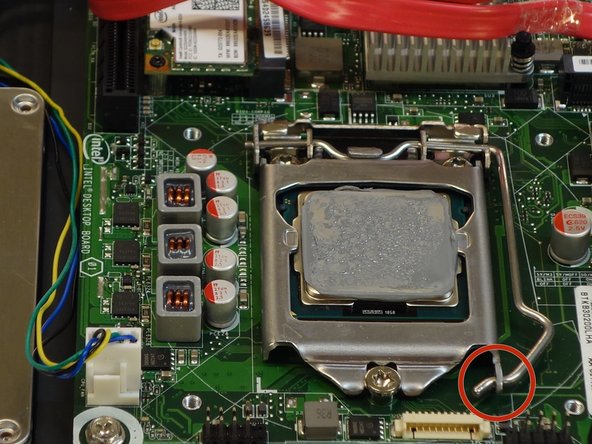
    • Use the screwdriver to unscrew the three PH2 slotted screws to release the CPU holder.

    • Press down the spring on the right side of the CPU and pull it carefully to the side.

    • Put the CPU aside.

    • To remove the thermal paste, you can use isopropanol. The thermal paste must be completely removed from the heatsink and CPU.

结论

To reassemble the unit, follow the instructions in reverse order.

另外一个人完成了本指南。

由衷感谢以下译者:

de en

100%

oldturkey03正在帮助我们修复这个世界! 您也想加入吗?
开始翻译 ›

Felice Suglia

于06/15/13注册

30,908 声望

创作了264篇指南

0条评论

添加评论

浏览统计数据:

过去 24 小时: 0

过去 7 天: 0

过去 30 天: 5

总计 138