正翻译步骤 5
步骤 5


-
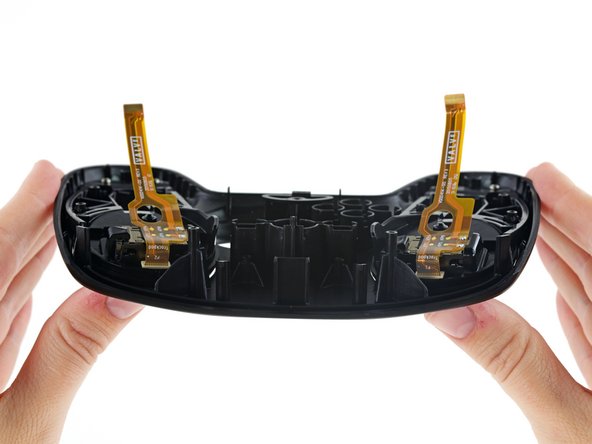
It's a trap! Lifting the motherboard out of its housing reveals a couple hidden ribbon cables connecting the touchpads to the underside of the board.
-
We're never fans of treacherous cables like these, but this is hardly the worst we've seen.
-
Moving right along, we disconnect the ribbon cables with a firm tug, freeing the upper assembly for closer inspection and giving us a glimpse at the inner workings of the touchpads.
您的所有投稿皆享有基于开源创作共享许可协议(CC BY-NC-SA)的著作权利。