正翻译步骤 8
步骤 8

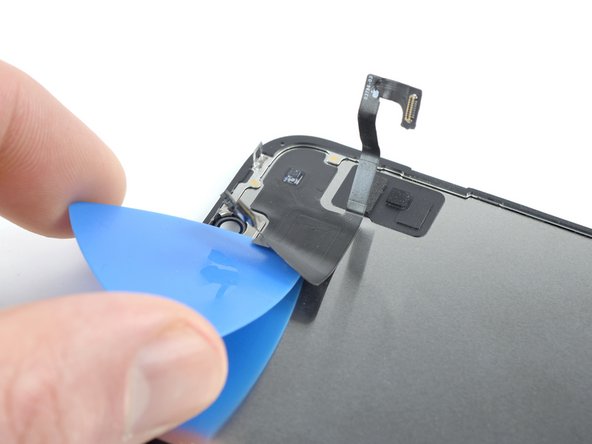


Remove the front sensor assembly
-
Insert an opening pick under the left side of the front sensor assembly.
-
Slide the pick under the assembly to separate it from the frame.
您的所有投稿皆享有基于开源创作共享许可协议(CC BY-NC-SA)的著作权利。