当前版本的文档还未经巡查,您可以查看最新的已查核版本。
你所需要的
-
这个步骤还没有翻译 帮忙翻译一下
-
If your display glass is cracked, keep further breakage contained and prevent bodily harm during your repair by taping the glass.
-
Lay overlapping strips of clear packing tape over the iPad's display until the whole face is covered. For particularly bad breaks, you may need to lay down two layers.
-
Do your best to follow the rest of the guide as described. However, once the glass is broken, it will likely continue to crack as you work, and you may need to use a metal prying tool to scoop the glass out.
-
-
-
这个步骤还没有翻译 帮忙翻译一下
-
Examine your replacement part, and your original display carefully to be sure they match.
-
Your replacement screen may be missing the sleep/wake sensor that is necessary for Smart Cover use. If you want to maintain functionality you will need to transfer the component.
-
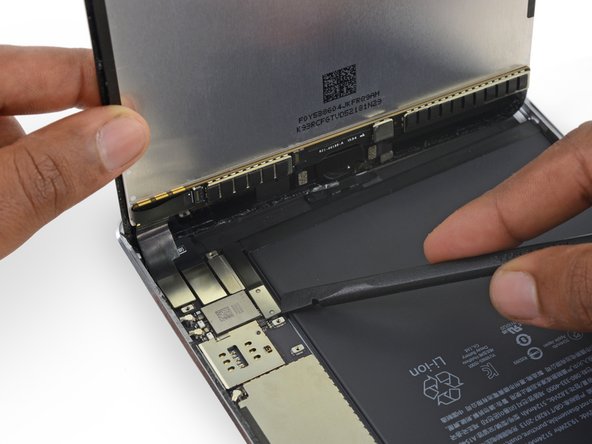
Desolder the six solder pads from the lower left of the display to remove the sensor assembly cable.
-


42等其他人完成本指南。

3条评论
Please post a caution about the home button ribbon cable. I was removing it from an extremely damaged screen and I accidentally slightly ripped it. Now I’m not sure what to do :( If I had known about the problems associated with changing a touch ID home button I would have been 100x more cautious but I’ve only ever had to fix my Mini 2 before so this wasn’t an issue.
I have an iFixit replacement screen (C-stock) that has some existing adhesive already on it, but there are a few parts of the adhesive that are folded over on itself. I also have replacement adhesive. Two questions:
Should I replace the existing, possibly-worn adhesive with new adhesive, or is it better to stay with the already-applied adhesive?
Should I warm up the adhesive when I’m applying the screen back onto the body? Or should I keep it room-temperature?
Just want to say Thank you for for the guide and what i can only describe as the perfect pctures to go along! Nice1