当前版本的文档还未经巡查,您可以查看最新的已查核版本 。
将iMac正面朝下平放在桌面上,将底部对准自己。
将维修孔盖中间的一个十字螺丝拧松。
螺丝是固定在维修孔盖上的。
移除维修孔盖。
在这个步骤中使用的工具:
Heavy-Duty Suction Cups (Pair)
$14.95
购买
玻璃面板固定在前挡板上, 周围有十四块磁铁。
将两个吸盘固定在玻璃面板的对角上。
要连接我们销售的吸盘 , 首先将吸盘口与玻璃面板表面平行放置。轻轻握住吸盘并转动可动手柄, 直到它与其他手柄平行。
如果你的吸盘无法吸附,尝试清理玻璃面板和吸盘的接触面。
轻轻地将玻璃面板直接拉出 iMac。
玻璃面板外围有多个定位点。为了避免把这些针脚从玻璃面板上扯下来, 一定要在拆卸过程中直接拉直。
在重新安装前, 务必要一丝不苟地清洗液晶屏和玻璃面板的内侧面, 因为在显示屏上的任何指纹或灰尘都将会令人讨厌。
更换玻璃时, 要确保玻璃和框架之间没有任何东西。杂乱电缆可能损坏玻璃。
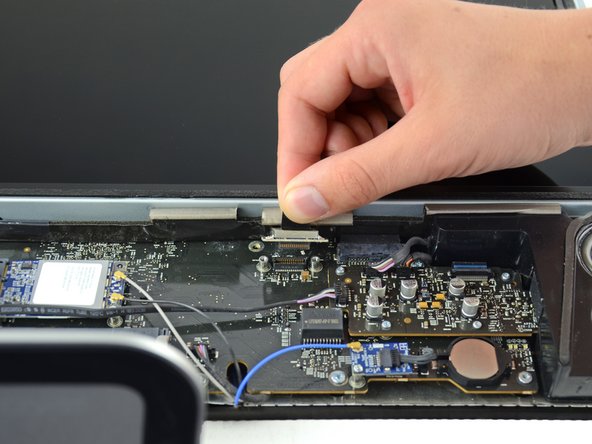
Remove the two 5.3 mm T6 torx screws from the LCD connector.
Firmly grasp the pull tab on top of the connector and pull it straight up out of its port.
Make sure that you are pulling the tab and not the connector cable.
Remove the eight T8 Torx screws securing the display panel to the rear case.
The iMac shown is a 20" model, but the screw locations should be approximately correct.
Place your hands on either side of the bottom of the display panel, and lift it up enough that you can reach the connectors inside.
Do not try to remove the display panel completely as it is still connected to the rest of the device.
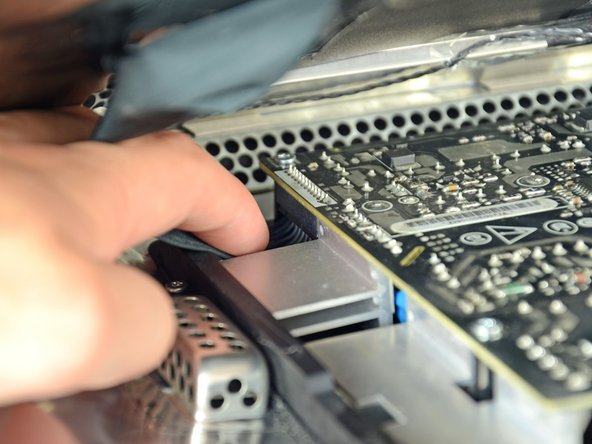
While holding the display panel up with one hand, locate and remove the display thermal sensor cable from its connector.
While still holding the display panel up, use two fingers to firmly push down on the power supply cable connector from its socket.
Be very careful not to touch the exposed face of the power supply to avoid electric shock from the many large capacitors attached to the other side of the board.
嵌入本指南
选择一个尺寸并复制下面的代码,将本指南作为一个小插件嵌入到你的网站/论坛中。
单个步骤
完整指南
小——600像素
中——800像素
大——1200像素
预览