当前版本的文档还未经巡查,您可以查看最新的已查核版本 。
在这个步骤中使用的工具:
iMac Intel 21.5" Cardboard Service Wedge
$4.99
购买
如果铰链可以自由活动,iMac将会失去平衡,维修很难进行。有了 iMac 维修支撑盒,维修操作将会更加丝滑,但是没有这玩意儿也行。
如果你使用的是 iFixit 硬纸板维修楔 ,请按照 这些组装说明 将其组装在一起。
在开始你的iMac的任何维修操作之前:拔掉电源线 ,按住电源按钮至少十秒钟,以释放电源的电容器。
特别注意! 不要触摸电源线上的电容器引线或任何外露焊点,只能触摸电路板边缘。
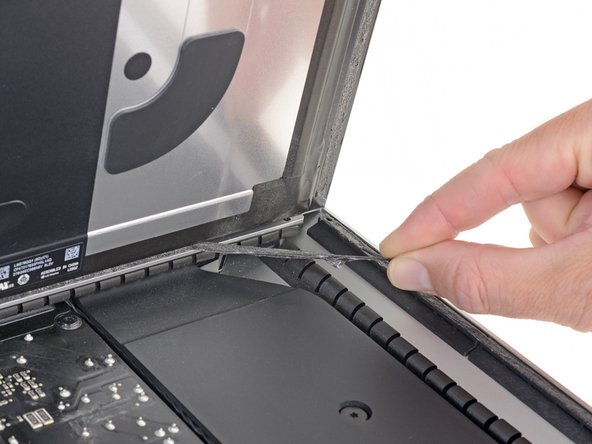
虽然开屏工具切除了大部分的胶,但显示屏的些许的胶还是会黏在外壳。塑料卡是最后分离粘合剂的必要工具。
让 iMac 躺在桌面上,屏幕朝天。
从 iMac 的右上角开始,往屏幕和后壳之间插一张塑料卡。
请注意不要将塑料卡插入超过0.95厘米,否则可能会损坏内部组件。
如图所示,将两张塑料卡片插入角落附近,轻轻地往侧边扭动来增加显示屏跟主机壳的间隙。
如果有部分的黏胶而无法完全分离的时候,停止扭转,使用其中一张卡片来切开剩余的黏胶。
开始将显示屏上部从框架拉起。
只需抬起显示屏几英寸——因为显示屏的数据线和电源线仍然和主板相连。
请务必小心,不要触碰电容器引线或电源背面任何裸露的焊点(红色方框)。
抓住显示屏底部边缘粘胶条末端的小标签,将胶条拉向 iMac 顶部,将其取下。
对另一条胶条重复此步骤并将其取下。
如果任一胶条在取下前断裂,请使用塑料卡划开剩余的粘胶。
务必小心,不要触摸电源供应器背面的电容器引线或任何暴露的焊接点。只能通过边缘处理电路板。
不要让任何暴露的焊接点接触金属表面,因为这可能会导致短路。
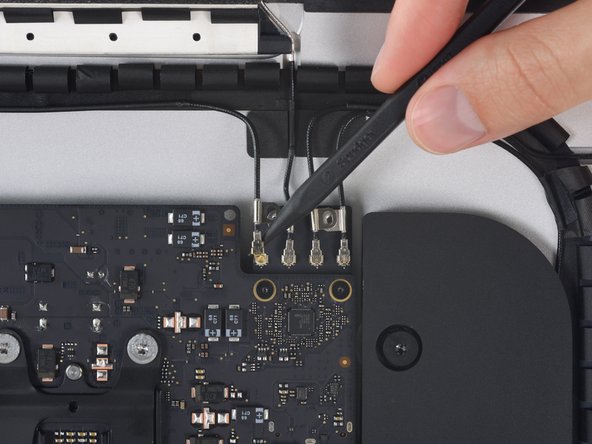
翻转电源供应器,查看位于主板后面的 DC 电源排线连接。
要断开排线连接,请挤压连接器背面、主板后面的释放夹 ,并将连接器拉出。
将 iMac 倒置放在背面有助于接下来的几个步骤。
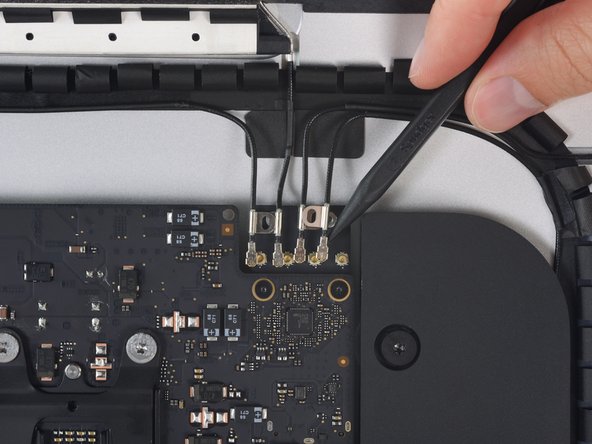
使用撬棒的平头端,按下 AC 输入排线接口侧面的释放夹 。
在用撬棒按住释放夹的同时,抓住 AC 输入排线,并将接口直接拉出插座。
Flip up the metal retaining bracket on the FaceTime camera cable connector.
Pull the FaceTime camera cable straight out of its socket on the logic board.
This is a delicate connector that can be easily damaged.
Use the tip of a spudger to flip open the retaining flap on the microphone ribbon cable ZIF socket .
Be sure you are prying up on the hinged retaining flap, not the socket itself.
Gently pull the microphone ribbon cable straight out of its socket.
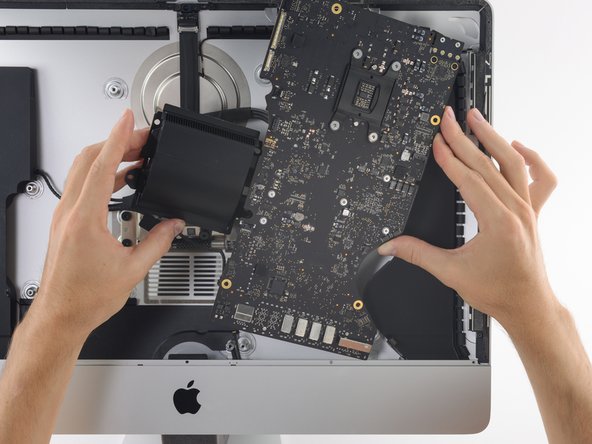
Tilt the top of the logic board away from the rear enclosure.
As you tilt the logic board, pull the right speaker connector to the right and out of the way of the board.
Lift the logic board straight up and out of the iMac.
Be careful not to snag the board on any of the rear enclosure's screw posts.
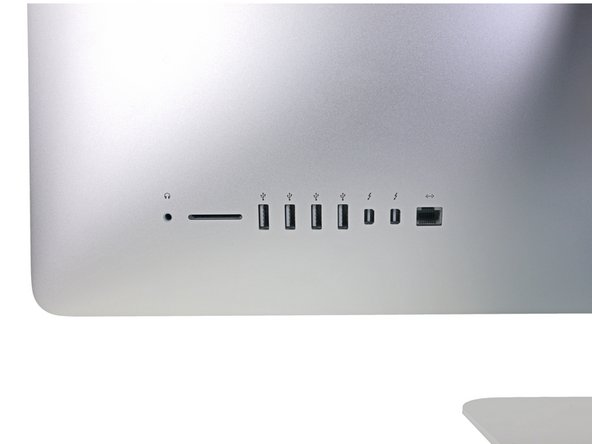
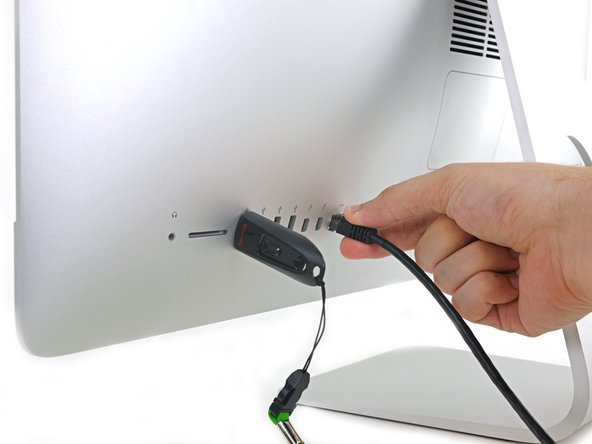
When reassembling your iMac, be very careful to align the exterior I/O ports correctly. The logic board can sit crooked even when secured with all its screws.
Use a USB flash drive and/or ethernet cable to keep the logic board seated correctly while you tighten the screws.
嵌入本指南
选择一个尺寸并复制下面的代码,将本指南作为一个小插件嵌入到你的网站/论坛中。
单个步骤
完整指南
小——600像素
中——800像素
大——1200像素
预览