跳转到主内容

当前版本的文档还未经巡查,您可以查看最新的已查核版本

iMac Intel 21.5" EMC 2638 内存更换

你所需要的

  1. iMac Intel 21.5" EMC 2638 内存更换, 显示屏组件: 步骤 1 中的图像 1,1
    在这个步骤中使用的工具:
    iMac Intel 21.5" Cardboard Service Wedge
    $4.99
    购买
    • 如果铰链可以自由活动,iMac将会失去平衡,维修很难进行。有了 iMac 维修支撑盒,维修操作将会更加丝滑,但是没有这玩意儿也行。

    • 如果你使用的是 iFixit 硬纸板维修楔,请按照 这些组装说明 将其组装在一起。

    • 在开始你的iMac的任何维修操作之前:拔掉电源线,按住电源按钮至少十秒钟,以释放电源的电容器。

    • 特别注意!不要触摸电源线上的电容器引线或任何外露焊点,只能触摸电路板边缘。

  2. iMac Intel 21.5" EMC 2638 内存更换: 步骤 2 中的图像 1,2 iMac Intel 21.5" EMC 2638 内存更换: 步骤 2 中的图像 2,2
    • 从显示屏的左边开始,就是靠近电源按钮的一侧。将 iMac 开屏工具插入玻璃面板和后部外壳之间的缝隙中。

    • 在 iMac开屏工具中心的支点会防止你将轮子插太深。如果使用别的没有防呆设计的工具,插入请不要超过0.95厘米。否则,您可能会切断天线电缆并造成严重损坏。

  3. iMac Intel 21.5" EMC 2638 内存更换: 步骤 3 中的图像 1,3 iMac Intel 21.5" EMC 2638 内存更换: 步骤 3 中的图像 2,3 iMac Intel 21.5" EMC 2638 内存更换: 步骤 3 中的图像 3,3
    • 像用披萨刀一样用这个工具——沿着缝隙一直滚动就行,里面的泡沫双面胶就会被割开了。

    • 这个工具一定要用往前推的,不要往回拉,否则轮子会掉。

    • 按照如上所述方法,沿着显示器的左侧使用这个工具。

  4. iMac Intel 21.5" EMC 2638 内存更换: 步骤 4 中的图像 1,3 iMac Intel 21.5" EMC 2638 内存更换: 步骤 4 中的图像 2,3 iMac Intel 21.5" EMC 2638 内存更换: 步骤 4 中的图像 3,3
    • 沿着屏幕顶端左上角前进,继续使用工具。

  5. iMac Intel 21.5" EMC 2638 内存更换: 步骤 5 中的图像 1,2 iMac Intel 21.5" EMC 2638 内存更换: 步骤 5 中的图像 2,2
    • 沿着显示器的左上角切胶。

  6. iMac Intel 21.5" EMC 2638 内存更换: 步骤 6 中的图像 1,2 iMac Intel 21.5" EMC 2638 内存更换: 步骤 6 中的图像 2,2
    • 沿着显示器的顶部继续。

    • 你可能需要重复上述操作数次,以确保尽可能地将胶分开。

  7. iMac Intel 21.5" EMC 2638 内存更换: 步骤 7 中的图像 1,3 iMac Intel 21.5" EMC 2638 内存更换: 步骤 7 中的图像 2,3 iMac Intel 21.5" EMC 2638 内存更换: 步骤 7 中的图像 3,3
    • 将工具从显示屏右上角推进去。

  8. iMac Intel 21.5" EMC 2638 内存更换: 步骤 8 中的图像 1,2 iMac Intel 21.5" EMC 2638 内存更换: 步骤 8 中的图像 2,2
    • 沿著显示屏右侧使用工具向下滚动。

  9. iMac Intel 21.5" EMC 2638 内存更换: 步骤 9 中的图像 1,2 iMac Intel 21.5" EMC 2638 内存更换: 步骤 9 中的图像 2,2
    • 将开屏工具沿着屏幕右侧推到底。

    • 此时,你需要在整个显示器周围重复数次切胶操作,以确保可以去除更多的胶。

  10. iMac Intel 21.5" EMC 2638 内存更换: 步骤 10 中的图像 1,3 iMac Intel 21.5" EMC 2638 内存更换: 步骤 10 中的图像 2,3 iMac Intel 21.5" EMC 2638 内存更换: 步骤 10 中的图像 3,3
    • 虽然开屏工具切除了大部分的胶,但显示屏的些许的胶还是会黏在外壳。塑料卡是最后分离粘合剂的必要工具。

    • 让 iMac 躺在桌面上,屏幕朝天。

    • 从 iMac 的右上角开始,往屏幕和后壳之间插一张塑料卡。

    • 请注意不要将塑料卡插入超过0.95厘米,否则可能会损坏内部组件。

  11. iMac Intel 21.5" EMC 2638 内存更换: 步骤 11 中的图像 1,2 iMac Intel 21.5" EMC 2638 内存更换: 步骤 11 中的图像 2,2
    • 轻柔地扭动塑料卡,这样可以把屏幕和后壳之间撬个缝。

    • 别撬大劲儿了。这个缝不大于0.6厘米就行。

  12. iMac Intel 21.5" EMC 2638 内存更换: 步骤 12 中的图像 1,3 iMac Intel 21.5" EMC 2638 内存更换: 步骤 12 中的图像 2,3 iMac Intel 21.5" EMC 2638 内存更换: 步骤 12 中的图像 3,3
    • 将卡片往前滑至机身顶端中间,以去除显示器右上角剩余的黏胶。

    • 请确定避开 iSight 摄像头,否则摄像头可能会损坏。

  13. iMac Intel 21.5" EMC 2638 内存更换: 步骤 13 中的图像 1,2 iMac Intel 21.5" EMC 2638 内存更换: 步骤 13 中的图像 2,2
    • 將塑料卡再次插入右上角做稍微的固定,防止黏胶再次黏上显示屏。

  14. iMac Intel 21.5" EMC 2638 内存更换: 步骤 14 中的图像 1,3 iMac Intel 21.5" EMC 2638 内存更换: 步骤 14 中的图像 2,3 iMac Intel 21.5" EMC 2638 内存更换: 步骤 14 中的图像 3,3
    • 在显示屏和框架之间的空隙插入第二张塑料卡,位置大概在 iMac 左上角顶端。

  15. iMac Intel 21.5" EMC 2638 内存更换: 步骤 15 中的图像 1,2 iMac Intel 21.5" EMC 2638 内存更换: 步骤 15 中的图像 2,2
    • 轻轻地向上扭动卡片,稍微增加显示器和框架之间的空隙。

    • 与另一边一样,慢慢地扭动卡片使黏胶分离,请注意不要给显示屏玻璃施加太大的压力。

  16. iMac Intel 21.5" EMC 2638 内存更换: 步骤 16 中的图像 1,3 iMac Intel 21.5" EMC 2638 内存更换: 步骤 16 中的图像 2,3 iMac Intel 21.5" EMC 2638 内存更换: 步骤 16 中的图像 3,3
    • 将塑料卡向中间滑动,在 iSight 摄像头之前停止。

  17. iMac Intel 21.5" EMC 2638 内存更换: 步骤 17 中的图像 1,2 iMac Intel 21.5" EMC 2638 内存更换: 步骤 17 中的图像 2,2
    • 将塑料卡插入左上角。

  18. iMac Intel 21.5" EMC 2638 内存更换: 步骤 18 中的图像 1,3 iMac Intel 21.5" EMC 2638 内存更换: 步骤 18 中的图像 2,3 iMac Intel 21.5" EMC 2638 内存更换: 步骤 18 中的图像 3,3
    • 如图所示,将两张塑料卡片插入角落附近,轻轻地往侧边扭动来增加显示屏跟主机壳的间隙。

    • 如果有部分的黏胶而无法完全分离的时候,停止扭转,使用其中一张卡片来切开剩余的黏胶。

    • 开始将显示屏上部从框架拉起。

    • 只需抬起显示屏几英寸——因为显示屏的数据线和电源线仍然和主板相连。

  19. iMac Intel 21.5" EMC 2638 内存更换, 显示屏: 步骤 19 中的图像 1,2 iMac Intel 21.5" EMC 2638 内存更换, 显示屏: 步骤 19 中的图像 2,2
    • 用一只手托起显示屏,另一只手拔下显示屏电源线。

    • 将显示屏向上抬起,以便于更好的触及接口,但请勿抬升太多,以免过度拉伸排线并对其造成损坏(抬起约 8 英寸)。

  20. iMac Intel 21.5" EMC 2638 内存更换: 步骤 20 中的图像 1,3 iMac Intel 21.5" EMC 2638 内存更换: 步骤 20 中的图像 2,3 iMac Intel 21.5" EMC 2638 内存更换: 步骤 20 中的图像 3,3
    • 使用撬棒尖端撬起显示屏数据线上的金属固定盖。

    • 小心地将显示数据线从主板上的插座中拔出。

    • 确保将显示屏数据线接口从插座中直接拔出。

  21. iMac Intel 21.5" EMC 2638 内存更换: 步骤 21 中的图像 1,2 iMac Intel 21.5" EMC 2638 内存更换: 步骤 21 中的图像 2,2
    • 将显示屏抬起到接近垂直的位置。

    • 此时,沿显示屏底部仍有一条胶带,它会像铰链一样将显示屏固定在框架上。可以将显示屏上下移动几次来松开胶带。

  22. iMac Intel 21.5" EMC 2638 内存更换: 步骤 22 中的图像 1,3 iMac Intel 21.5" EMC 2638 内存更换: 步骤 22 中的图像 2,3 iMac Intel 21.5" EMC 2638 内存更换: 步骤 22 中的图像 3,3
    • 请务必小心,不要触摸电容器引线或电源背面任何裸露的焊点(红色框内)。

    • 抓住底部边缘显示屏胶带之一末端的小拉片,然后将胶带向 iMac 顶部,将其除去。

    • 对另一条胶带重复此步骤并将其移除。

    • 如果任一胶带在移除之前断裂,请使用塑料卡切掉剩余的胶带。

  23. iMac Intel 21.5" EMC 2638 内存更换: 步骤 23 中的图像 1,3 iMac Intel 21.5" EMC 2638 内存更换: 步骤 23 中的图像 2,3 iMac Intel 21.5" EMC 2638 内存更换: 步骤 23 中的图像 3,3
    • 将显示屏从机架上抬起,然后从 iMac 上取下。

    • 可能需要从一侧慢慢提起,与剩余的胶带剥离。

    • 请非常小心地操作显示屏--它很重,而且是玻璃制成的。

    • 在重新组装过程中,请访问我们的 显示屏粘合剂指南 安装新粘合剂。

  24. 这个步骤还没有翻译 帮忙翻译一下

    iMac Intel 21.5" EMC 2638 内存更换: 步骤 24 中的图像 1,2 iMac Intel 21.5" EMC 2638 内存更换: 步骤 24 中的图像 2,2
    • Remove the following five Phillips screws holding the lower support bracket in place:

    • Four 3.2 mm screws

    • One 1.7 mm screw

    • On at least some EMC 2544 machines, all five screws are the same size.

    • You may need to peel up the display adhesive lining the bottom edge of the iMac enclosure to access the screws.

  25. 这个步骤还没有翻译 帮忙翻译一下

    iMac Intel 21.5" EMC 2638 内存更换: 步骤 25 中的图像 1,1
    • Remove the lower support bracket from the iMac enclosure.

  26. 这个步骤还没有翻译 帮忙翻译一下

    iMac Intel 21.5" EMC 2638 内存更换: 步骤 26 中的图像 1,1
    • Remove the following screws securing the hard drive bracket to the rear enclosure:

    • Two 21 mm T10 Torx screws from the left-hand hard drive bracket.

    • One 9 mm T10 Torx screw.

    • One 27 mm T10 Torx screw.

  27. 这个步骤还没有翻译 帮忙翻译一下

    iMac Intel 21.5" EMC 2638 内存更换: 步骤 27 中的图像 1,2 iMac Intel 21.5" EMC 2638 内存更换: 步骤 27 中的图像 2,2
    • Remove the left and right hard drive brackets from the iMac.

  28. 这个步骤还没有翻译 帮忙翻译一下

    iMac Intel 21.5" EMC 2638 内存更换: 步骤 28 中的图像 1,3 iMac Intel 21.5" EMC 2638 内存更换: 步骤 28 中的图像 2,3 iMac Intel 21.5" EMC 2638 内存更换: 步骤 28 中的图像 3,3
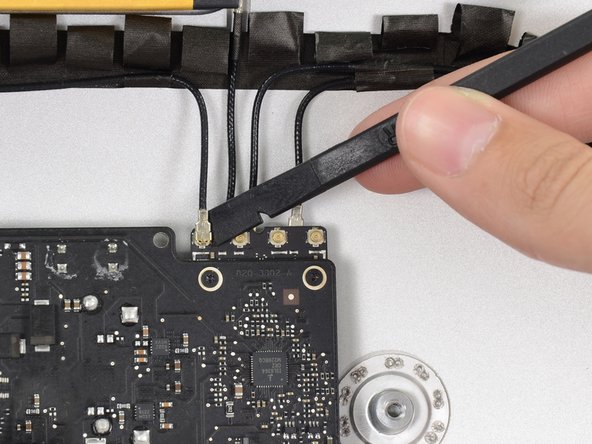
    • The next few steps bring your hands close to the exposed face of the power supply. Do not touch the face of the power supply or any of the exposed solder. Touching it risks a high voltage shock from the many large capacitors attached to the board.

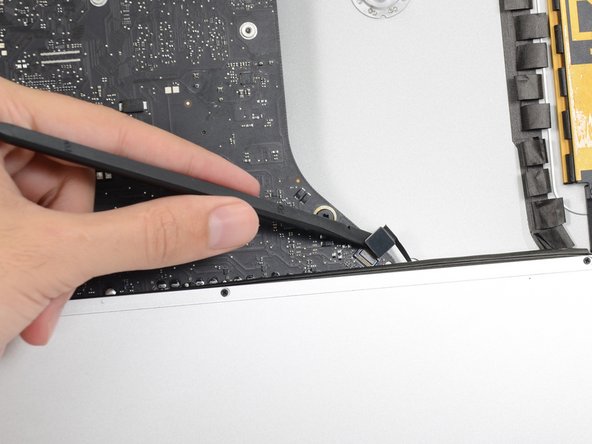
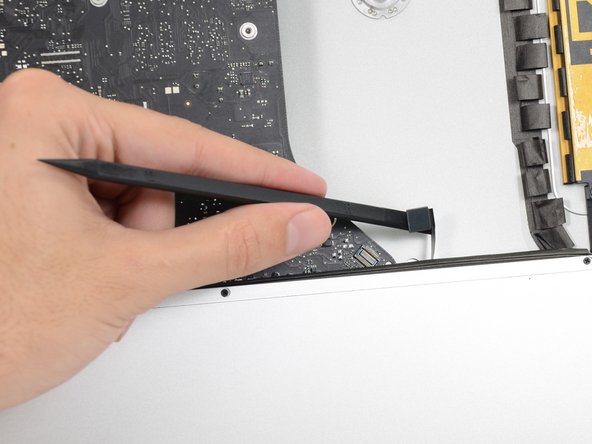
    • Use the tip of a spudger to push each side of the power button cable connector and gently walk it out of its socket.

  29. 这个步骤还没有翻译 帮忙翻译一下

    iMac Intel 21.5" EMC 2638 内存更换: 步骤 29 中的图像 1,2 iMac Intel 21.5" EMC 2638 内存更换: 步骤 29 中的图像 2,2
    • Use the tip of a spudger to push each side of the power supply control cable connector and gently walk it out of its socket.

  30. 这个步骤还没有翻译 帮忙翻译一下

    iMac Intel 21.5" EMC 2638 内存更换: 步骤 30 中的图像 1,1
    • Remove the two 7.2 mm T10 Torx screws securing the power supply to the rear enclosure.

    • In newer model iMacs these are 7.2 mm T8 Torx screws.

    • During reassembly, be careful not to trap the power button wire behind the board.

  31. 这个步骤还没有翻译 帮忙翻译一下

    iMac Intel 21.5" EMC 2638 内存更换: 步骤 31 中的图像 1,2 iMac Intel 21.5" EMC 2638 内存更换: 步骤 31 中的图像 2,2
    • When working on the power supply, be very careful not to touch the capacitor leads or any exposed solder joints on the back of the power supply. Only handle the board by the edges.

    • Tilt the power supply forward.

  32. 这个步骤还没有翻译 帮忙翻译一下

    iMac Intel 21.5" EMC 2638 内存更换: 步骤 32 中的图像 1,3 iMac Intel 21.5" EMC 2638 内存更换: 步骤 32 中的图像 2,3 iMac Intel 21.5" EMC 2638 内存更换: 步骤 32 中的图像 3,3
    • Pull the power supply slightly up and out from the rear enclosure.

    • Rotate the power supply counterclockwise, lifting the right side up about an inch higher than the left.

  33. 这个步骤还没有翻译 帮忙翻译一下

    iMac Intel 21.5" EMC 2638 内存更换: 步骤 33 中的图像 1,2 iMac Intel 21.5" EMC 2638 内存更换: 步骤 33 中的图像 2,2
    • Slide the power supply to the right to clear the screw posts on the rear enclosure.

  34. 这个步骤还没有翻译 帮忙翻译一下

    iMac Intel 21.5" EMC 2638 内存更换: 步骤 34 中的图像 1,3 iMac Intel 21.5" EMC 2638 内存更换: 步骤 34 中的图像 2,3 iMac Intel 21.5" EMC 2638 内存更换: 步骤 34 中的图像 3,3
    • Rock the power supply forward and remove it from its recess in the rear enclosure.

    • Do not try to completely remove the power supply from the iMac yet—it is still connected to the logic board.

  35. 这个步骤还没有翻译 帮忙翻译一下

    iMac Intel 21.5" EMC 2638 内存更换: 步骤 35 中的图像 1,2 iMac Intel 21.5" EMC 2638 内存更换: 步骤 35 中的图像 2,2
    • Be very careful not to touch the capacitor leads or any exposed solder joints on the back of the power supply. Only handle the board by the edges.

    • Flip the power supply over to access the DC power cable connection behind the logic board.

    • Squeeze the tab on the back side of the DC power cable connector and pull it straight out of its socket on the back of the logic board.

  36. 这个步骤还没有翻译 帮忙翻译一下

    iMac Intel 21.5" EMC 2638 内存更换: 步骤 36 中的图像 1,3 iMac Intel 21.5" EMC 2638 内存更换: 步骤 36 中的图像 2,3 iMac Intel 21.5" EMC 2638 内存更换: 步骤 36 中的图像 3,3
    • You may find it helpful to set the iMac down on its back for the next couple of steps.

    • Use the flat end of a spudger to press the clip on the side of the AC inlet cable connector inward.

    • While pressing on the release clip with the spudger, grasp the AC inlet cable, and pull the connector straight out of its socket.

  37. 这个步骤还没有翻译 帮忙翻译一下

    iMac Intel 21.5" EMC 2638 内存更换: 步骤 37 中的图像 1,1
    • Remove the power supply from the iMac.

  38. 这个步骤还没有翻译 帮忙翻译一下

    iMac Intel 21.5" EMC 2638 内存更换: 步骤 38 中的图像 1,2 iMac Intel 21.5" EMC 2638 内存更换: 步骤 38 中的图像 2,2
    • Gently pull the fan cable connector straight away from its socket on the logic board.

  39. 这个步骤还没有翻译 帮忙翻译一下

    iMac Intel 21.5" EMC 2638 内存更换: 步骤 39 中的图像 1,1
    • Remove the three 12.3 mm T10 shoulder screws securing the fan to the rear enclosure.

  40. 这个步骤还没有翻译 帮忙翻译一下

    iMac Intel 21.5" EMC 2638 内存更换: 步骤 40 中的图像 1,2 iMac Intel 21.5" EMC 2638 内存更换: 步骤 40 中的图像 2,2
    • Remove the fan from the iMac.

  41. iMac Intel 21.5" EMC 2638 内存更换, 硬盘组件: 步骤 41 中的图像 1,3 iMac Intel 21.5" EMC 2638 内存更换, 硬盘组件: 步骤 41 中的图像 2,3 iMac Intel 21.5" EMC 2638 内存更换, 硬盘组件: 步骤 41 中的图像 3,3
    • 从主板最近的边缘提起硬盘并拉出凹槽。

    • 硬盘是通过一条SATA排线连接——请先不要把硬盘从你的 iMac 强行拔出。

  42. iMac Intel 21.5" EMC 2638 内存更换: 步骤 42 中的图像 1,2 iMac Intel 21.5" EMC 2638 内存更换: 步骤 42 中的图像 2,2
    • 使用撬棒轻轻地撬开大的塑料接口来断开SATA电源和数据排线。

  43. iMac Intel 21.5" EMC 2638 内存更换: 步骤 43 中的图像 1,1
    • 从 iMac 上移除硬盘组件。

  44. 这个步骤还没有翻译 帮忙翻译一下

    iMac Intel 21.5" EMC 2638 内存更换: 步骤 44 中的图像 1,1
    • Remove the single 7.2 mm T10 screw securing the hard drive tray to the rear enclosure.

  45. 这个步骤还没有翻译 帮忙翻译一下

    iMac Intel 21.5" EMC 2638 内存更换: 步骤 45 中的图像 1,1
    • Remove the hard drive tray from the rear enclosure.

  46. 这个步骤还没有翻译 帮忙翻译一下

    iMac Intel 21.5" EMC 2638 内存更换: 步骤 46 中的图像 1,2 iMac Intel 21.5" EMC 2638 内存更换: 步骤 46 中的图像 2,2
    • Push on each side of the left speaker cable connector with the tip of a spudger and gently walk it out of its socket.

  47. 这个步骤还没有翻译 帮忙翻译一下

    iMac Intel 21.5" EMC 2638 内存更换: 步骤 47 中的图像 1,2 iMac Intel 21.5" EMC 2638 内存更换: 步骤 47 中的图像 2,2
    • If necessary, use a pair of tweezers to gently peel the tape securing the left speaker cable to the SATA data/power cable.

    • This tape only needs to be removed if you are removing the left speaker.

  48. 这个步骤还没有翻译 帮忙翻译一下

    iMac Intel 21.5" EMC 2638 内存更换: 步骤 48 中的图像 1,3 iMac Intel 21.5" EMC 2638 内存更换: 步骤 48 中的图像 2,3 iMac Intel 21.5" EMC 2638 内存更换: 步骤 48 中的图像 3,3
    • De-route the left speaker cable by pulling it straight up out of the retaining clip in the back of the rear enclosure.

    • In a similar fashion, lift the combo SATA data/power cable up out of the retaining clip.

  49. 这个步骤还没有翻译 帮忙翻译一下

    iMac Intel 21.5" EMC 2638 内存更换: 步骤 49 中的图像 1,3 iMac Intel 21.5" EMC 2638 内存更换: 步骤 49 中的图像 2,3 iMac Intel 21.5" EMC 2638 内存更换: 步骤 49 中的图像 3,3
    • Use the flat edge of a spudger to flip up the metal retaining bracket on the iSight camera cable connector.

    • Pull the iSight camera cable straight out of its socket on the logic board.

    • Do not use excessive force. This is a delicate connector that can be easily damaged.

  50. 这个步骤还没有翻译 帮忙翻译一下

    iMac Intel 21.5" EMC 2638 内存更换: 步骤 50 中的图像 1,3 iMac Intel 21.5" EMC 2638 内存更换: 步骤 50 中的图像 2,3 iMac Intel 21.5" EMC 2638 内存更换: 步骤 50 中的图像 3,3
    • Use the flat edge of a spudger to disconnect each of the four antenna connectors from the AirPort/Bluetooth card.

    • Note the original positions for each connector when reconnecting the cables.

  51. 这个步骤还没有翻译 帮忙翻译一下

    iMac Intel 21.5" EMC 2638 内存更换: 步骤 51 中的图像 1,3 iMac Intel 21.5" EMC 2638 内存更换: 步骤 51 中的图像 2,3 iMac Intel 21.5" EMC 2638 内存更换: 步骤 51 中的图像 3,3
    • Use the flat edge of a spudger to pry the headphone jack cable connector from its socket on the logic board.

    • Push the cable slightly to the right to clear it for the removal of the logic board.

  52. 这个步骤还没有翻译 帮忙翻译一下

    iMac Intel 21.5" EMC 2638 内存更换: 步骤 52 中的图像 1,1
    • Remove the following screws securing the exhaust duct to the rear enclosure:

    • Two 6.3 mm T8 screws

    • Two 4.7 mm T8 screws

  53. 这个步骤还没有翻译 帮忙翻译一下

    iMac Intel 21.5" EMC 2638 内存更换: 步骤 53 中的图像 1,1
    • Remove the four 7.2 mm T10 screws securing the logic board to the rear enclosure.

  54. 这个步骤还没有翻译 帮忙翻译一下

    iMac Intel 21.5" EMC 2638 内存更换: 步骤 54 中的图像 1,3 iMac Intel 21.5" EMC 2638 内存更换: 步骤 54 中的图像 2,3 iMac Intel 21.5" EMC 2638 内存更换: 步骤 54 中的图像 3,3
    • Tilt the top of the logic board away from the rear enclosure.

    • Lift the logic board straight up and out of the iMac.

    • Be careful not to snag the board on any of the rear case's screw posts.

    • The I/O boards at the bottom of the logic board will be the greatest challenge. It is recommended to pull gently to avoid any damage.

  55. 这个步骤还没有翻译 帮忙翻译一下

    iMac Intel 21.5" EMC 2638 内存更换: 步骤 55 中的图像 1,2 iMac Intel 21.5" EMC 2638 内存更换: 步骤 55 中的图像 2,2
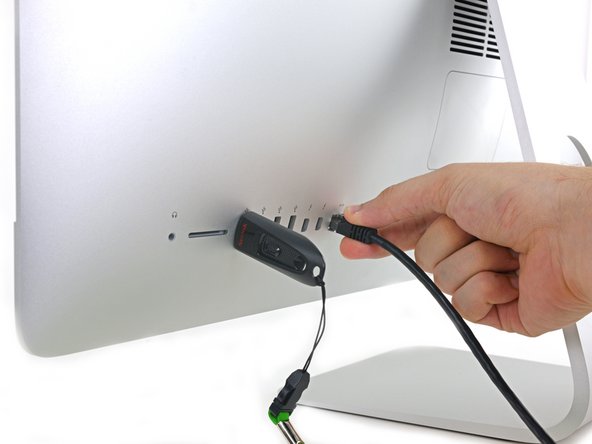
    • When installing the logic board, take care to align the exterior I/O ports correctly. The logic board can sit crooked even when secured with all its screws.

    • Use a USB flash drive and/or ethernet cable to ensure the logic board is seated correctly while you screw it in.

  56. iMac Intel 21.5" EMC 2638 内存更换, 内存: 步骤 56 中的图像 1,3 iMac Intel 21.5" EMC 2638 内存更换, 内存: 步骤 56 中的图像 2,3 iMac Intel 21.5" EMC 2638 内存更换, 内存: 步骤 56 中的图像 3,3
    • 同时推开内存模块两侧的卡舌以松开。

    • 内存模块应从插座中轻微弹出。

    • 抓住内存模块的左上角和右上角,小心地将其从插座中直接拔出。

    • 必要时,重复此过程以取出其他内存模块。

结论

要重新组装设备,请按照相反的说明进行操作。

161等其他人完成本指南。

由衷感谢以下译者:

en zh

100%

Yanqi Wang正在帮助我们修复这个世界! 您也想加入吗?
开始翻译 ›

41条评论

Holy jesus - just to replace/upgrade some RAM? Wow. What advice do you have for the final stage of reassembly if you've had to take the strips of adhesive off - what (if anything) do you replace it with?

James Ward - 回复

James, in the parts section at the top you can purchase the adhesive strips that are a custom fit ([关联产品丢失或禁用: IF173-005]). I just replaced the hard drive and these strips are quite easy to work with. It's just a pain that you have to replace the adhesive anytime you need to go inside. Apple is getting lazy.

Tom Coleman - 回复

This was very easy to follow. The number of steps seem high, but half are just removing the display to make sure you are very careful with the fragile glass, so there are really only about 35 steps. You may also need to remove the right speaker before disconnecting the 4 AirPort/Bluetooth antennae, currently before step 50. The speaker is shown in earlier pics, then "disappears."

Eric Demopoulos - 回复

yes from what I went through it made sense to unscrew both speakers so you can move them a little bit to get things down like that and plugging the hard drive back in

Jonathan Martocci -

I hate my iMac so much right now. Why Apple make so difficult to replace RAM on this machine?

error01 - 回复

添加评论

浏览统计数据:

过去 24 小时: 22

过去 7 天: 125

过去 30 天: 532

总计 104,272