跳转到主内容

bObi Robotic Vacuum Obstacle Sensors Replacement

你所需要的

  1. bObi Robotic Vacuum Obstacle Sensors Replacement, Top Cover: 步骤 1 中的图像 1,2 bObi Robotic Vacuum Obstacle Sensors Replacement, Top Cover: 步骤 1 中的图像 2,2
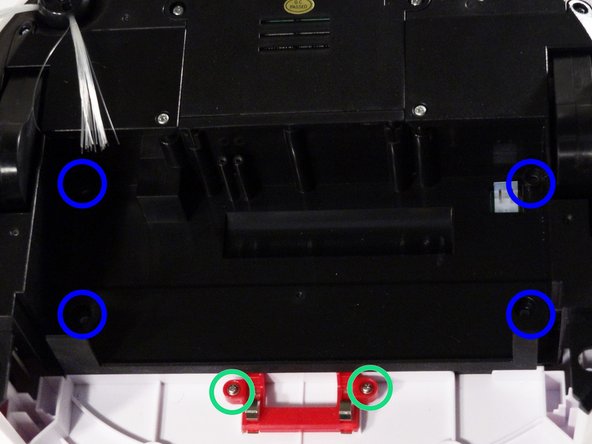
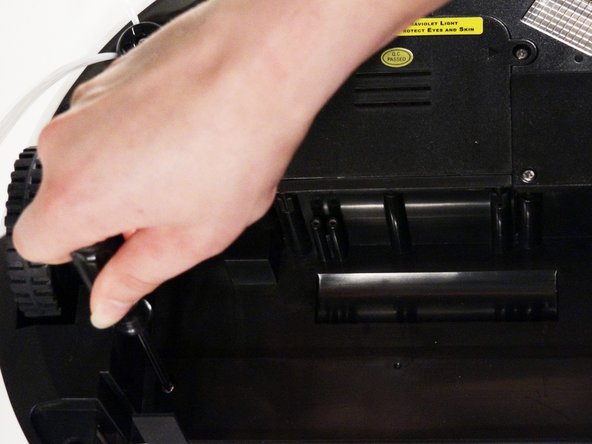
    • Remove bObi’s front wheel to access one of the screws holding bObi together.

    • Make sure the wheel is turned closer to bObi's front touch sensors. Use your screwdriver for leverage, and the wheel will pop up and out.

    • Uninstall the larger screw that sits deeper in the wheel compartment.

  2. bObi Robotic Vacuum Obstacle Sensors Replacement: 步骤 2 中的图像 1,3 bObi Robotic Vacuum Obstacle Sensors Replacement: 步骤 2 中的图像 2,3 bObi Robotic Vacuum Obstacle Sensors Replacement: 步骤 2 中的图像 3,3
    • Remove bObi's dustbin.

    • Uninstall the 2 screws close to the bin and 2 smaller screws above her main brushes.

  3. bObi Robotic Vacuum Obstacle Sensors Replacement: 步骤 3 中的图像 1,3 bObi Robotic Vacuum Obstacle Sensors Replacement: 步骤 3 中的图像 2,3 bObi Robotic Vacuum Obstacle Sensors Replacement: 步骤 3 中的图像 3,3
    • Lift the brush holder. To detach completely, unplug it from bObi.

    • Remove the two screws on the dustbin contact point holder inside bObi.

    • There are 4 screws beneath the main brushes. Uninstall these, and open bObi up to expose her main circuit board.

  4. bObi Robotic Vacuum Obstacle Sensors Replacement: 步骤 4 中的图像 1,3 bObi Robotic Vacuum Obstacle Sensors Replacement: 步骤 4 中的图像 2,3 bObi Robotic Vacuum Obstacle Sensors Replacement: 步骤 4 中的图像 3,3
    • Detach the two circuit plugs connecting bObi's cover to the main board and the cover will be completely removed.

  5. bObi Robotic Vacuum Obstacle Sensors Replacement, Obstacle detection sensors: 步骤 5 中的图像 1,3 bObi Robotic Vacuum Obstacle Sensors Replacement, Obstacle detection sensors: 步骤 5 中的图像 2,3 bObi Robotic Vacuum Obstacle Sensors Replacement, Obstacle detection sensors: 步骤 5 中的图像 3,3
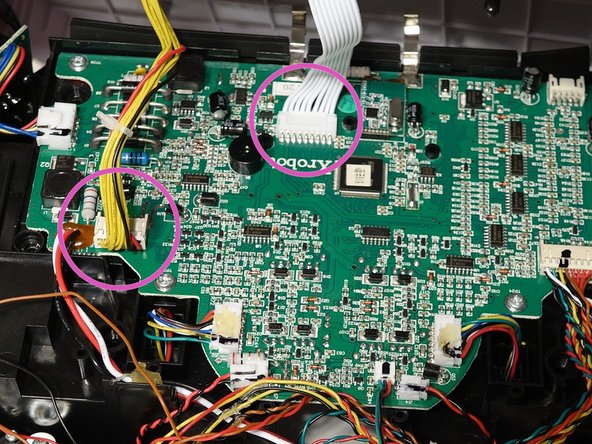
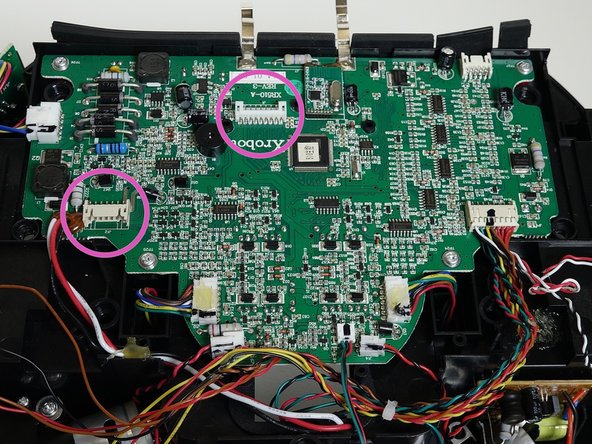
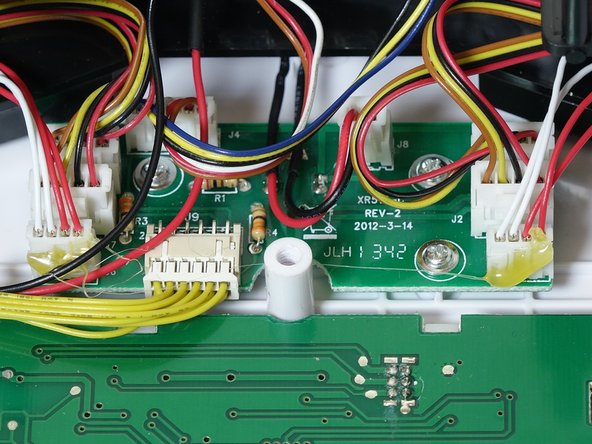
    • All of bObi’s wall detection sensors are plugged in to a small circuit board on the underside of the cover.

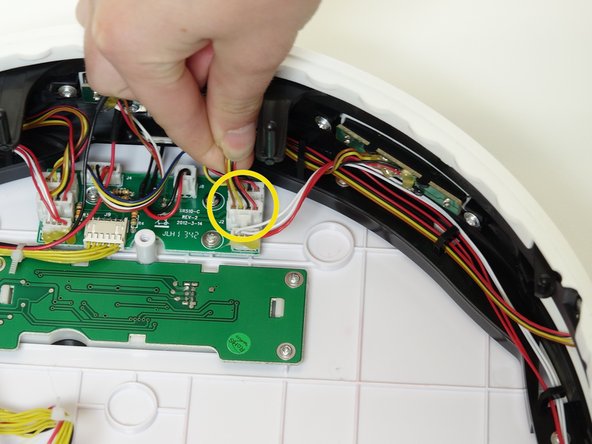
    • Refer to bObi’s check up test in order to determine which sensor is in need of repair. Then, remove the two screws holding it on the front bumper.

  6. bObi Robotic Vacuum Obstacle Sensors Replacement: 步骤 6 中的图像 1,2 bObi Robotic Vacuum Obstacle Sensors Replacement: 步骤 6 中的图像 2,2
    • You will be able to push the sensor from the inside of the cover, so it pops out of its place on the bumper.

    • Unplug the appropriate circuit plug from the cover's circuit board.

  7. bObi Robotic Vacuum Obstacle Sensors Replacement: 步骤 7 中的图像 1,3 bObi Robotic Vacuum Obstacle Sensors Replacement: 步骤 7 中的图像 2,3 bObi Robotic Vacuum Obstacle Sensors Replacement: 步骤 7 中的图像 3,3
    • Unhook the wires from the holders on the inside of the bumper.

    • Feed the circuit plug and its wires through the open space in bObi’s bumper.

  8. bObi Robotic Vacuum Obstacle Sensors Replacement: 步骤 8 中的图像 1,3 bObi Robotic Vacuum Obstacle Sensors Replacement: 步骤 8 中的图像 2,3 bObi Robotic Vacuum Obstacle Sensors Replacement: 步骤 8 中的图像 3,3
    • Put the circuit plug for your replacement part through the obstacle detection sensor’s open slot.

    • Place the actual sensor in its space on the bumper and install the two screws which secure it to bObi.

  9. bObi Robotic Vacuum Obstacle Sensors Replacement: 步骤 9 中的图像 1,2 bObi Robotic Vacuum Obstacle Sensors Replacement: 步骤 9 中的图像 2,2
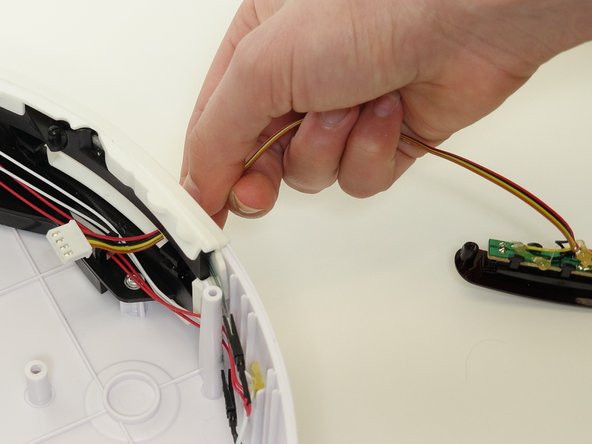
    • Feed the wires for the sensor's circuit plug back through the hooks on bObi's bumper.

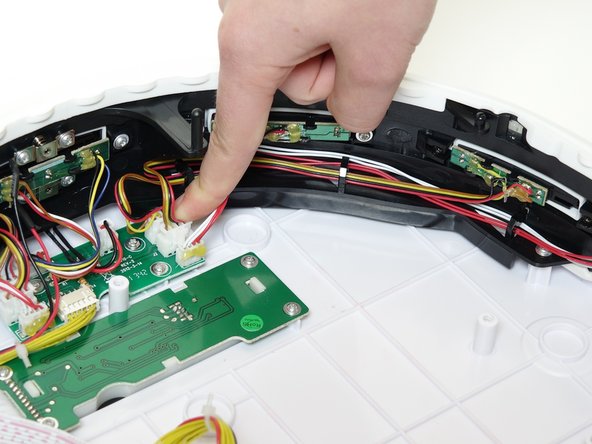
    • Then, plug it into the empty spot on bObi’s cover circuit board.

    • To finish off this repair, follow the closing bObi manual: Closing bObi's Cover Post-Repair

结论

To reassemble bObi, refer to the Closing bObi Guide.

Chelsea

于09/24/14注册

2,278 声望

创作了31篇指南

0条评论

添加评论

浏览统计数据:

过去 24 小时: 1

过去 7 天: 9

过去 30 天: 11

总计 461