跳转到主内容

Xbox One Elite Controller (Model 1698) Daughterboard Replacement

你所需要的

  1. Xbox One Elite Controller (Model 1698) Daughterboard Replacement, Show me the Screws!: 步骤 1 中的图像 1,2 Xbox One Elite Controller (Model 1698) Daughterboard Replacement, Show me the Screws!: 步骤 1 中的图像 2,2
    • You can remove the side panels with a pry tool.

    • You don't need to remove the rubber. The rubber on this controller was already bad

  2. Xbox One Elite Controller (Model 1698) Daughterboard Replacement, Removing the back panel screws: 步骤 2 中的图像 1,1
    • Remove the 5 Torx Security Bit (TR9) screws

  3. Xbox One Elite Controller (Model 1698) Daughterboard Replacement, Popping that back panel off: 步骤 3 中的图像 1,3 Xbox One Elite Controller (Model 1698) Daughterboard Replacement, Popping that back panel off: 步骤 3 中的图像 2,3 Xbox One Elite Controller (Model 1698) Daughterboard Replacement, Popping that back panel off: 步骤 3 中的图像 3,3
    • Pry the panel next to the 3.5mm port

    • Be careful to not rip the ribbon shown in the next step

  4. Xbox One Elite Controller (Model 1698) Daughterboard Replacement, Warning Carefully remove the ribbon: 步骤 4 中的图像 1,2 Xbox One Elite Controller (Model 1698) Daughterboard Replacement, Warning Carefully remove the ribbon: 步骤 4 中的图像 2,2
    • Be careful to not rip the ribbon cable

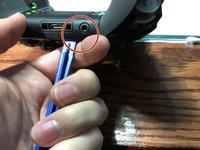
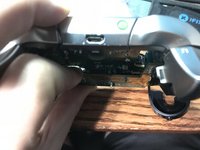
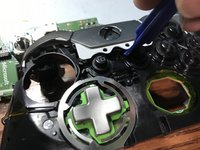
    • You can pop the connector up to remove the ribbon easily

    • Ribbon Cable

  5. Xbox One Elite Controller (Model 1698) Daughterboard Replacement, Screws on controller motherboard: 步骤 5 中的图像 1,1
    • Remove the 2 Torx (T6) screws

  6. Xbox One Elite Controller (Model 1698) Daughterboard Replacement, Desolder wires from motherboard: 步骤 6 中的图像 1,2 Xbox One Elite Controller (Model 1698) Daughterboard Replacement, Desolder wires from motherboard: 步骤 6 中的图像 2,2
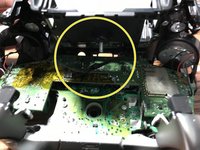
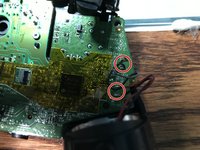
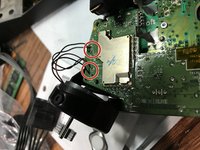
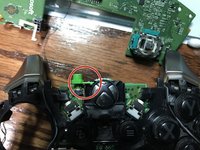
    • Desolder the 4 wires on each side, these control the vibrations and the RT LT

  7. Xbox One Elite Controller (Model 1698) Daughterboard Replacement, Remove the motherboard: 步骤 7 中的图像 1,2 Xbox One Elite Controller (Model 1698) Daughterboard Replacement, Remove the motherboard: 步骤 7 中的图像 2,2
    • Pull up from the "top" side of the controller on the sister board.

  8. Xbox One Elite Controller (Model 1698) Daughterboard Replacement, Remove the Home Button Cover: 步骤 8 中的图像 1,3 Xbox One Elite Controller (Model 1698) Daughterboard Replacement, Remove the Home Button Cover: 步骤 8 中的图像 2,3 Xbox One Elite Controller (Model 1698) Daughterboard Replacement, Remove the Home Button Cover: 步骤 8 中的图像 3,3
    • Be Careful to not lose the sync button

    • Pry the middle section up from the home button side.

    • This will also remove the LB and RB which is a single part

  9. Xbox One Elite Controller (Model 1698) Daughterboard Replacement, Remove the controller daughterboard: 步骤 9 中的图像 1,2 Xbox One Elite Controller (Model 1698) Daughterboard Replacement, Remove the controller daughterboard: 步骤 9 中的图像 2,2
    • Unscrew the 6 Torx (T6) screws

结论

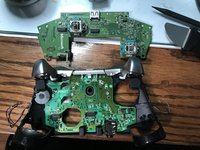
To reassemble your device, follow these instructions in reverse order.

2等其他人完成本指南。

EasyAsABC123

于01/22/10注册

2,407 声望

创作了5篇指南

0条评论

添加评论

浏览统计数据:

过去 24 小时: 7

过去 7 天: 16

过去 30 天: 74

总计 8,241