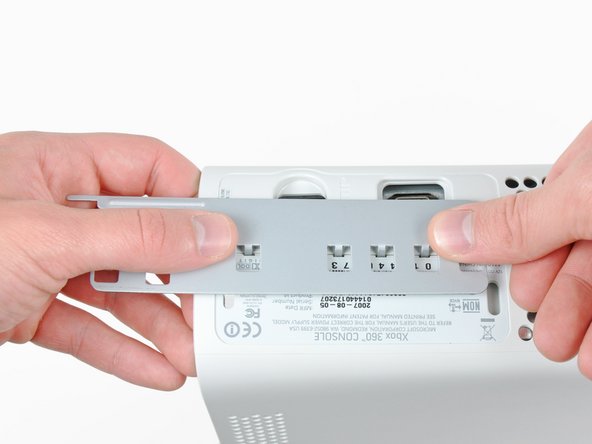
In the next few steps, you will use the tip of a spudger or the finger of an Xbox 360 opening tool to release the clips along the left and right sides of the bottom vent. Their locations are highlighted in red.
You will insert the tool into the holes molded into the white plastic side case pieces.
To release the clips, work from the front edge of the bottom vent.
While slightly lifting the front edge of the bottom vent, use the tip of a spudger to push the clips closest to the front of the bottom vent towards the inside of the console.
Stand the console vertically with the top edge facing up.
The top vent is secured to the console via clips. The first two clips are located underneath the top vent closest to the faceplate, as shown in the pictures.
In the next few steps, you will use the tip of a spudger or the finger of an Xbox 360 opening tool to release the clips along the left and right sides of the top vent. Their locations are highlighted in red.
To release the clips, work from the middle of the top vent.
While slightly lifting the front edge of the top vent, use the tip of a spudger to push the clips closest to the center of the top vent towards the inside of the console.
The upper and lower cases are attached via several latches, located in the front and back of the console. These latches must be disengaged to separate the upper case from the console.
Use the flat end of a spudger to release the following latches:
While pushing the upper and lower cases apart, use the tip of a spudger or the finger of an Xbox 360 opening tool to push the long clip highlighted in red toward the center of the 360.
The clip should release, leaving the clips near the power connector as the only thing holding the upper and lower cases together.
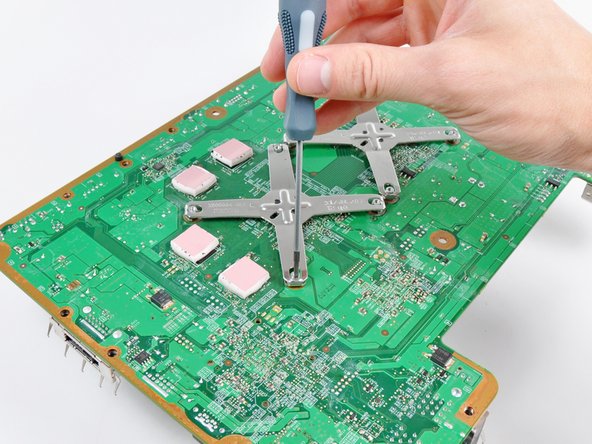
Insert your screwdriver parallel to the motherboard between the X clamp and its retaining post.
Twist the screwdriver to fully release the X clamp from its retaining post.
Repeat this process for all four corners of the X clamp.
When removing the last corner of the X clamp and holding the motherboard upside down, be sure to catch the GPU heat sink to avoid damage from it falling.
To reinstall the X clamp, first start by attaching two corners to the posts on the heat sink.
While holding the third arm of the X clamp down against the post attached to the heat sink, use a small flathead screwdriver to pry the X clamp away from the heat sink post.
As you pry, press down on the arm of the X clamp until you "walk" it down into the retaining groove cut into the post attached to the heat sink.
Repeat this process for the fourth arm of the X clamp.
Insert the tip of a small flathead screwdriver between the X clamp and its retaining post on the heat sink.
Pry the X clamp away from its retaining post until it is lifted above the small groove cut into the retaining post.
If necessary, insert your screwdriver parallel to the motherboard between the X clamp and its retaining post. Twist the screwdriver to fully release the X clamp from its retaining post.
Repeat this process for all four corners of the X clamp.
When removing the last corner of the X clamp and holding the motherboard upside down, be sure to catch the CPU heat sink to avoid damage from it falling.
Remove the CPU heat sink from the motherboard. When reinstalling the CPU heat sink, be sure to apply a new layer of thermal paste.
If replacing the motherboard transfer the four thermal pads on the underside of the motherboard to your new motherboard.
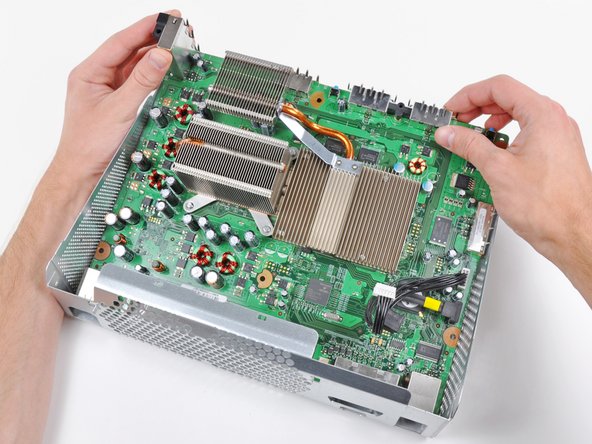
Motherboard remains.
The DVD drive and the motherboard are "married" when they leave the factory. If you replace one you must replace the other. If you put any old DVD drive onto a motherboard that it is not "married" to it will only play DVDs, no games. It is possible to alter the keys so that they match.
Outstanding guide! My system did not need repairs. I simply opened it and gutted it so I could clean the entire thing inside and out like new to help maintain its lifespan. There is a metal frame underneath the top portion of the 360 case. I was unable to get inside this gap to clean it and a can of air duster is not powerful enough to blow out all the dirt/dust stuck to it. Has anyone found a way to get under there and clean?
I skipped putting back on the clamps since they were tedious to put on, Instead i just screwed the heatsink screws in and hoped that would keep it tight.