跳转到主内容

Visual Land Prestige Pro 7D LCD Display Replacement

你所需要的

  1. Visual Land Prestige Pro 7D LCD Display Replacement, Back Panel: 步骤 1 中的图像 1,1
    • Unscrew the two 4.0mm Phillips head screws found near the ports at the bottom of the device using a PH #00 screwdriver.

  2. Visual Land Prestige Pro 7D LCD Display Replacement: 步骤 2 中的图像 1,1
    • Be careful when taking the back panel off. The speaker is connected to both the front and back panels, and may get pulled out if you are not gentle when lifting the back panel away.

    • Slide the plastic prying tool in between the front and back panel and pry them apart on all 4 sides.

    • It may be easiest to start on one of the sides, and work your way around the device. The bottom, with the ports, is the most difficult side and can be saved for last.

    • There are small latches that make this difficult. Moderate force may be required to separate the two panels.

  3. Visual Land Prestige Pro 7D LCD Display Replacement, Front-Facing Camera: 步骤 3 中的图像 1,2 Visual Land Prestige Pro 7D LCD Display Replacement, Front-Facing Camera: 步骤 3 中的图像 2,2
    • Remove the black pad on the back of the camera by peeling it off.

  4. Visual Land Prestige Pro 7D LCD Display Replacement: 步骤 4 中的图像 1,1
    • With the bottom of the device facing away from you, pull the camera out of its black housing.

    • The camera will come right out when you lift with your fingers.

  5. Visual Land Prestige Pro 7D LCD Display Replacement: 步骤 5 中的图像 1,1
    • Use the tweezers to lift the grey connector, connecting the camera ribbon to the circuit board, up from the beige housing. It should rotate up, and allow you to slide the ribbon out from under the connector.

  6. Visual Land Prestige Pro 7D LCD Display Replacement, Display: 步骤 6 中的图像 1,1
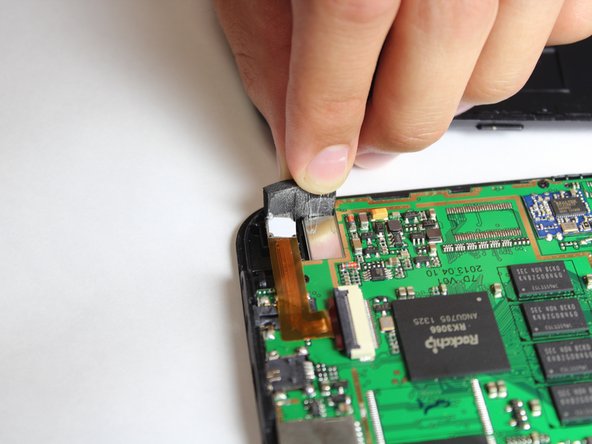
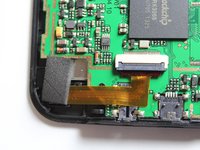
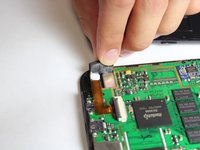
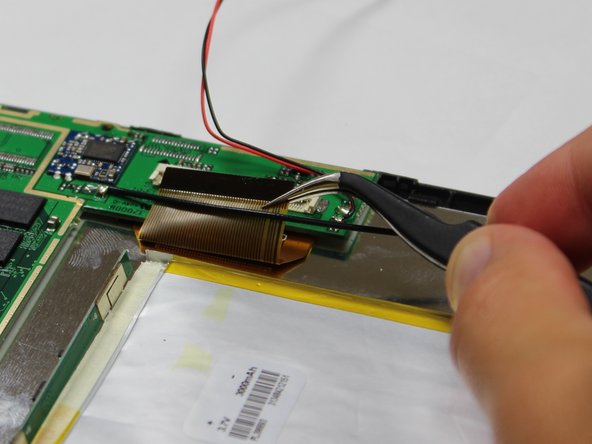
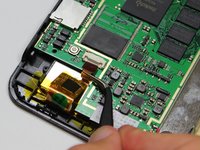
    • Remove the three 4.0mm screws holding down the circuit board with the Phillips #00 screwdriver.

  7. Visual Land Prestige Pro 7D LCD Display Replacement: 步骤 7 中的图像 1,2 Visual Land Prestige Pro 7D LCD Display Replacement: 步骤 7 中的图像 2,2
    • Use the tweezers to lift the grey connector, located near the battery and speaker, up from the beige housing. It should rotate up, and allow you to slide the ribbon out from under the connector.

  8. Visual Land Prestige Pro 7D LCD Display Replacement: 步骤 8 中的图像 1,2 Visual Land Prestige Pro 7D LCD Display Replacement: 步骤 8 中的图像 2,2
    • Use the tweezers to lift the grey connector, located near the reset button, up from the beige housing. It should rotate up, and allow you to slide the ribbon out from under the connector.

  9. Visual Land Prestige Pro 7D LCD Display Replacement: 步骤 9 中的图像 1,1
    • Turn the device around, and use the large plastic opening tool to pry the battery off of the back of the silver LCD.

    • Do not worry if the battery bends while you are removing it. It is flexible, and you did not just break it.

    • Some of the glue holding the battery in place may stick to the back of the LCD.

  10. Visual Land Prestige Pro 7D LCD Display Replacement: 步骤 10 中的图像 1,1
    • Lift the circuit board and the battery off of the front panel.

  11. Visual Land Prestige Pro 7D LCD Display Replacement: 步骤 11 中的图像 1,1
    • Remove the two 3.0mm screws holding down the black tabs using the Phillips #00 screwdriver.

    • Each screw is holding a black tab down onto the silver LCD. When the screws are removed these black tabs will fall off.

    • When putting the device back together, the screws go through the middle holes of the black tabs.

  12. Visual Land Prestige Pro 7D LCD Display Replacement: 步骤 12 中的图像 1,2 Visual Land Prestige Pro 7D LCD Display Replacement: 步骤 12 中的图像 2,2
    • Use the Plastic Opening Tool to gently pry the black hooks away from the edges of the silver LCD. Then lift the LCD off of the front panel.

    • As the LCD is pried off of the front panel, some of the plastic hooks holding it to the front panel might catch on the edges of the LCD. Avoid this by gently bending the front panel outwards while removing the LCD.

  13. Visual Land Prestige Pro 7D LCD Display Replacement: 步骤 13 中的图像 1,1
    • Soldering guns are hot and can easily damage you or the device.

    • Desolder the black wire from the LCD.

    • For soldering information, see our guide: 如何焊接和拆焊.

结论

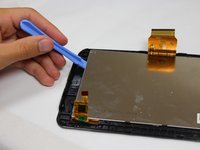
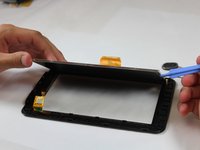
To reassemble your device, follow these instructions in reverse order.

另外一个人完成了本指南。

Matt Ferrari

于10/14/14注册

266 声望

撰写一个指南

团队

Cal Poly, Team 10-41, Amido Fall 2014 Cal Poly, Team 10-41, Amido Fall 2014 的会员

CPSU-AMIDO-F14S10G41

4 名成员

创作了12篇指南

0条评论

添加评论

浏览统计数据:

过去 24 小时: 0

过去 7 天: 0

过去 30 天: 2

总计 5,284