跳转到主内容

Trackpad Prereq

仅作为前提条件
本指南仅提供前提条件!本指南是另一个程序的一部分,不能单独使用。

你所需要的

  1. Trackpad Prereq, Remove the trackpad connector screws: 步骤 1 中的图像 1,2 Trackpad Prereq, Remove the trackpad connector screws: 步骤 1 中的图像 2,2
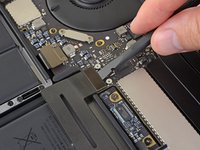
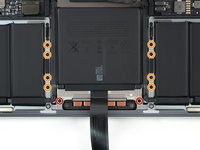
    • Use a T3 Torx driver to remove the two 1.8 mm screws securing the trackpad cable connector bracket.

  2. Trackpad Prereq: 步骤 2 中的图像 1,1
    在这个步骤中使用的工具:
    Tweezers
    $4.99
    • Remove the trackpad cable connector bracket with a pair of tweezers.

  3. Trackpad Prereq, Disconnect the trackpad: 步骤 3 中的图像 1,2 Trackpad Prereq, Disconnect the trackpad: 步骤 3 中的图像 2,2
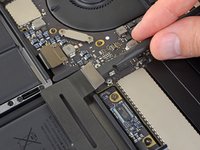
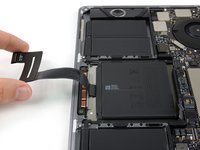
    • Use a spudger to disconnect the trackpad ribbon cable by gently prying its connector straight up from the logic board.

  4. Trackpad Prereq, Heat the trackpad cable: 步骤 4 中的图像 1,1
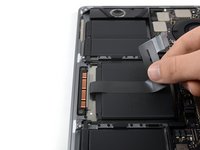
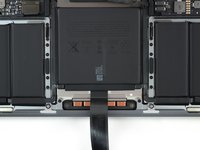
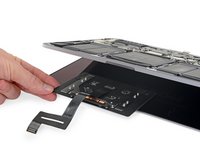
    • Prepare an iOpener and lay it on top of the trackpad ribbon cable for about a minute, in order to soften the adhesive securing the trackpad ribbon cable to the top of the battery.

    • If you don't have an iOpener, use a hair dryer to warm up the cable instead. The cable should be warm, but not too hot to touch. Be careful not to overheat the battery.

  5. Trackpad Prereq, Peel up the trackpad cable: 步骤 5 中的图像 1,3 Trackpad Prereq, Peel up the trackpad cable: 步骤 5 中的图像 2,3 Trackpad Prereq, Peel up the trackpad cable: 步骤 5 中的图像 3,3
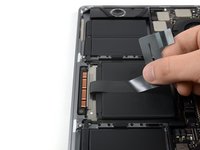
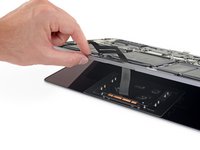
    • Carefully peel the trackpad ribbon cable up off the battery, and push it out of the way.

    • Do not fold or tear the cable.

  6. Trackpad Prereq, Remove the trackpad screws: 步骤 6 中的图像 1,2 Trackpad Prereq, Remove the trackpad screws: 步骤 6 中的图像 2,2
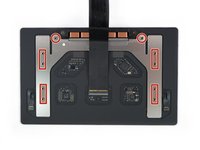
    • Use a T5 Torx driver to remove the ten screws securing the trackpad assembly:

    • Two 4.3 mm screws

    • Eight 5.8 mm screws

  7. Trackpad Prereq: 步骤 7 中的图像 1,2 Trackpad Prereq: 步骤 7 中的图像 2,2
    • Swing the display open slightly to access the trackpad.

    • Carefully thread the trackpad ribbon cable out through the hole in the MacBook Pro's frame.

  8. Trackpad Prereq, Remove the trackpad: 步骤 8 中的图像 1,3 Trackpad Prereq, Remove the trackpad: 步骤 8 中的图像 2,3 Trackpad Prereq, Remove the trackpad: 步骤 8 中的图像 3,3
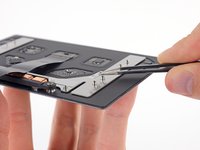
    • Remove the trackpad assembly.

    • Be sure not to lose the six small washers (two circular and four rectangular) resting on the underside of the trackpad.

结论

To reassemble your device, follow these instructions in reverse order.

Tobias Isakeit

于03/31/14注册

129,557 声望

创作了189篇指南

团队

Tobias Isakeit - Repairability Engineer Tobias Isakeit - Repairability Engineer 的会员

Business

1 名成员

创作了1,145篇指南

0指南评论

添加评论

浏览统计数据:

过去 24 小时: 0

过去 7 天: 1

过去 30 天: 5

总计 110