跳转到主内容

Toshiba Satellite U840W Processor Fan Replacement.

你所需要的

  1. Toshiba Satellite U840W Processor Fan Replacement., Toshiba Satellite U840W Disassembly Guide: 步骤 1 中的图像 1,2 Toshiba Satellite U840W Processor Fan Replacement., Toshiba Satellite U840W Disassembly Guide: 步骤 1 中的图像 2,2
    • There are ten 5mm screws surrounding the edge of the cover.

    • A rubber cap covers the eleventh 5mm screw (in the center).

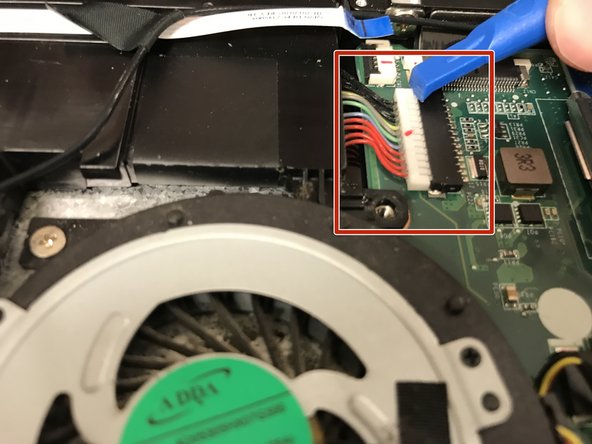
    • Remove the screws using a Phillips #00 screwdriver.
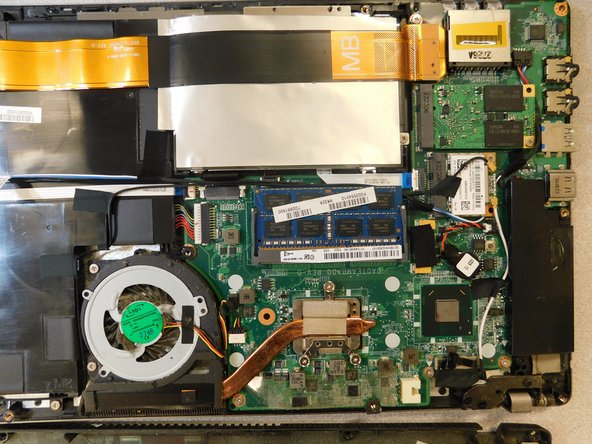
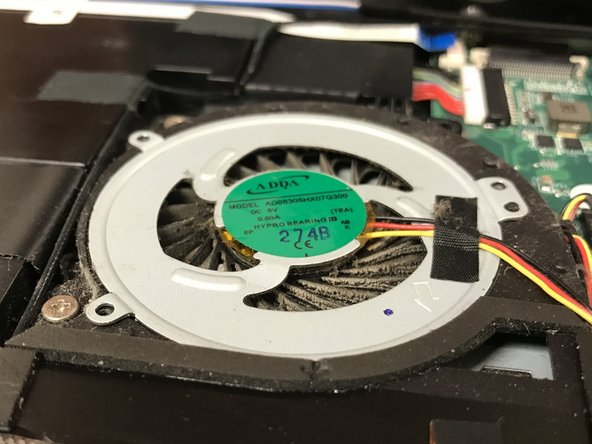
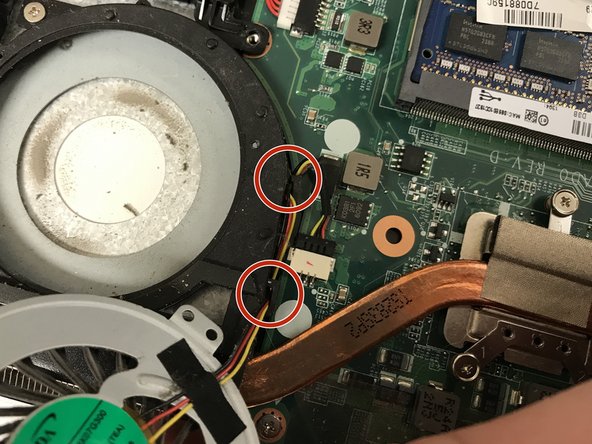
  2. Toshiba Satellite U840W Processor Fan Replacement.: 步骤 2 中的图像 1,3 Toshiba Satellite U840W Processor Fan Replacement.: 步骤 2 中的图像 2,3 Toshiba Satellite U840W Processor Fan Replacement.: 步骤 2 中的图像 3,3
    • Pry between the casing and cover using a plastic wedge tool.

    • Use the wedge tool to move along the case & slowly pry it open.

    • The wire for the 12v charging port connects the cover to the casing.

  3. Toshiba Satellite U840W Processor Fan Replacement.: 步骤 3 中的图像 1,3 Toshiba Satellite U840W Processor Fan Replacement.: 步骤 3 中的图像 2,3 Toshiba Satellite U840W Processor Fan Replacement.: 步骤 3 中的图像 3,3
    • Disconnect this connector from the motherboard to avoid damaging the motherboard or charging port cable.

  4. Toshiba Satellite U840W Processor Fan Replacement.: 步骤 4 中的图像 1,1
    • Disconnect the battery.

    • Hold down the power button for ~10 seconds to discharge any stored electricity from the motherboard.

  5. Toshiba Satellite U840W Processor Fan Replacement., Processor Fan: 步骤 6 中的图像 1,2 Toshiba Satellite U840W Processor Fan Replacement., Processor Fan: 步骤 6 中的图像 2,2
    • Remove the three 3mm screws using a Phillips #00 screwdriver.

  6. Toshiba Satellite U840W Processor Fan Replacement.: 步骤 7 中的图像 1,2 Toshiba Satellite U840W Processor Fan Replacement.: 步骤 7 中的图像 2,2
    • A plastic prying tool can be used to help you remove the fan.

    • Plastic wire guides hold the wire in place. Manipulate the wire out from these guides.

  7. Toshiba Satellite U840W Processor Fan Replacement.: 步骤 8 中的图像 1,2 Toshiba Satellite U840W Processor Fan Replacement.: 步骤 8 中的图像 2,2
    • Remove the connector from the motherboard.

结论

To reassemble your device, follow these instructions in reverse order.

另外一个人完成了本指南。

Tony Aprile

于02/04/19注册

118 声望

撰写一个指南

团队

Gateway, Team S1-G1, Saknee Spring 2019 Gateway, Team S1-G1, Saknee Spring 2019 的会员

GCC-SAKNEE-S19S1G1

4 名成员

创作了5篇指南

0条评论

添加评论

浏览统计数据:

过去 24 小时: 2

过去 7 天: 4

过去 30 天: 8

总计 319