跳转到主内容
加入维修社区 - 创建账户

SuperSonic Matrix Mid SC-999 Headphone Jack Replacement

你所需要的

  1. SuperSonic Matrix Mid SC-999 Headphone Jack Replacement, Back Cover: 步骤 1 中的图像 1,1
    • Wedge the plastic opening tool between the back cover of the device and the front panel.

    • You will hear a snapping sound as the cover is separated from the body of the device.

    询问修复机器人

    添加评论

  2. SuperSonic Matrix Mid SC-999 Headphone Jack Replacement: 步骤 2 中的图像 1,1
    • Slide the opening tool along the seam between the front panel and the back cover to un-clip the remaining connections around the device.

    • Again, you will hear a snapping sound as the cover is separated from the body of the device.

    询问修复机器人

    添加评论

  3. SuperSonic Matrix Mid SC-999 Headphone Jack Replacement: 步骤 3 中的图像 1,2 SuperSonic Matrix Mid SC-999 Headphone Jack Replacement: 步骤 3 中的图像 2,2
    • Lift the back cover from the body of the device to expose the internal components.

    询问修复机器人

    添加评论

  4. SuperSonic Matrix Mid SC-999 Headphone Jack Replacement, Headphone Jack: 步骤 4 中的图像 1,1
    • Locate the headphone jack on the device.

    询问修复机器人

    添加评论

  5. SuperSonic Matrix Mid SC-999 Headphone Jack Replacement: 步骤 5 中的图像 1,2 SuperSonic Matrix Mid SC-999 Headphone Jack Replacement: 步骤 5 中的图像 2,2
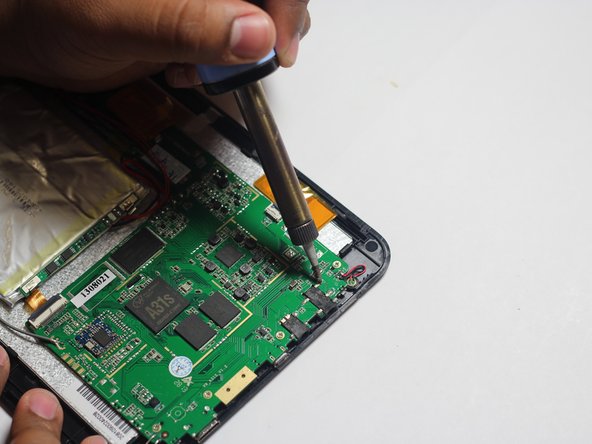
    • Desolder the 5 soldered connections (marked in red) that connect the headphone jack to the device.

    • If you're unfamiliar with soldering or desoldering check out this guide.

    • Be sure to wear protective eye wear. The soldering iron will become extremely hot, so be mindful in your handling.

    询问修复机器人

    添加评论

结论

To reassemble your device, follow these instructions in reverse order.

取消:我没有完成这个指南。

团队

Dr Shaverz boyz Dr Shaverz boyz 的会员

Community

3 名成员

创作了14篇指南

0指南评论

添加评论

浏览统计数据:

过去 24 小时: 1

过去 7 天: 7

过去 30 天: 35

总计 514