简介
When games have been in storage or used for years on end, they need to get a good dose of TLC. In extreme cases you need to crack them open to get everything. It can be tense opening up a loved game in the fear that you'll destroy it.
Alternatively, you can open up a game no one liked and make it into an innocuous enclosure for something else.
你所需要的
-
-
On the bottom front corners of the cartridge you should see two screws using the 3.8mm "Gamebit" screwdriver bit. A 3.0U Spanner bit can also get them out.
-
Once the screws are out, slide the front part of the plastic casing down to clear the tabs on the top of the case.
-
The two halves of the case should open easily.
-
-
-
-
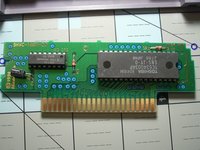
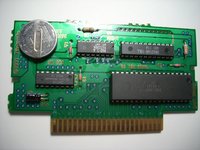
At this point the game board and pins are freely accessible.
-
Here you can fully clean the pin set and inspect for damage to the circuit board.
-
Cleaning the pins is the easiest part; use a cotton swab and either a rich mixture isopropyl alcohol or Brasso. Other people swear by an eraser(the white kind), but it can lead to damage if you're not careful. Personally, Brasso works the best.
-


To reassemble the cartridge, follow these instructions in reverse order.
23等其他人完成本指南。

