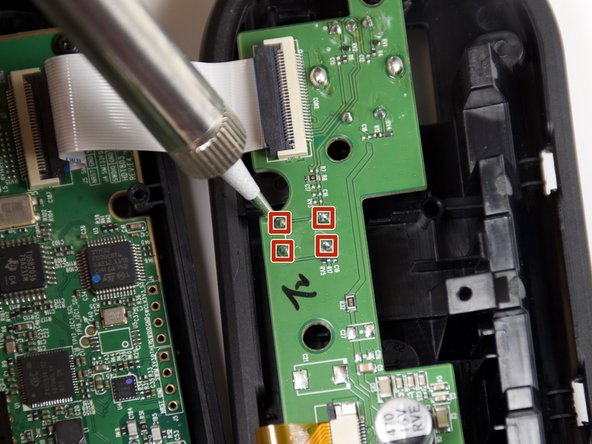
跳转到主内容

SteelSeries Arctis Pro Plus GameDAC Secondary Button Replacement

你所需要的

  1. SteelSeries Arctis Pro Plus GameDAC Secondary Button Replacement, GameDAC Secondary Button: 步骤 1 中的图像 1,3 SteelSeries Arctis Pro Plus GameDAC Secondary Button Replacement, GameDAC Secondary Button: 步骤 1 中的图像 2,3 SteelSeries Arctis Pro Plus GameDAC Secondary Button Replacement, GameDAC Secondary Button: 步骤 1 中的图像 3,3
    • Remove the plastic cover using the iFixit opening tool to pry the cover open.

    • Insert opening picks to keep the cover open as you work your way around the GameDAC.
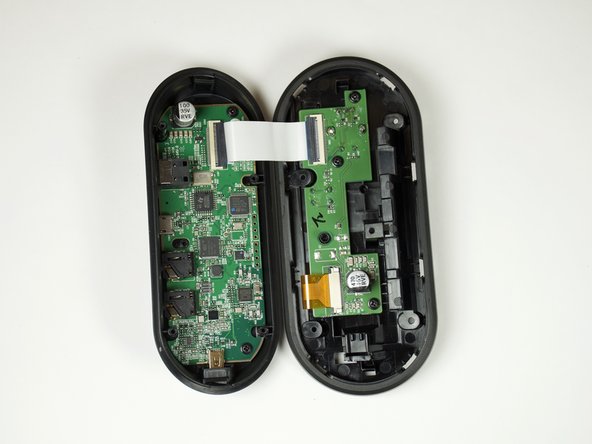
    • Pop the cover off.

  2. SteelSeries Arctis Pro Plus GameDAC Secondary Button Replacement: 步骤 2 中的图像 1,2 SteelSeries Arctis Pro Plus GameDAC Secondary Button Replacement: 步骤 2 中的图像 2,2
    • Remove the control wheel from the GameDAC by pulling on the knob.

  3. SteelSeries Arctis Pro Plus GameDAC Secondary Button Replacement: 步骤 3 中的图像 1,2 SteelSeries Arctis Pro Plus GameDAC Secondary Button Replacement: 步骤 3 中的图像 2,2
    • Remove the five 6mm screws using the Phillips #0 driver head.

    • There is one screw hidden on the upper right-hand side of the display.

  4. SteelSeries Arctis Pro Plus GameDAC Secondary Button Replacement: 步骤 4 中的图像 1,2 SteelSeries Arctis Pro Plus GameDAC Secondary Button Replacement: 步骤 4 中的图像 2,2
    • Hold the sides of the GameDAC and pull apart.

    • Don't pull the two sides apart quickly or forcefully to avoid tearing the wire connection between the two boards.

  5. SteelSeries Arctis Pro Plus GameDAC Secondary Button Replacement: 步骤 5 中的图像 1,1
    • Remove the three 4mm screws from the circuit board using the Phillips #0 driver head.

  6. SteelSeries Arctis Pro Plus GameDAC Secondary Button Replacement: 步骤 6 中的图像 1,2 SteelSeries Arctis Pro Plus GameDAC Secondary Button Replacement: 步骤 6 中的图像 2,2
    • Desolder the four button pins from the board to remove the button.

    • For help desoldering connections, follow this useful guide on 如何焊接和拆焊.

    • Use caution when soldering. The heated tip may cause damage to the board or burn you.

结论

To reassemble your device, follow these instructions in reverse order.

3等其他人完成本指南。

Kyle Chang

于01/24/19注册

1,152 声望

创作了7篇指南

团队

Cal Poly, Team S18-G1, White Winter 2019 Cal Poly, Team S18-G1, White Winter 2019 的会员

CPSU-WHITE-W19S18G1

4 名成员

创作了21篇指南

0条评论

添加评论

浏览统计数据:

过去 24 小时: 0

过去 7 天: 4

过去 30 天: 19

总计 1,117