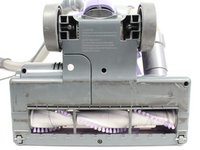
跳转到主内容

Shark NV352 Motherboard Replacement

你所需要的

  1. Shark NV352 Motherboard Replacement, Roller Brush: 步骤 1 中的图像 1,2 Shark NV352 Motherboard Replacement, Roller Brush: 步骤 1 中的图像 2,2
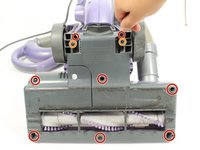
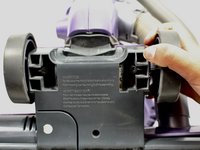
    • Lift the latches on both sides of the vacuum to release the dust canister.

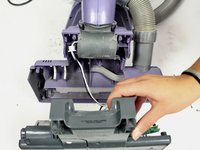
    • Remove the dust canister from the vacuum by lifting it up.

  2. Shark NV352 Motherboard Replacement: 步骤 2 中的图像 1,1
    • Lay down the vacuum to access the bottom panel of the roller brush compartment.

  3. Shark NV352 Motherboard Replacement: 步骤 3 中的图像 1,2 Shark NV352 Motherboard Replacement: 步骤 3 中的图像 2,2
    • Using the metal spudger, pry the two small wheels located at the two bottom corners of the vacuum to remove them.

  4. Shark NV352 Motherboard Replacement: 步骤 4 中的图像 1,2 Shark NV352 Motherboard Replacement: 步骤 4 中的图像 2,2
    • Remove the eight 19mm Phillips #2 screws from the plastic cover.

    • Remove the two 14 mm Phillips #2 screws from the upper section of the plastic cover.

  5. Shark NV352 Motherboard Replacement: 步骤 5 中的图像 1,2 Shark NV352 Motherboard Replacement: 步骤 5 中的图像 2,2
    • You will need to apply a strong force while pulling the wheels off because they are attached very tightly.

    • Remove the wheels by pulling them out of their axles, away from the vacuum.

  6. Shark NV352 Motherboard Replacement: 步骤 6 中的图像 1,2 Shark NV352 Motherboard Replacement: 步骤 6 中的图像 2,2
    • Perform the next step slowly and carefully so the wiring connecting the motherboard to the rest of the vacuum is not broken.

    • Gently pull the grey lower part of the roller brush compartment away from the purple upper part of the compartment.

  7. Shark NV352 Motherboard Replacement: 步骤 7 中的图像 1,1
    • Lift up and then pull the roller belt off of the roller brush and the motor to remove it.

  8. Shark NV352 Motherboard Replacement: 步骤 8 中的图像 1,1
    • Take out the roller brush by lifting it out of its tray.

  9. Shark NV352 Motherboard Replacement, Motherboard: 步骤 9 中的图像 1,1
    • The capacitors on the motherboard may still hold a residual charge, so avoid touching them because there is a risk of getting shocked.

    • Remove the motherboard carefully so you don't cause damage by pulling the wires connected to it.

    • Lift the motherboard out of the plastic tray to remove it.

  10. Shark NV352 Motherboard Replacement: 步骤 10 中的图像 1,1
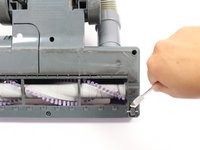
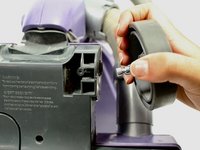
    • Disconnect the wires connecting the motherboard to the vacuum by unscrewing the twist-on wire connectors.

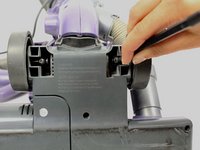
    • Desolder the wires connecting the motherboard to the motor. Get tips on how to desolder by checking out How to Solder and Desolder.

结论

To reassemble your device, follow these instructions in reverse order.

3等其他人完成本指南。

Wesley T Benica

于09/22/17注册

378 声望

创作了2篇指南

团队

Cal Poly, Team S18-G5, Forte Fall 2017 Cal Poly, Team S18-G5, Forte Fall 2017 的会员

CPSU-FORTE-F17S18G5

4 名成员

创作了10篇指南

5条评论

Thanks Thomas! Your support is greatly appreciated!

Vincent Leuzze -

Any knowledge on how to fix or replace the handle lick button. Mine won't lock and so the whole vacuum doesn't work

Jana Butler - 回复

I have a 350 will the 352 powerhead motherboard work as a replacement as I can’t find a 305 one

chaseraymond - 回复

I have a 350 vacume but need a replacement powerhead circuit board would the 352 work? It looks the same and it’s the same unit?

chaseraymond - 回复

添加评论

浏览统计数据:

过去 24 小时: 2

过去 7 天: 7

过去 30 天: 13

总计 1,317