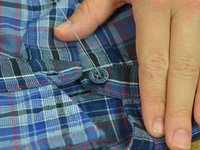
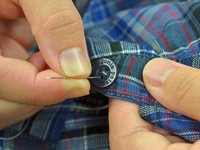
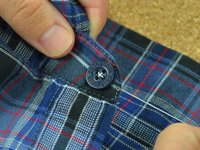
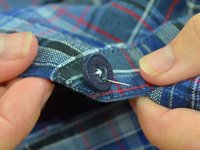
跳转到主内容

Sew a Button

你所需要的

  1. Sew a Button, Button: 步骤 1 中的图像 1,1
    • Locate the area where the button has gone missing.

  2. Sew a Button: 步骤 2 中的图像 1,2 Sew a Button: 步骤 2 中的图像 2,2
    • Overlap the buttonhole with where the button should be. Going through the buttonhole, mark the fabric below with tailor's chalk.

  3. Sew a Button: 步骤 3 中的图像 1,2 Sew a Button: 步骤 3 中的图像 2,2
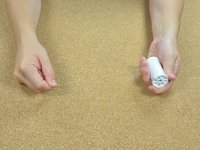
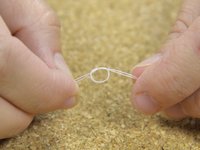
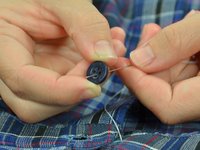
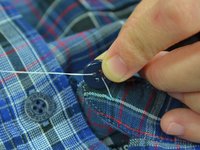
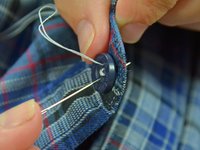
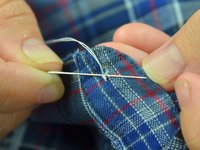
    • Get a length of thread—about an arms-length should be more than enough.
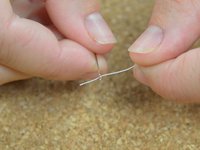
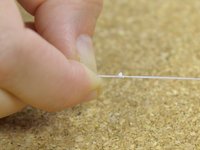
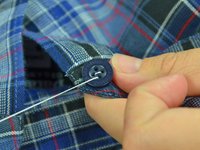
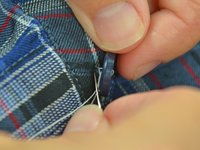
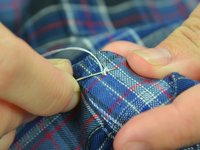
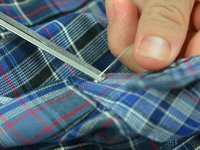
    • Thread a needle.

  4. Sew a Button: 步骤 4 中的图像 1,3 Sew a Button: 步骤 4 中的图像 2,3 Sew a Button: 步骤 4 中的图像 3,3
    • Let the needle slide down the thread until it hangs at the center. You should have two equal lengths of thread on either side of the needle.

    • Tie the loose ends of the thread together.

  5. Sew a Button: 步骤 5 中的图像 1,2 Sew a Button: 步骤 5 中的图像 2,2
    • Tie a second regular knot over the first one to make it bigger. You don't want the thread slipping right through the grain of the fabric.

  6. Sew a Button: 步骤 6 中的图像 1,3 Sew a Button: 步骤 6 中的图像 2,3 Sew a Button: 步骤 6 中的图像 3,3
    • Poke the needle up through the chalk mark from the underside of the fabric.

    • Pull the thread taut, until the knot catches the backside of the fabric.

  7. Sew a Button: 步骤 7 中的图像 1,2 Sew a Button: 步骤 7 中的图像 2,2
    • Thread the needle through one hole of the button. You can pick any hole to start with.

    • Let the button drop all the way down onto the fabric.

  8. Sew a Button: 步骤 8 中的图像 1,3 Sew a Button: 步骤 8 中的图像 2,3 Sew a Button: 步骤 8 中的图像 3,3
    • Push the needle through the buttonhole directly opposite the one you have already threaded.

    • Be sure to go through only the button, not the fabric.

  9. Sew a Button: 步骤 9 中的图像 1,3 Sew a Button: 步骤 9 中的图像 2,3 Sew a Button: 步骤 9 中的图像 3,3
    • Push the needle back through the fabric directly next to where you initially pushed the needle up.

    • Pull the thread taut, until the button lays flat on the fabric.

  10. Sew a Button: 步骤 10 中的图像 1,3 Sew a Button: 步骤 10 中的图像 2,3 Sew a Button: 步骤 10 中的图像 3,3
    • Push the needle back up through the backside of the fabric, directly next to the original knot

    • Work the needle up through one of the two remaining holes without thread .

    • Pull the thread taut.

  11. Sew a Button: 步骤 11 中的图像 1,3 Sew a Button: 步骤 11 中的图像 2,3 Sew a Button: 步骤 11 中的图像 3,3
    • Go back through the last remaining empty hole on the button.

    • Be sure to go through only the button, not the fabric.

    • Go back down through the fabric, as close as possible to the other two threads.

    • Pull the thread taut.

  12. Sew a Button: 步骤 12 中的图像 1,3 Sew a Button: 步骤 12 中的图像 2,3 Sew a Button: 步骤 12 中的图像 3,3
    • Drive the needle back up through the underside of the fabric and into the first hole that you threaded.

    • Pull the thread taut.

  13. Sew a Button: 步骤 13 中的图像 1,2 Sew a Button: 步骤 13 中的图像 2,2
    • Go back down through the second hole, directly across from the hole you just came up through.

    • Pull taut.

  14. Sew a Button: 步骤 14 中的图像 1,3 Sew a Button: 步骤 14 中的图像 2,3 Sew a Button: 步骤 14 中的图像 3,3
    • Push the needle up through the third hole again.

    • Pull it taut.

    • Push the needle down through the fourth hole and pull it taut.

    • Repeat steps 12-14 of this guide one more time, then proceed.

  15. Sew a Button: 步骤 15 中的图像 1,3 Sew a Button: 步骤 15 中的图像 2,3 Sew a Button: 步骤 15 中的图像 3,3
    • You have sewn in the button. Now you need a knot to keep the button in place.

    • Push the needle through the loops of thread on the underside of the fabric. Be careful not to catch the fabric.

  16. Sew a Button: 步骤 16 中的图像 1,2 Sew a Button: 步骤 16 中的图像 2,2
    • Leave some slack in the thread and draw the needle through the loop created by the slack.

    • Pull the thread taut, forming a knot.

    • Repeat steps 15 and 16 one more time to add a second knot.

  17. Sew a Button: 步骤 17 中的图像 1,2 Sew a Button: 步骤 17 中的图像 2,2
    • Clip the excess thread off.

    • Check your button for stability.

终点

56等其他人完成本指南。

Brittany McCrigler

于03/05/12注册

89,011 声望

创作了131篇指南

团队

iFixit iFixit 的会员

Staff

135 名成员

创作了16,732篇指南

5条评论

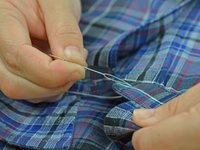
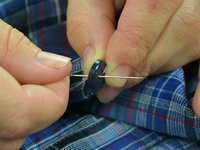
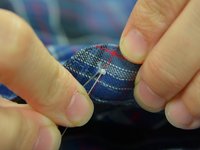
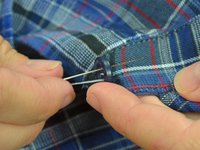
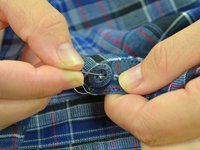
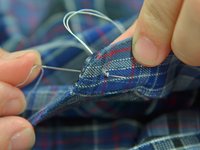
What helps after the last step 14 is to wrap the thread around and around a few times underneath the button itself (binding all the threads together) and making one last pass through the cloth before the final knot. This makes the repair much more durable.

mccreerydennis - 回复

The wrapping below the button is not only more durable, but is actually frequently used when replacing buttons on blazers, sport coats, and the like as a protection from friction as the garment moves and shifts while being worn.

Matt - 回复

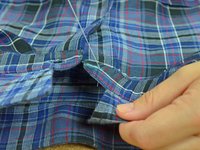
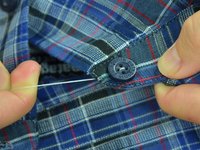
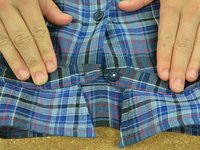
Wrapping the threads underneath the button to create a shank is useful for coat buttons where the fabric is thick and you don’t want the fabric to pucker. As noted, it adds durability to the button attachment. On a shirt collar, as seen here, it would create too much bulk where you need the button to lie quite flat, so this method is quite sufficient.

Jonathan Wells - 回复

Thanks Jonathan. Great insight.

Louie Leung - 回复

Parfait, mon pantalon est comme neuf :)

Brendan - 回复

添加评论

浏览统计数据:

过去 24 小时: 3

过去 7 天: 39

过去 30 天: 112

总计 16,337