跳转到主内容

SONOS ZP100 Network Card Replacement

你所需要的

  1. SONOS ZP100 Network Card Replacement, Lets begin!: 步骤 1 中的图像 1,2 SONOS ZP100 Network Card Replacement, Lets begin!: 步骤 1 中的图像 2,2
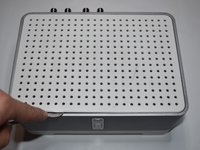
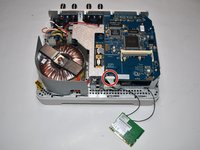
    • With the SONOS ZP100 (ZonePlayer) you can use external speakers to play your music that is streamed to the Sonos ZP100 via WiFi or cable.

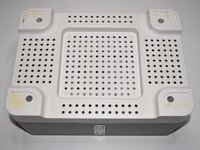
    • The mute button and the volume buttons are located on the front.

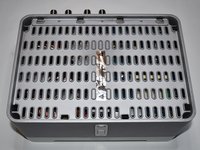
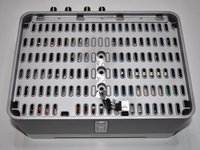
    • On the back are the the four Ethernet ports, the connections for the speakers, subwoofer, audio-in and the power supply.

    • The integrated amplifier delivers an output of 2 x 50 watts.

    • With the Sonos S1 System App, the ZP100 can be controlled via a smartphone or a computer.

  2. SONOS ZP100 Network Card Replacement, Remove cover: 步骤 2 中的图像 1,2 SONOS ZP100 Network Card Replacement, Remove cover: 步骤 2 中的图像 2,2
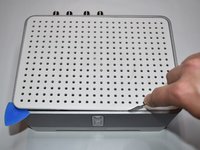
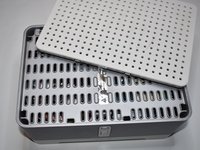
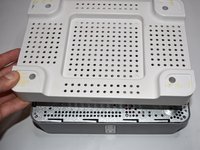
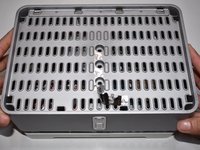
    • The upper cover is fastened with two retaining lugs on the front and two on the sides.

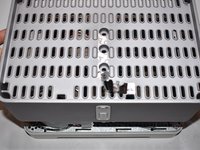
    • There are fixed brackets on the back that cannot be pressed in.

  3. SONOS ZP100 Network Card Replacement: 步骤 3 中的图像 1,3 SONOS ZP100 Network Card Replacement: 步骤 3 中的图像 2,3 SONOS ZP100 Network Card Replacement: 步骤 3 中的图像 3,3
    • Gently try to lift one side with a metal spudger. Make sure not to press in the retaining lug directly, as it can break off very easily.

    • When you've lifted one side, use an Opening Pick to keep the lid from snapping back into place.

    • Lift the lid up and out of its mounting towards the back.

    • Sharp-edged tools can cause scratches and leverage, which later remain visible on the device.

  4. SONOS ZP100 Network Card Replacement, Remove the screws from the upper case: 步骤 4 中的图像 1,3 SONOS ZP100 Network Card Replacement, Remove the screws from the upper case: 步骤 4 中的图像 2,3 SONOS ZP100 Network Card Replacement, Remove the screws from the upper case: 步骤 4 中的图像 3,3
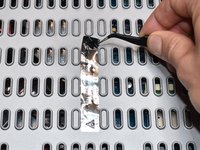
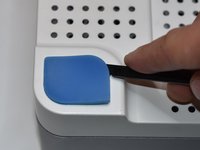
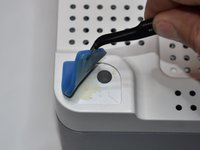
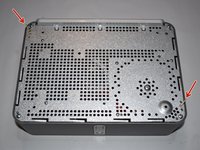
    • Using the precision tweezers to remove the sticker in the center of the top chassis.

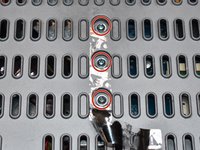
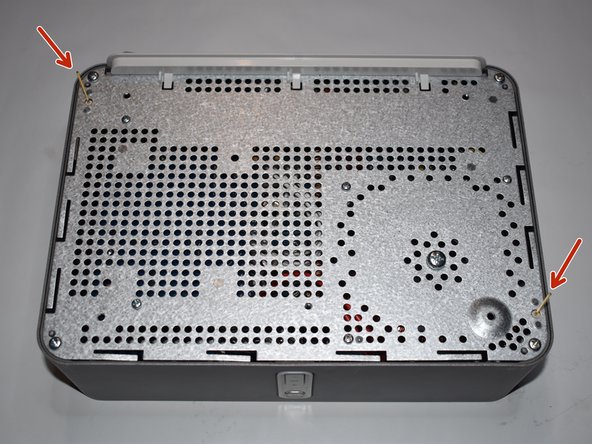
    • Remove the three 35 mm Phillips screws and their washers that attach the top of the device to the bottom.

    • Even after removing the power plug, there may be dangerous charges on components in the device.

  5. SONOS ZP100 Network Card Replacement: 步骤 5 中的图像 1,1
    • Now turn the device over so you can remove the screws on the bottom.

  6. SONOS ZP100 Network Card Replacement, Remove the rubber feet: 步骤 6 中的图像 1,3 SONOS ZP100 Network Card Replacement, Remove the rubber feet: 步骤 6 中的图像 2,3 SONOS ZP100 Network Card Replacement, Remove the rubber feet: 步骤 6 中的图像 3,3
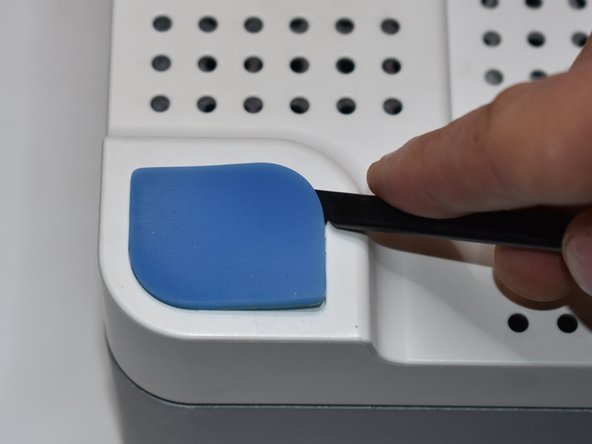
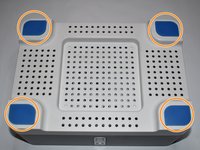
    • Use a spudger to remove the four stuck-on rubber feet. If necessary, use some heat (iOpener / hair dryer) to be able to loosen the feet better.

  7. SONOS ZP100 Network Card Replacement, Remove the base plate: 步骤 7 中的图像 1,1
    • Remove the four 10 mm Phillips screws in the countersinks.

  8. SONOS ZP100 Network Card Replacement: 步骤 8 中的图像 1,2 SONOS ZP100 Network Card Replacement: 步骤 8 中的图像 2,2
    • Lift the bottom lid up and set it aside. You will need it again.

    • The two WiFi antennas are located on the underside. These can cause injury or break.

  9. SONOS ZP100 Network Card Replacement: 步骤 9 中的图像 1,1
    • Remove the four 10 mm Phillips screws on the bottom.

  10. SONOS ZP100 Network Card Replacement: 步骤 10 中的图像 1,2 SONOS ZP100 Network Card Replacement: 步骤 10 中的图像 2,2
    • For a better stand and to avoid damaging the antenna, put the lower cover back on and turn the device over.

  11. SONOS ZP100 Network Card Replacement, Remove the upper case: 步骤 11 中的图像 1,2 SONOS ZP100 Network Card Replacement, Remove the upper case: 步骤 11 中的图像 2,2
    • Lift the top lid straight up on both sides.

  12. SONOS ZP100 Network Card Replacement: 步骤 12 中的图像 1,3 SONOS ZP100 Network Card Replacement: 步骤 12 中的图像 2,3 SONOS ZP100 Network Card Replacement: 步骤 12 中的图像 3,3
    • On the underside of the cover between the screws there are two heat conducting pads that transfer the heat generated from the amplifier-board to the case.

    • These Pads are very important, be careful not to lose them. They can either stick to the lid or in the device.

  13. SONOS ZP100 Network Card Replacement, Remove the WiFi card: 步骤 13 中的图像 1,3 SONOS ZP100 Network Card Replacement, Remove the WiFi card: 步骤 13 中的图像 2,3 SONOS ZP100 Network Card Replacement, Remove the WiFi card: 步骤 13 中的图像 3,3
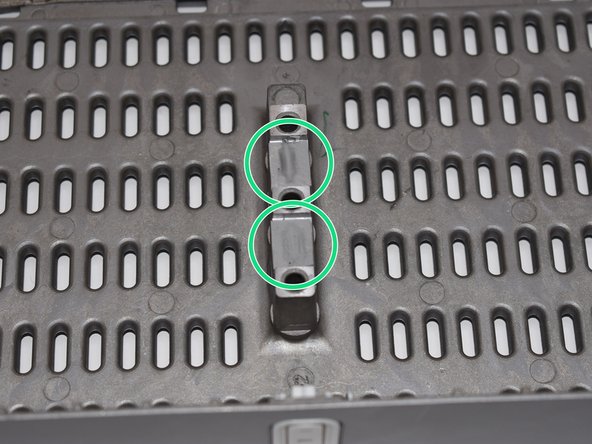
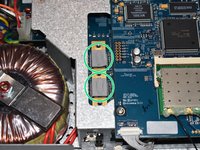
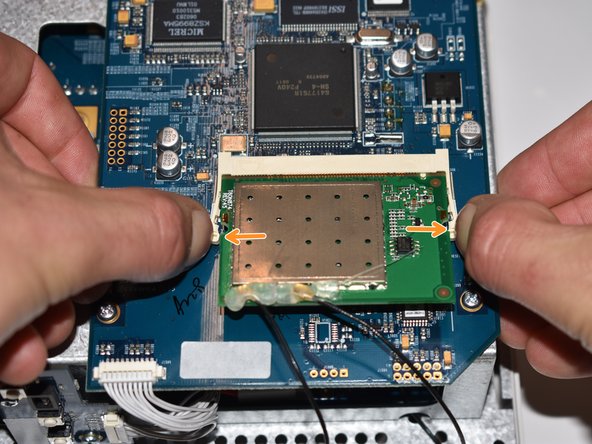
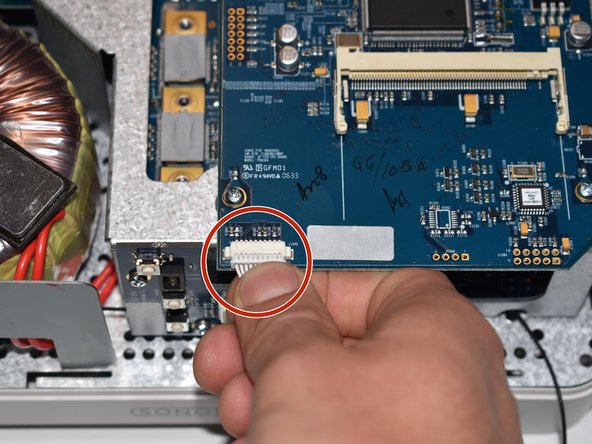
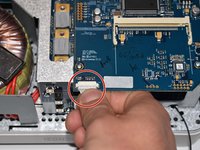
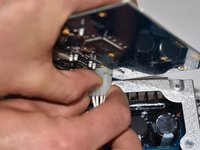
    • Press both tabs outwards with our fingernails.

    • The card should pop up by itself.

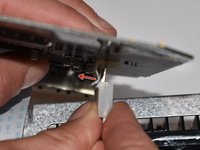
    • Pull out the card in the direction of the connector and place it in front of the device.

    • The WiFi card is still connected to the device with two cables. Be careful not to damage or tear them down.

  14. SONOS ZP100 Network Card Replacement: 步骤 14 中的图像 1,2 SONOS ZP100 Network Card Replacement: 步骤 14 中的图像 2,2
    • Pull the 10-pin flat connector straight off towards the front of the device.

    • Make sure to pull out the entire plug including all cables.

  15. SONOS ZP100 Network Card Replacement, Loosen the screws on the network card: 步骤 15 中的图像 1,1
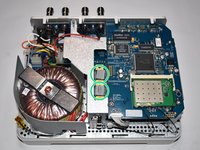
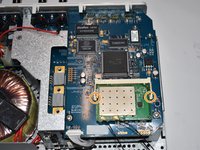
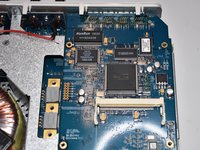
    • Remove the four 7 mm Phillips screws securing the network card to the case.

  16. SONOS ZP100 Network Card Replacement, Lift the network card: 步骤 16 中的图像 1,3 SONOS ZP100 Network Card Replacement, Lift the network card: 步骤 16 中的图像 2,3 SONOS ZP100 Network Card Replacement, Lift the network card: 步骤 16 中的图像 3,3
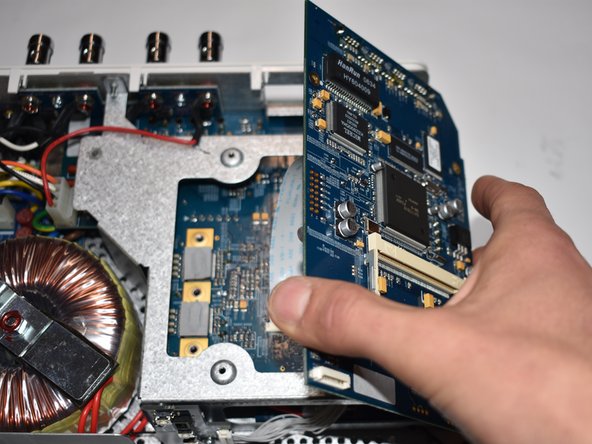
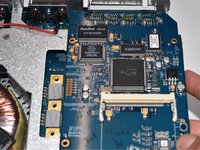
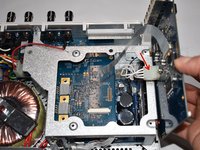
    • Lift the network card up at an angle and pull it together with the ethernet ports towards the front a little bit out of its fixing on the back.

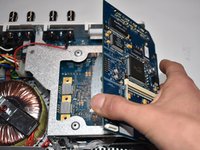
    • Carefully turn the network card to the side.

    • The network card is still connected to the bottom with two cables. Be careful not to damage them.

  17. SONOS ZP100 Network Card Replacement, Remove the ribbon cable: 步骤 17 中的图像 1,3 SONOS ZP100 Network Card Replacement, Remove the ribbon cable: 步骤 17 中的图像 2,3 SONOS ZP100 Network Card Replacement, Remove the ribbon cable: 步骤 17 中的图像 3,3
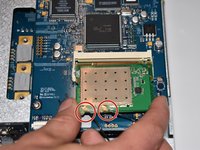
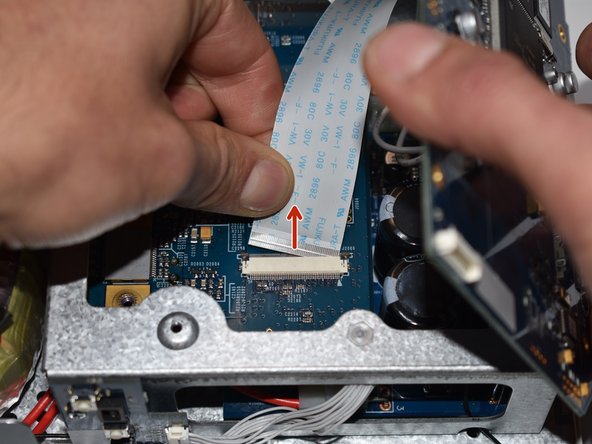
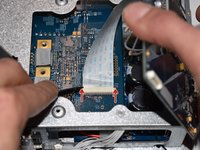
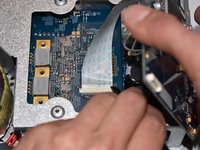
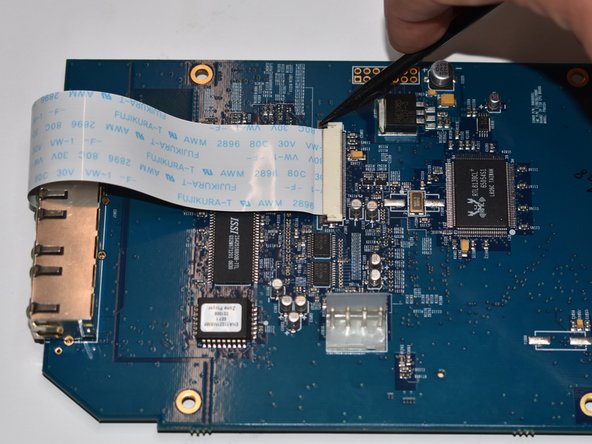
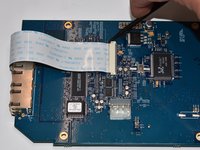
    • Press the two tabs evenly away from the connector.

    • Gently pull the ribbon cable straight out of the connector toward the back.

  18. SONOS ZP100 Network Card Replacement, Turn the network card to the side: 步骤 18 中的图像 1,1
    • Now you can turn the network card further outwards so it is easier to get to the next connector.

  19. SONOS ZP100 Network Card Replacement, Remove the power connection: 步骤 19 中的图像 1,3 SONOS ZP100 Network Card Replacement, Remove the power connection: 步骤 19 中的图像 2,3 SONOS ZP100 Network Card Replacement, Remove the power connection: 步骤 19 中的图像 3,3
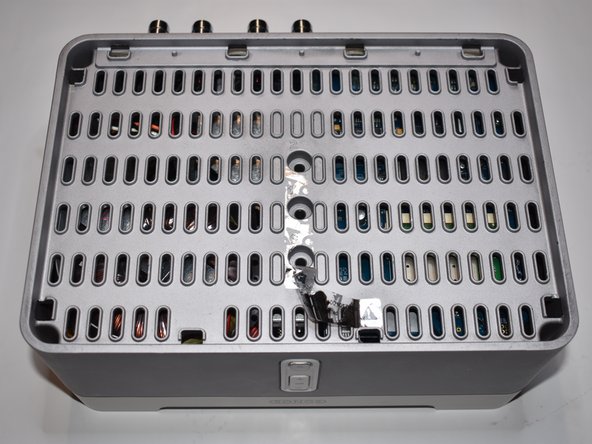
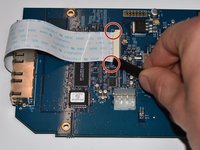
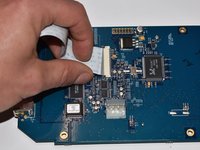
    • Remove the power cable from the network card. The plug is secured by a plastic tab. Push the nose away from the connector to pull it out.

  20. SONOS ZP100 Network Card Replacement, Remove network card: 步骤 20 中的图像 1,1
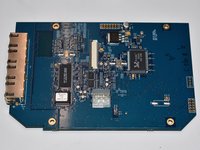
    • The network card is now completely separated and cut from the power supply.

  21. SONOS ZP100 Network Card Replacement, Detach ribbon cable from Network Adapter board: 步骤 21 中的图像 1,3 SONOS ZP100 Network Card Replacement, Detach ribbon cable from Network Adapter board: 步骤 21 中的图像 2,3 SONOS ZP100 Network Card Replacement, Detach ribbon cable from Network Adapter board: 步骤 21 中的图像 3,3
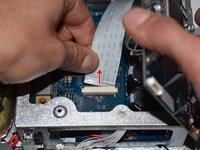
    • Press the two tabs evenly away from the socket.

    • Gently pull the ribbon cable to the Ethernet ports straight out of its socket on the network card.

    • Ribbon cables are very fragile handle with care.

  22. SONOS ZP100 Network Card Replacement, Network card: 步骤 22 中的图像 1,2 SONOS ZP100 Network Card Replacement, Network card: 步骤 22 中的图像 2,2
    • Front and back view of the network card.

结论

To reassemble your device, follow these instructions in reverse order.

由衷感谢以下译者:

de en

100%

这些译者帮助我们修补全世界! 您也想加入吗?
开始翻译 ›

Adrian

于12/20/13注册

345 声望

撰写一个指南

团队

adrian büsselmann adrian büsselmann 的会员

Business

1 名成员

创作了2篇指南

0条评论

添加评论

浏览统计数据:

过去 24 小时: 0

过去 7 天: 2

过去 30 天: 22

总计 1,278