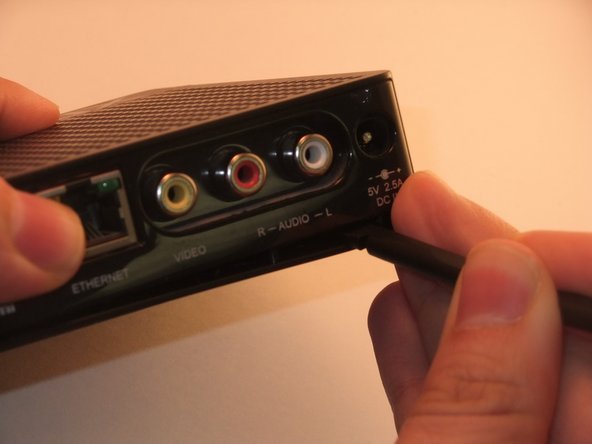
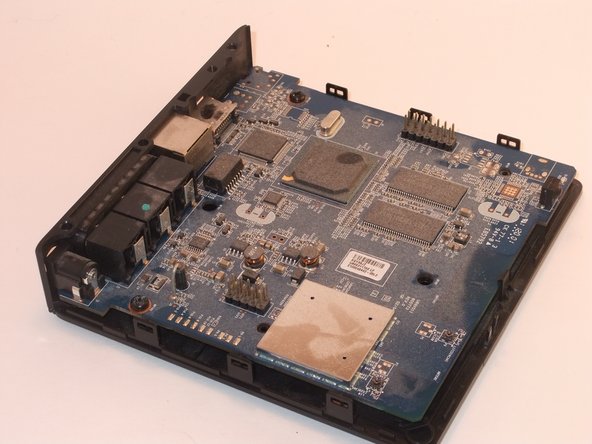
跳转到主内容

Roku XD 2050X Ethernet Port Replacement

你所需要的

  1. Roku XD 2050X Ethernet Port Replacement, Case: 步骤 1 中的图像 1,3 Roku XD 2050X Ethernet Port Replacement, Case: 步骤 1 中的图像 2,3 Roku XD 2050X Ethernet Port Replacement, Case: 步骤 1 中的图像 3,3
    • Ensure the Roku XDis unplugged.

    • Take care when handling components. Circuit boards, soldering points, and other areas may have sharp points.

    • Turn the device upside down.

    • Remove the two rubber pads using a plastic spudger.

  2. Roku XD 2050X Ethernet Port Replacement: 步骤 2 中的图像 1,2 Roku XD 2050X Ethernet Port Replacement: 步骤 2 中的图像 2,2
    • Remove the two Phillips #1 9mm pan-head screws.

  3. Roku XD 2050X Ethernet Port Replacement: 步骤 3 中的图像 1,3 Roku XD 2050X Ethernet Port Replacement: 步骤 3 中的图像 2,3 Roku XD 2050X Ethernet Port Replacement: 步骤 3 中的图像 3,3
    • Insert spudger between upper and lower frame underneath the port access.

    • Guide spudger around to loosen upper and lower frame to pry frame apart.

    • Gently remove upper frame.

  4. Roku XD 2050X Ethernet Port Replacement: 步骤 4 中的图像 1,2 Roku XD 2050X Ethernet Port Replacement: 步骤 4 中的图像 2,2
    • Remove the two Phillips #1 8mm pan-head screws.

  5. Roku XD 2050X Ethernet Port Replacement: 步骤 5 中的图像 1,1
    • On the side of the board opposite the ports, find and tilt back the tab securing the board in place.

    • Lift the motherboard out of the lower frame.

  6. Roku XD 2050X Ethernet Port Replacement, Ethernet Port: 步骤 6 中的图像 1,1
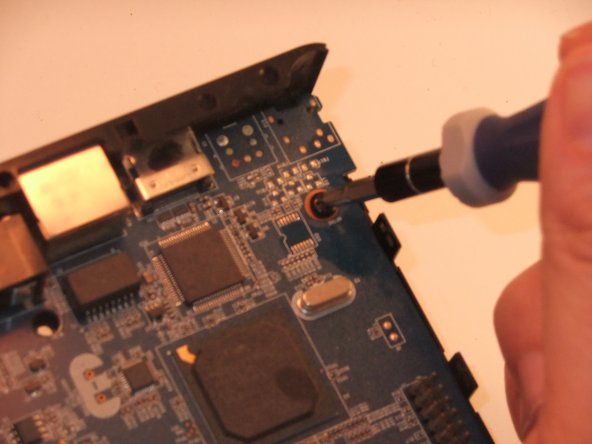
    • Desolder the 8 contact points.

    • For help with soldering view the iFixit soldering guide.

  7. Roku XD 2050X Ethernet Port Replacement: 步骤 7 中的图像 1,1
    • Use pliers to pinch the two anchor points and gently press them through the board to separate ethernet port.

    • Remove the Ethernet port from board.

结论

To reassemble your device, follow these instructions in reverse order.

另外一个人完成了本指南。

0条评论

添加评论

浏览统计数据:

过去 24 小时: 0

过去 7 天: 0

过去 30 天: 3

总计 1,094