简介
My loyal screen Hyundai W241D caused me trouble some time ago.
As you can see in the video, at the bottom of the picture appear white lines, where everything should be black. The whole content of the screen is squeezed, what hurts in the eyes.
I read about that problem online in a forum, replacing defective capacitors can help. Because there are few costs connected with new capacitors I had to try that out.
Warning: Exercise caution when following this guide. Ensure capacitors are discharged.
视频概述
-
-
First things first: remove the stand. I use a wall mounting so it was already removed.
-
-
-
-
Pry the white cover out of the black frame. On the left and right side there are 5 little bumps (picture) snapped into little holes where you have to pry them out carefully.
-
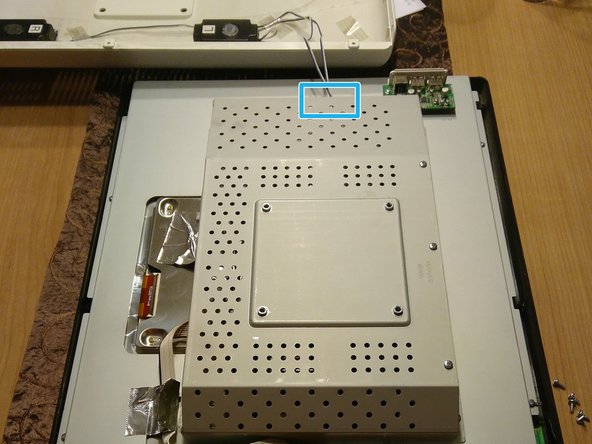
Remove the connector of the speakers cable.
-
-
-
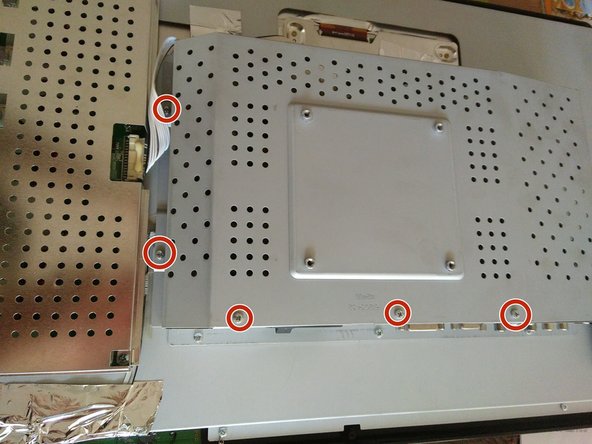
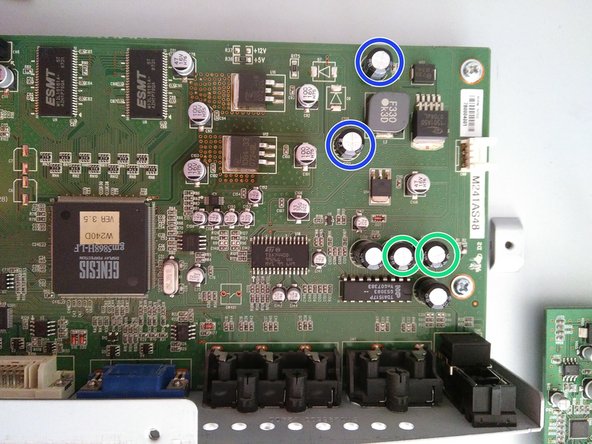
On the right side of the picture you see the circuit board on which the capacitors to replace reside.
-
Capacitor (2) of type 330 µF / 16V
-
Capacitor (2) of type 470 µF / 16V
-
Capacitor (2) of type 220 µF / 25V
-
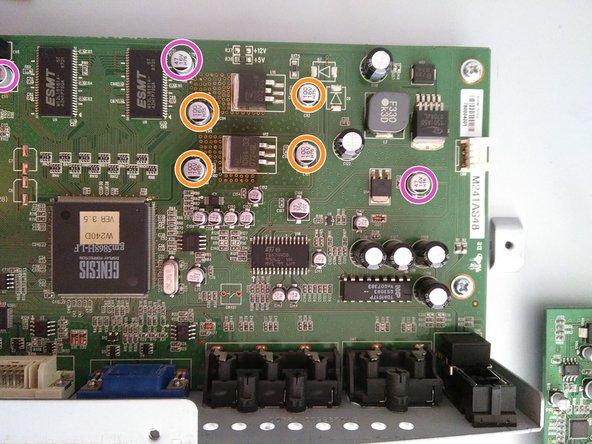
SMD-Capacitor (4) of type 100 µF / 16V
-
SMD-Capacitor (3) of type 47 µF / 16V
-


To reassemble your device, follow these instructions step 1-4 in reverse order.
To reassemble your device, follow these instructions step 1-4 in reverse order.
另外一个人完成了本指南。

