跳转到主内容

Protocol Videodrone AP Camera Replacement

你所需要的

  1. Protocol Videodrone AP Camera Replacement, Camera: 步骤 1 中的图像 1,1
    • Power off the drone before proceeding with this repair.

  2. Protocol Videodrone AP Camera Replacement: 步骤 2 中的图像 1,1
    • Remove the propeller screws (1 per propeller).

    • You can use the Phillips #0 screwdriver if you don't own the one included with drone.

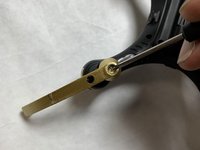
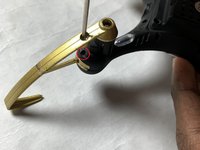
  3. Protocol Videodrone AP Camera Replacement: 步骤 3 中的图像 1,2 Protocol Videodrone AP Camera Replacement: 步骤 3 中的图像 2,2
    • Remove the screws holding on the propeller guards using the Phillips #0 screwdriver (2 per propeller guard).

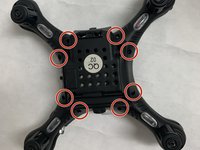
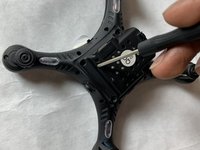
  4. Protocol Videodrone AP Camera Replacement: 步骤 4 中的图像 1,2 Protocol Videodrone AP Camera Replacement: 步骤 4 中的图像 2,2
    • Using the Phillips #0 screwdriver to remove the eight screws securing the body of the drone.

  5. Protocol Videodrone AP Camera Replacement: 步骤 5 中的图像 1,1
    • Remove the case.

  6. Protocol Videodrone AP Camera Replacement: 步骤 6 中的图像 1,1
    • Remove the propeller motor screws (3 per motor).

    • The plastic screw housing is attached to the motor.

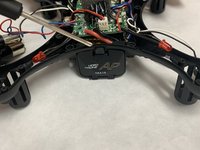
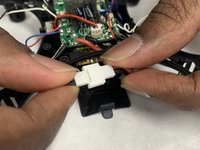
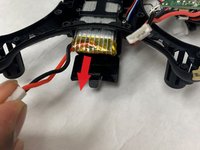
  7. Protocol Videodrone AP Camera Replacement: 步骤 7 中的图像 1,3 Protocol Videodrone AP Camera Replacement: 步骤 7 中的图像 2,3 Protocol Videodrone AP Camera Replacement: 步骤 7 中的图像 3,3
    • Depress the tab to open the battery housing.

    • Disconnect the battery connectors

    • Remove the battery.

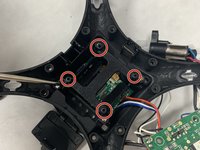
  8. Protocol Videodrone AP Camera Replacement: 步骤 8 中的图像 1,1
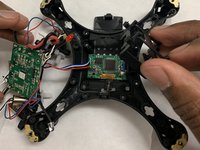
    • Using the Phillips #0 screwdriver, remove the four circuit board screws.

    • Remove circuit board.

  9. Protocol Videodrone AP Camera Replacement: 步骤 9 中的图像 1,2 Protocol Videodrone AP Camera Replacement: 步骤 9 中的图像 2,2
    • Remove the four battery housing screws with the Phillips #0 screwdriver.

    • Remove the battery housing to reveal the camera circuit board underneath.

  10. Protocol Videodrone AP Camera Replacement: 步骤 10 中的图像 1,1
    • Pull upwards on the strip to remove the camera out of its slot.

  11. Protocol Videodrone AP Camera Replacement: 步骤 11 中的图像 1,1
    • Remove camera circuit board from housing.

    • On the main circuit board, desolder the the connection points connecting to camera circuit board.

    • Four wires need to be desoldered. Colours include: Red, white, black and blue.

    • For more information on soldering connections, please visit the How to Solder and Desolder Connections guide.

结论

To reassemble your device, follow these instructions in reverse order.

Karan Paranganat

于11/07/19注册

352 声望

创作了2篇指南

团队

IUPUI, Team S2-G2, Harley Fall 2019 IUPUI, Team S2-G2, Harley Fall 2019 的会员

IUPUI-HARLEY-F19S2G2

3 名成员

创作了2篇指南

0条评论

添加评论

浏览统计数据:

过去 24 小时: 1

过去 7 天: 1

过去 30 天: 2

总计 250