Pull the keyboard ribbon straight up from the logic board. Place the keyboard aside.
The connector may be tight. Gently rock the connector from side to side while pulling directly upward to free it. You can use this technique on many of the cards and cables you'll be disconnecting.
Make sure you have removed the laptop battery and CD/DVD modules from the expansion bays before proceeding.
Grasp the plastic tab on the processor's right side and pull it directly up.
Some processors may be missing the plastic pull tab. In this case, we suggest using a non-metal tool to gently pry up the processor. Slip the tool's thin edge under the front right corner of the processor and carefully pry it up.
Grasp the upper plastic casing where it locks into the internal frame and pull back. When the plastic tab has cleared the slot that the casing locks into, pull up enough to keep it from locking back into place.
The PC card eject button on the laptop's left side prevents the upper casing from lifting up. In order to bypass the button, push it in far enough so that you can pull the upper casing's left side out and up beyond the button.
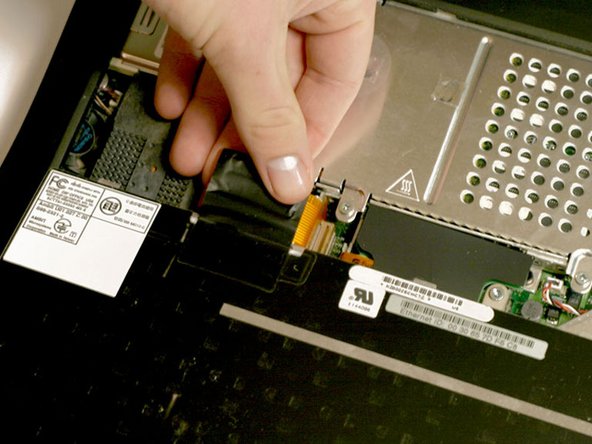
Lift the left side of the case partly up so that you can access and disconnect the audio in/out cables from the sound card in the upper right of the case.
Be careful not to lift the upper casing too far before you have disconnected the audio in/out cables or you may damage the sound card.
Remove the upper casing. Note that there are two tabs on the laptop's front that often cause the upper case to stick.
Gently clasp the left side of the metal shield between your thumb and forefinger and carefully pull up and toward the front of the laptop.
Be very careful when removing the leftmost clip on the EMI Shield from its slot, as this piece will bend very easily. This is one of the easiest parts to damage in the Pismo.
Gently lift the front edge of the logic board and pull it toward you.
There are two major obstacles to avoid when removing the logic board: the first is the fan and connector cables, and the second is the bolt in the back left corner.