跳转到主内容

Polyconcept 900-MHz Retro Cordless Telephone Device Microphone Replacement

你所需要的

  1. Polyconcept 900-MHz Retro Cordless Telephone Device Microphone Replacement, Removing the Battery Cover: 步骤 1 中的图像 1,3 Polyconcept 900-MHz Retro Cordless Telephone Device Microphone Replacement, Removing the Battery Cover: 步骤 1 中的图像 2,3 Polyconcept 900-MHz Retro Cordless Telephone Device Microphone Replacement, Removing the Battery Cover: 步骤 1 中的图像 3,3
    • Hold the mouthpiece of the handset and locate the lock-unlock text.

    • Twist the battery cover counterclockwise from the "lock" to the "unlock" position.

  2. Polyconcept 900-MHz Retro Cordless Telephone Device Microphone Replacement, Disconnecting the Battery Wire: 步骤 2 中的图像 1,3 Polyconcept 900-MHz Retro Cordless Telephone Device Microphone Replacement, Disconnecting the Battery Wire: 步骤 2 中的图像 2,3 Polyconcept 900-MHz Retro Cordless Telephone Device Microphone Replacement, Disconnecting the Battery Wire: 步骤 2 中的图像 3,3
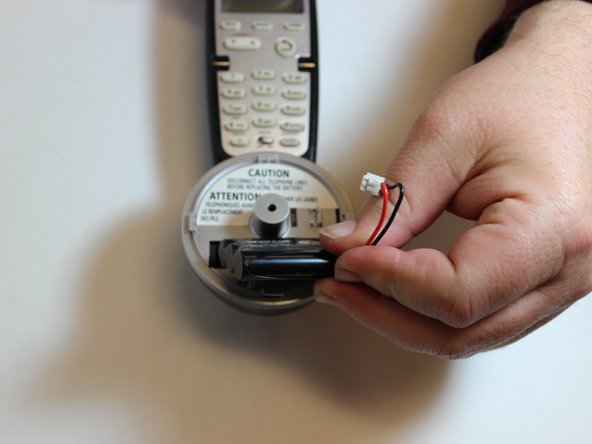
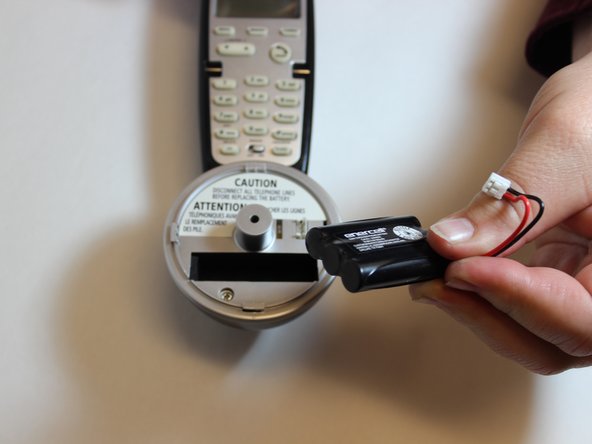
    • To disconnect the battery pack wire from the phone, squeeze the tab against the connector and pull connector straight up from the socket.

  3. Polyconcept 900-MHz Retro Cordless Telephone Device Microphone Replacement, Removing the Battery Pack: 步骤 3 中的图像 1,3 Polyconcept 900-MHz Retro Cordless Telephone Device Microphone Replacement, Removing the Battery Pack: 步骤 3 中的图像 2,3 Polyconcept 900-MHz Retro Cordless Telephone Device Microphone Replacement, Removing the Battery Pack: 步骤 3 中的图像 3,3
    • Pull the battery from the battery compartment.

    • You may need to gently wiggle the battery back and forth in its compartment to help loosen it.

  4. Polyconcept 900-MHz Retro Cordless Telephone Device Microphone Replacement, Removing Microphone Cover Screw: 步骤 4 中的图像 1,1
    • Use a Philips #00 screwdriver to remove the single 7mm screw.

  5. Polyconcept 900-MHz Retro Cordless Telephone Device Microphone Replacement, Prying off the Microphone Cover: 步骤 5 中的图像 1,3 Polyconcept 900-MHz Retro Cordless Telephone Device Microphone Replacement, Prying off the Microphone Cover: 步骤 5 中的图像 2,3 Polyconcept 900-MHz Retro Cordless Telephone Device Microphone Replacement, Prying off the Microphone Cover: 步骤 5 中的图像 3,3
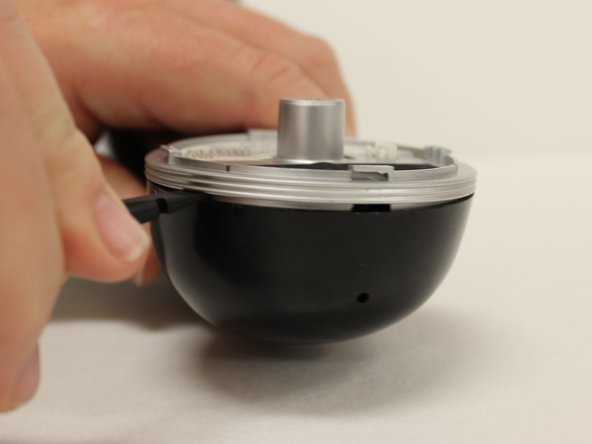
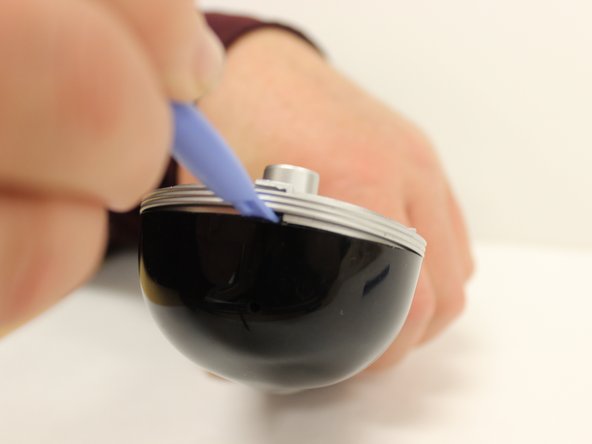
    • Use the spudger to begin prying the microphone cover off of the handset piece.

    • As you pry up the cover, slide the spudger around the gap to separate the two pieces.

    • Use the opening tools to wedge into the larger gaps and further pry apart the pieces.

    • Prying apart the two pieces is difficult and will take effort. It helps if you wedge multiple tools on different sides of the gap. There is no need to be gentle.

  6. Polyconcept 900-MHz Retro Cordless Telephone Device Microphone Replacement, Uncovering Wire Connections: 步骤 6 中的图像 1,3 Polyconcept 900-MHz Retro Cordless Telephone Device Microphone Replacement, Uncovering Wire Connections: 步骤 6 中的图像 2,3 Polyconcept 900-MHz Retro Cordless Telephone Device Microphone Replacement, Uncovering Wire Connections: 步骤 6 中的图像 3,3
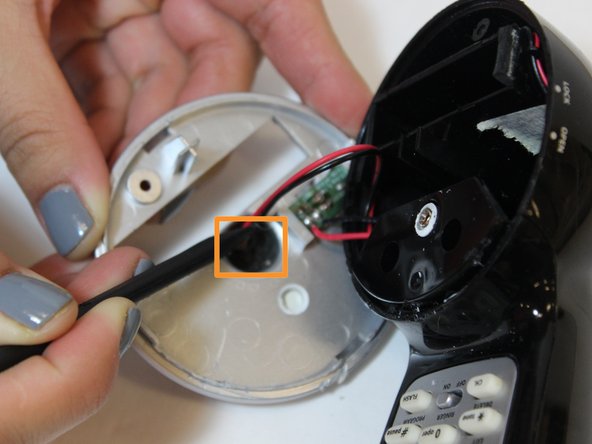
    • Use the spudger to scrape the glue away from the wire connections.

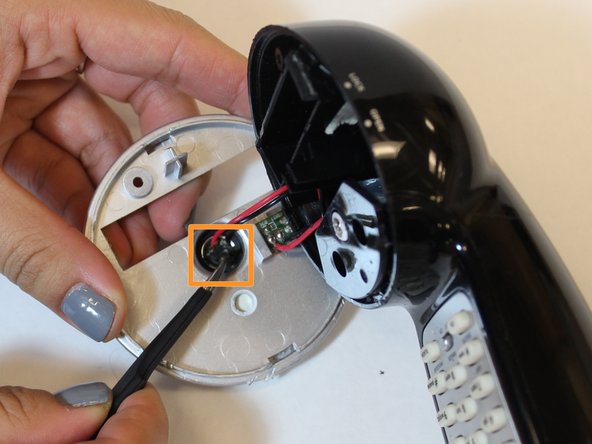
    • Use the spudger to scrape and tweezers to pull away the black foam covering the other wire connections.

  7. Polyconcept 900-MHz Retro Cordless Telephone Device Microphone Replacement, Desoldering Wire Connections: 步骤 7 中的图像 1,1
    • Use the soldering station to desolder the wire connections.

    • For further instructions on using the soldering station click here.

结论

To reassemble your device, follow these instructions in reverse order.

另外一个人完成了本指南。

0条评论

添加评论

浏览统计数据:

过去 24 小时: 0

过去 7 天: 0

过去 30 天: 4

总计 204