跳转到主内容

当前版本的文档还未经巡查,您可以查看最新的已查核版本

你所需要的

  1. 这个步骤还没有翻译 帮忙翻译一下

    : 步骤 1 中的图像 1,3 : 步骤 1 中的图像 2,3 : 步骤 1 中的图像 3,3
    • Flip the headset face down.

    • Squeeze both sides of the battery cover.

    • While squeezing, pull the cover up slowly to remove it.

  2. 这个步骤还没有翻译 帮忙翻译一下

    : 步骤 2 中的图像 1,3 : 步骤 2 中的图像 2,3 : 步骤 2 中的图像 3,3
    • Locate and detatch the white connector that connects the wires of the battery to the wires of the headset.

  3. 这个步骤还没有翻译 帮忙翻译一下

    : 步骤 3 中的图像 1,2 : 步骤 3 中的图像 2,2
    • Use a hairdryer or heat gun to melt the adhesive along the crevice that joins the black and silver components.

    • Apply additional heat at the tip of the microphone.

  4. 这个步骤还没有翻译 帮忙翻译一下

    : 步骤 4 中的图像 1,2 : 步骤 4 中的图像 2,2
    • After heating the headset, use the plastic opening tool to carefully pry the black cover from the headset.

    • Be aware of the two plastic connectors inside the headset. If the black cover does not come off smoothly, apply additional heat on the connectors.

  5. 这个步骤还没有翻译 帮忙翻译一下

    : 步骤 5 中的图像 1,2 : 步骤 5 中的图像 2,2
    • Remove the microphone from the tip of the plastic.

    • You will have to lift the microphone straight up because it is held in place by a small piece of plastic.

  6. 这个步骤还没有翻译 帮忙翻译一下

    : 步骤 6 中的图像 1,2 : 步骤 6 中的图像 2,2
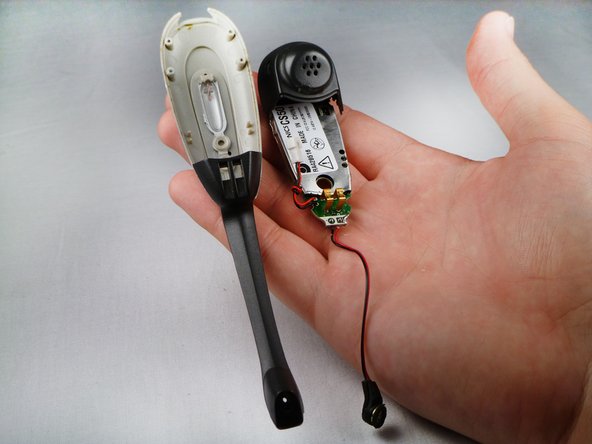
    • Use the heat gun to melt the adhesive connecting the headset face to the speaker casing.

    • Use the plastic opening tool to separate the speaker casing from the headset face.

    • Add extra heat to the sides to melt the adhesive between the plastic connectors.

  7. 这个步骤还没有翻译 帮忙翻译一下

    : 步骤 7 中的图像 1,2 : 步骤 7 中的图像 2,2
    • Slowly separate the motherboard from the rest of the headset.

  8. 这个步骤还没有翻译 帮忙翻译一下

    : 步骤 8 中的图像 1,1
    • Locate the microphone wires on the bottom of the motherboard.

    • Use a hairdryer or heat gun to melt the glue off of the motherboard.

  9. 这个步骤还没有翻译 帮忙翻译一下

    : 步骤 9 中的图像 1,1
    • Flip the device over.

    • Use a soldering iron to remove the solder that holds the wires to the motherboard.

    • For help soldering, click here.

    • The microphone piece should be completely detached from the motherboard.

  10. 这个步骤还没有翻译 帮忙翻译一下

    : 步骤 10 中的图像 1,3 : 步骤 10 中的图像 2,3 : 步骤 10 中的图像 3,3
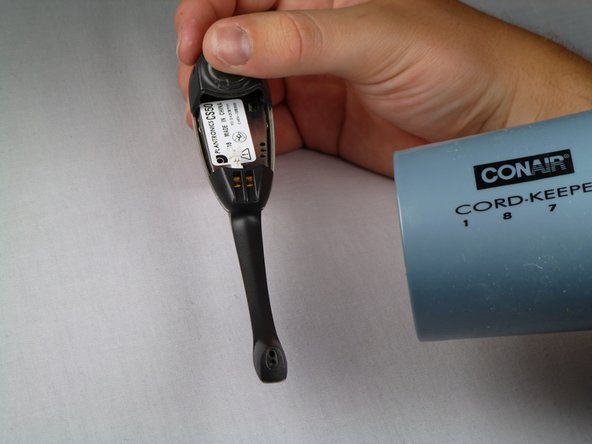
    • Using a blow dryer or a heat gun, heat the crevice to melt the adhesive between the plastic covers.

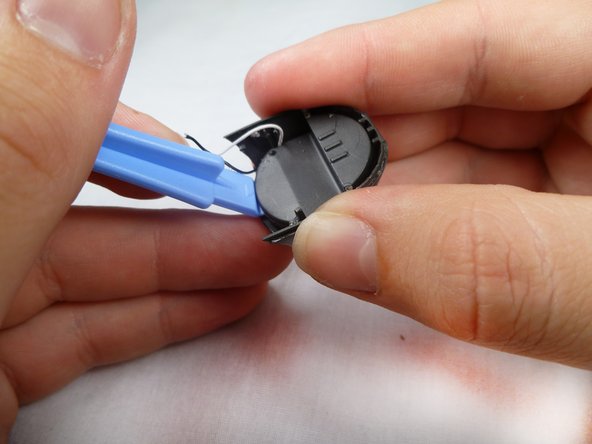
    • Using a plastic opening tool, prop open the edges.

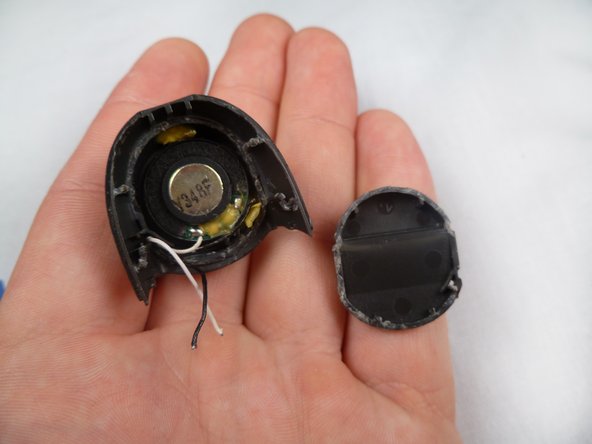
    • Gently pull the black speaker casing up to remove it.

  11. 这个步骤还没有翻译 帮忙翻译一下

    : 步骤 11 中的图像 1,2 : 步骤 11 中的图像 2,2
    • Use the heat gun or blow dryer to melt the glue that connects the wires to the headset's motherboard.

    • The wires should come off as they are not soldered to the motherboard.

  12. 这个步骤还没有翻译 帮忙翻译一下

    : 步骤 12 中的图像 1,3 : 步骤 12 中的图像 2,3 : 步骤 12 中的图像 3,3
    • Use the heat gun to melt the adhesive that holds the bottom of the casing.

    • Use the plastic opening tool to remove the bottom of the casing.

  13. 这个步骤还没有翻译 帮忙翻译一下

    : 步骤 13 中的图像 1,3 : 步骤 13 中的图像 2,3 : 步骤 13 中的图像 3,3
    • Use the blow dryer or heat gun to melt the glue that holds the speaker.

    • Use the plastic opening tool to carefully remove the speaker from its casing.

终点

团队

Cal Poly, Team 17-29, Amido Spring 2012 Cal Poly, Team 17-29, Amido Spring 2012 的会员

CPSU-AMIDO-S12S17G29

4 名成员

创作了7篇指南

0条评论

添加评论

浏览统计数据:

过去 24 小时: 1

过去 7 天: 12

过去 30 天: 18

总计 1,847