跳转到主内容

当前版本的文档还未经巡查,您可以查看最新的已查核版本

你所需要的

  1. 这个步骤还没有翻译 帮忙翻译一下

    : 步骤 1 中的图像 1,1
    • Flip the speaker upside down with the back panel of plugs pointed away from you.

  2. 这个步骤还没有翻译 帮忙翻译一下

    : 步骤 2 中的图像 1,2 : 步骤 2 中的图像 2,2
    • Use the metal spudger to pry off the rubber bottom cover. It will be glued onto the bottom of the speaker.

    • Work the rubber cover off by slowly going all the way around with the metal spudger, applying as much force as needed.

    • Since the cover is glued, a heat gun at low temperature or a hair dryer may be useful to speed up the process. However it is not required in this step.

  3. 这个步骤还没有翻译 帮忙翻译一下

    : 步骤 3 中的图像 1,1
    • Scrape most of the glue away to reveal the five flathead screws - four around the outside, and one in the middle.

  4. 这个步骤还没有翻译 帮忙翻译一下

    : 步骤 4 中的图像 1,1
    • Remove the five 6 mm screws with a Phillips #2 screwdriver.

  5. 这个步骤还没有翻译 帮忙翻译一下

    : 步骤 5 中的图像 1,1
    • Lift off the metal plate. It will be surprisingly heavy and it is approximately 1cm thick.

  6. 这个步骤还没有翻译 帮忙翻译一下

    : 步骤 6 中的图像 1,3 : 步骤 6 中的图像 2,3 : 步骤 6 中的图像 3,3
    • This step requires permanently damaging the casing of your device.

    • Turn the speaker counter-clockwise 90 degrees.

    • Use a knife to cut along the left seam all the way down the length of the device.

  7. 这个步骤还没有翻译 帮忙翻译一下

    : 步骤 7 中的图像 1,2 : 步骤 7 中的图像 2,2
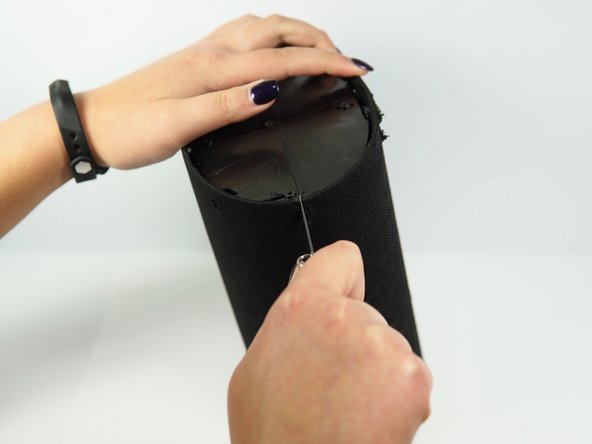
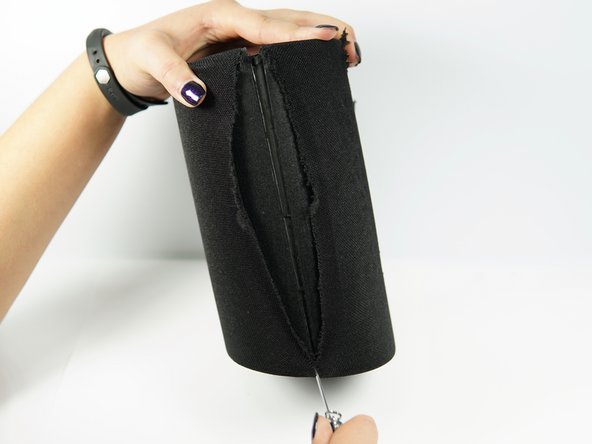
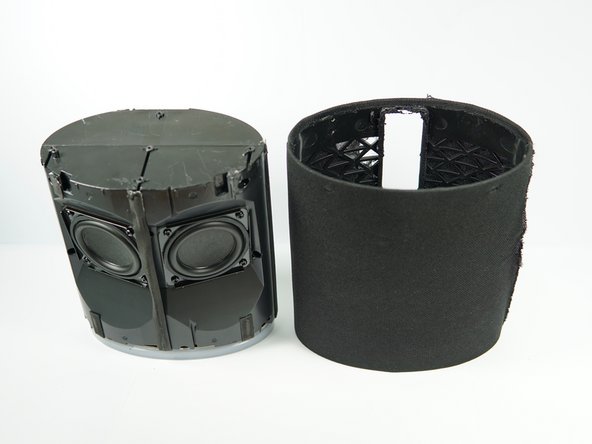
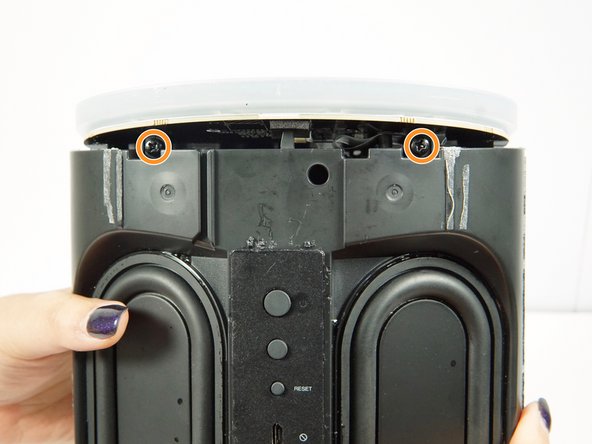
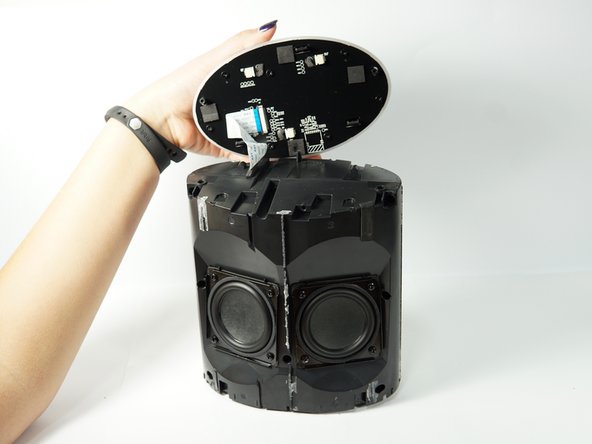
    • The casing should be easily removed by prying and lifting it off.

    • If the casing gets caught on the back panel of plugs, use the metal spudger to lift the casing away from the panel, working all the way around. Pay special attention to the bottom, where it may be stuck with glue.

  8. 这个步骤还没有翻译 帮忙翻译一下

    : 步骤 8 中的图像 1,3 : 步骤 8 中的图像 2,3 : 步骤 8 中的图像 3,3
    • Flip device 180 degrees so the light ring/button panel is on top with the 'Elite' facing you.

    • Remove one 6 mm screw with a Phillips #2 screwdriver.

    • Spin the device so the opposite side is facing you.

    • Remove the two 6 mm screws with a Phillips #2 screwdriver.

  9. 这个步骤还没有翻译 帮忙翻译一下

    : 步骤 9 中的图像 1,2 : 步骤 9 中的图像 2,2
    • Carefully remove the top panel, light ring, button panel, and the corresponding board.

    • Do not pull too hard, as there is a strip of wiring connected to the part below that could tear if pulled too hard or too far away.

  10. 这个步骤还没有翻译 帮忙翻译一下

    : 步骤 10 中的图像 1,2 : 步骤 10 中的图像 2,2
    • Lay the speaker down flat to make it easier to work on.

    • Remove the seven 4 mm screws with a Phillips #2 screwdriver.

  11. 这个步骤还没有翻译 帮忙翻译一下

    : 步骤 11 中的图像 1,1
    • Lift up the panel and remove it from the device.

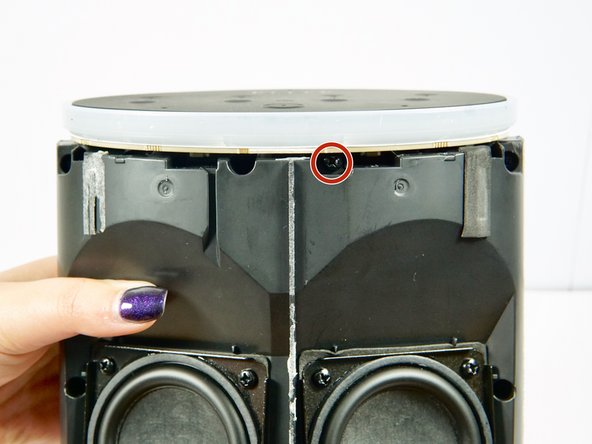
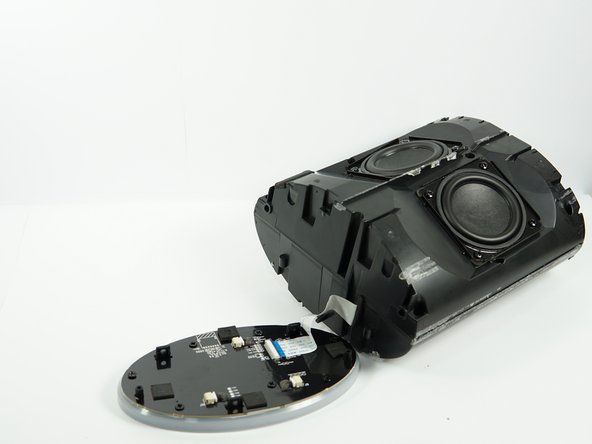
    • Desoldering may be required to separate the circuit board completely. Please use our How to Solder and Desolder Connections Guide to properly and safely conduct this procedure.

终点

Caroline Padilla

于04/22/18注册

344 声望

创作了2篇指南

团队

Cal Poly, Team S24-G10, Maness Spring 2018 Cal Poly, Team S24-G10, Maness Spring 2018 的会员

CPSU-MANESS-S18S24G10

3 名成员

创作了5篇指南

0条评论

添加评论

浏览统计数据:

过去 24 小时: 0

过去 7 天: 4

过去 30 天: 7

总计 257