跳转到主内容

PSP 300xc Motherboard Replacement

你所需要的

  1. PSP 300xc Motherboard Replacement, Battery: 步骤 1 中的图像 1,2 PSP 300xc Motherboard Replacement, Battery: 步骤 1 中的图像 2,2
    • Press the button securing the battery door to the PSP 300xc, and lift the battery door off.

    • Lift the battery out of the PSP.

  2. PSP 300xc Motherboard Replacement, Front Case: 步骤 2 中的图像 1,1
    • Use a spudger or your fingernail to remove the warranty sticker stuck to the inside of the battery tray

  3. PSP 300xc Motherboard Replacement: 步骤 3 中的图像 1,2 PSP 300xc Motherboard Replacement: 步骤 3 中的图像 2,2
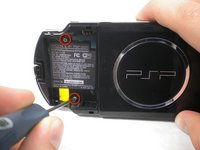
    • Remove four Phillips screws from the back of the PSP.

  4. PSP 300xc Motherboard Replacement: 步骤 4 中的图像 1,1
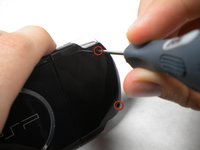
    • Remove two Phillips screws from the top of the PSP.

  5. PSP 300xc Motherboard Replacement: 步骤 5 中的图像 1,1
    • Remove a single screw from the bottom edge of the PSP.

  6. PSP 300xc Motherboard Replacement: 步骤 6 中的图像 1,2 PSP 300xc Motherboard Replacement: 步骤 6 中的图像 2,2
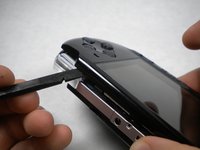
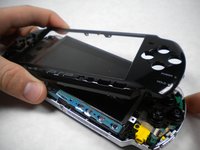
    • Insert a spudger between the front case and PSP, and slide the spudger along the perimeter of the front case to remove it.

  7. PSP 300xc Motherboard Replacement, LCD: 步骤 7 中的图像 1,1
    • Remove a single Phillips screw securing the home bar to the PSP 300xc.

  8. PSP 300xc Motherboard Replacement: 步骤 8 中的图像 1,2 PSP 300xc Motherboard Replacement: 步骤 8 中的图像 2,2
    • Push the home bar to the right about 1cm to release a tab, and begin to lift the right end of the home bar slightly.

    • Do not attempt to remove the home bar yet, it is still attached to the PSP 300xc.

  9. PSP 300xc Motherboard Replacement: 步骤 9 中的图像 1,1
    • Insert a spudger under the LCD, beside the black plastic tab.

    • Push the LCD to the left and pry up to release the left edge of the LCD from under the plastic tab.

  10. PSP 300xc Motherboard Replacement: 步骤 10 中的图像 1,1
    • Insert a spudger under the LCD, beside the black plastic tab.

    • Push the LCD to the right and pry up to release the right edge of the LCD from under the plastic tab.

  11. PSP 300xc Motherboard Replacement: 步骤 11 中的图像 1,3 PSP 300xc Motherboard Replacement: 步骤 11 中的图像 2,3 PSP 300xc Motherboard Replacement: 步骤 11 中的图像 3,3
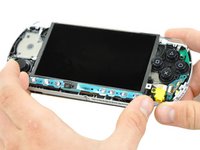
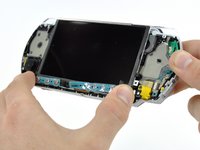
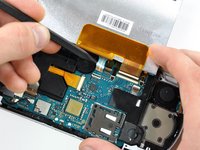
    • Rotate the LCD away from the PSP to reveal the LCD and home bar ribbon cables.

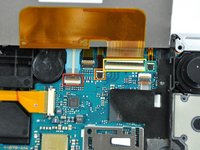
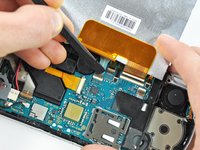
    • Use your fingernail or the edge of a plastic opening tool to flip up the retaining flap on the following four ZIF connectors:

    • Home bar cable

    • Microphone cable

    • LCD display data cable

    • Touchscreen cable

    • Be sure you are prying up on the retaining flap, not the socket itself

    • After flipping up the locking tabs on all four connectors, use your fingers or a spudger to gently pull the cables straight out of the connectors.

  12. PSP 300xc Motherboard Replacement: 步骤 12 中的图像 1,1
    • Remove the LCD from the PSP 300xc.

  13. PSP 300xc Motherboard Replacement, Home Bar: 步骤 13 中的图像 1,3 PSP 300xc Motherboard Replacement, Home Bar: 步骤 13 中的图像 2,3 PSP 300xc Motherboard Replacement, Home Bar: 步骤 13 中的图像 3,3
    • Lift the home bar up as high as it will go, but not so high that the wires disconnect.

    • Try to bend the small tab under the silver rim as little as possible it the following steps. The more you bend, the more likely it will snap.

    • Twist the home bar counter clockwise while carefully lifting it further. The left edge has to lift over the black plastic frame to allow it to rotate.

    • The home bar should now lift out of the PSP 300xc.

  14. PSP 300xc Motherboard Replacement, Trigger Buttons: 步骤 14 中的图像 1,2 PSP 300xc Motherboard Replacement, Trigger Buttons: 步骤 14 中的图像 2,2
    • Remove both trigger buttons by lifting them off the PSP 300xc.

  15. PSP 300xc Motherboard Replacement, Power Switch Board: 步骤 15 中的图像 1,1
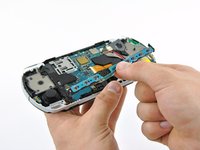
    • Using a finger or spudger, flip up the retaining flap on the power switch board ribbon cable socket.

    • Pull the ribbon cable out of its socket.

  16. PSP 300xc Motherboard Replacement: 步骤 16 中的图像 1,1
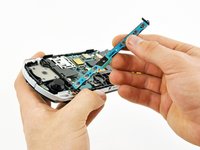
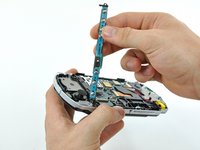
    • Using the flat end of a spudger, pry the power switch board up and off the PSP 300xc.

    • Remove the power switch board from the PSP.

  17. PSP 300xc Motherboard Replacement, Power Jack: 步骤 17 中的图像 1,1
    • Remove a single Phillips screw securing the power jack to the PSP.

  18. PSP 300xc Motherboard Replacement: 步骤 18 中的图像 1,1
    • Using the flat edge of a spudger, pry the small black tab away from the power jack to free it from the case.

  19. PSP 300xc Motherboard Replacement: 步骤 19 中的图像 1,1
    • Disconnect the power jack from its connector on the motherboard by pulling it straight out of its socket.

  20. PSP 300xc Motherboard Replacement, Analog Stick: 步骤 20 中的图像 1,1
    • Using the flat end of a spudger, peel the 'L' trigger contact pad up from the case.

  21. PSP 300xc Motherboard Replacement: 步骤 21 中的图像 1,2 PSP 300xc Motherboard Replacement: 步骤 21 中的图像 2,2
    • Using a fingernail or spudger, flip up the retaining flap on the d-pad and 'L' trigger ribbon cable.

    • Be sure you are prying up on the retaining flap, not the socket itself

    • Lift the black plastic bracket along with the d-pad contact pad, disconnecting the ribbon cable as you lift.

  22. PSP 300xc Motherboard Replacement: 步骤 22 中的图像 1,1
    • Remove a single Phillips screw securing the analog stick to the PSP 300xc.

  23. PSP 300xc Motherboard Replacement: 步骤 23 中的图像 1,2 PSP 300xc Motherboard Replacement: 步骤 23 中的图像 2,2
    • Use your fingernail or the edge of a plastic opening tool to flip up the retaining flap on the analog stick ribbon connector.

    • Lift the analog stick out of the PSP 300xc, disconnecting the ribbon cable as you remove it.

  24. PSP 300xc Motherboard Replacement, Motherboard: 步骤 24 中的图像 1,1
    • Push the small black tab holding the right speaker to the left.

    • The speaker will pop out of place.

  25. PSP 300xc Motherboard Replacement: 步骤 25 中的图像 1,1
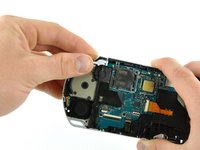
    • Using the flat edge of a spudger, pry the wireless board cable connector straight up and off the motherboard.

  26. PSP 300xc Motherboard Replacement: 步骤 26 中的图像 1,3 PSP 300xc Motherboard Replacement: 步骤 26 中的图像 2,3 PSP 300xc Motherboard Replacement: 步骤 26 中的图像 3,3
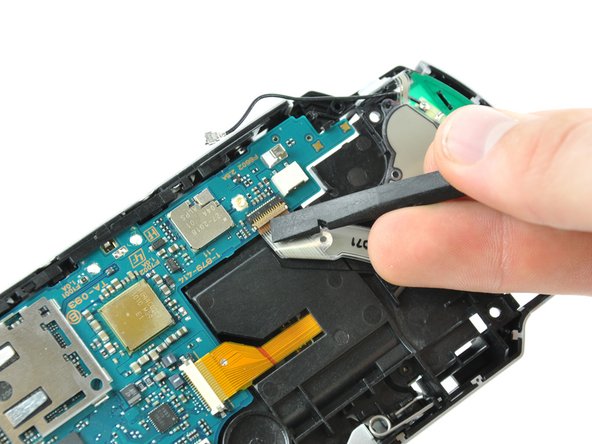
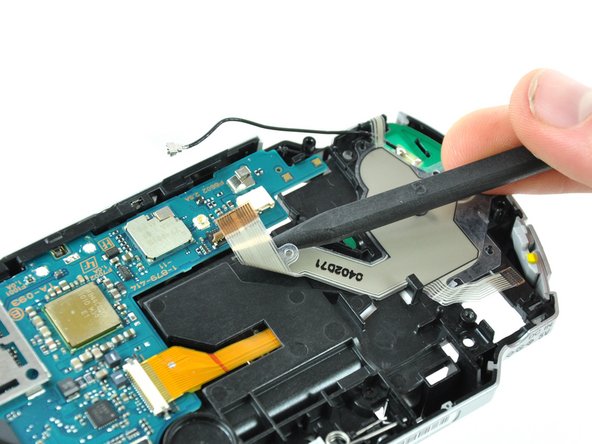
    • Using a fingernail or spudger, flip up the retaining flap on the following three ZIF connectors.

    • Action button contact pad ribbon

    • UMD drive ribbon

    • Be sure you are prying up on the retaining flap, not the socket itself.

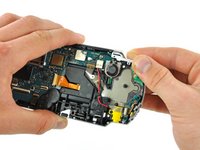
    • Use your fingernail or tip of a spudger to push both sides of the black retaining flap on the UMD laser ribbon socket to the right.

    • Use your fingers or a spudger to gently pull all three ribbon cables straight out of their sockets.

  27. PSP 300xc Motherboard Replacement: 步骤 27 中的图像 1,2 PSP 300xc Motherboard Replacement: 步骤 27 中的图像 2,2
    • Lift the right silver rim up and off the PSP 300xc

    • Lift the left silver rim up and off the PSP 300xc

  28. PSP 300xc Motherboard Replacement: 步骤 28 中的图像 1,2 PSP 300xc Motherboard Replacement: 步骤 28 中的图像 2,2
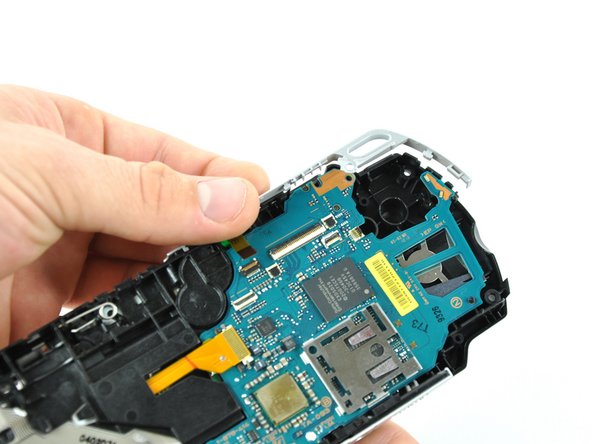
    • Lift the motherboard up from its bottom edge about 45 degrees from the case.

    • Slowly attempt to pull the motherboard out at roughly a 45 degree angle from the case.

    • It takes a little fidgeting to get the motherboard to come apart from the case.

结论

To reassemble your device, follow these instructions in reverse order.

13等其他人完成本指南。

Matthew Newsom

于01/05/10注册

39,500 声望

创作了67篇指南

3条评论

looking for bottom stick board

louie khalil - 回复

part No. 0402071

louie khalil - 回复

buttons is not working the right side

louie khalil - 回复

添加评论

浏览统计数据:

过去 24 小时: 1

过去 7 天: 18

过去 30 天: 69

总计 9,705