简介
拆卸Sony PSP-3000的UMD光碟机的指南
你所需要的
-
-
用撬棒或指甲剥去电池后面的保修标签。
This will end your warranty, so do it on your own risk!
Even though warranties are long expired on these things.
“IF” your on this Site “I FIX IT(tm) to lean how to repair something on your own… you “Should NOT” be too concerned about warranty any longer, as if you were .. for your iPhone or Pad etc… you would have taken it to the supplier.. No??
-
-
-
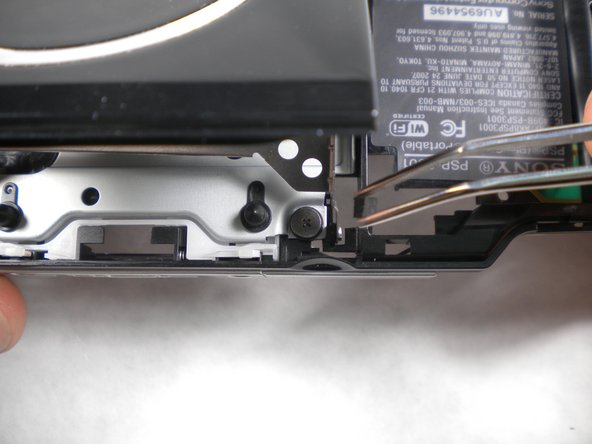
然后,从PSP的底部边缘(位于条形码旁边)上卸下单个螺钉。
“DON’T” forget to put your screws separately on a mag mat (Or sticky tape) so to 1) Not loose them & 2) Remember where they go as they may be of differing sizes. (Refer time the pictures also helps, but you can take a pic on your camera as you go to remind you also.
-
-
-
从“R”肩部按钮开始,将撬棒滑入PSP外壳之间,轻轻撬开外壳。
-
完全取下前壳。
J’ai récemment fait cette réparation et le boîtier avant ne voulait pas venir à condition d’enlever les deux vis sur le boîtier arrière au niveau du joystick et de la croix directionnelle. Il manque donc selon moi une partie mais je peux me tromper !
-
-
-
将主屏幕向右推,以释放位于LCD屏幕右侧的标签。
-
-
-
从顶部边缘角开始慢慢将LCD显示屏从PSP上抬起。
Attention à cette partie où l’écran est un peu bloqué dans le coin inférieur droit, il faut donner un peu de jeu vers la gauche pour le décaler et le retirer plus facilement.
-
-
-
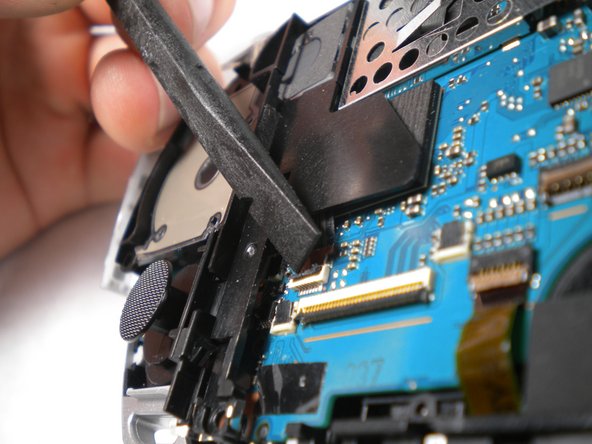
使用撬棒或指甲向上翻开四个带状电缆连接器上的小棕色锁。
-
将所有四根带状电缆拉出。
-
现在从PSP中取出LCD屏幕和主屏幕。
-
-


要重新组装设备,请按相反的顺序按照这些说明操作。
要重新组装设备,请按相反的顺序按照这些说明操作。
22等其他人完成本指南。

6条评论
Perfect!!! You forgot to mention 'GET YOUR EYEGLASSES' for the 50+ year old fathers that have to help on this procedure!!!! Man, oh man, are those parts small and delicate!!!! GREAT tutorial, than you very much! Blind in Boston.
The tutorial was great btw, however after assembling everything into my new blue Mod i was left with a white plastic piece and a spring witch is in my psp 3001 models , not sure but i see in the last picture of this tutorial you have the white piece left in the drive. it is located behind the cd rom part near the top of the psp where the 2 x holes are. it sucks cause it dont close properly without the white piece and theres also 1 of the 2 springs not mentioned in this tutorial neither im trying to figure out where it goes. But thanks for this guide as it has helped me alot..
:)
Ken
Someone found the location of the missing spring? Haven’t figured it out yet…
This has too many extra steps. If you’re *just* taking out the UMD drive, you only need to follow these sections: battery, casing, LCD screen, UMD drive. This guide should really just be called “how to completely disassemble your PSP 3000”.
wszystko zgodnie z instrucją , i drugi ekran wylany mimo ostroznosci, autor zapomnial dodac ze od razu ekran mozna sobie nowy zamawiac bo wg tego gownianego opisu uszkodzicie sobie lcd i nie gowno nie ostroznosc wam pomoze autorowi zycze aby ci huju kazdy sprzet sie w rekach rozwalal