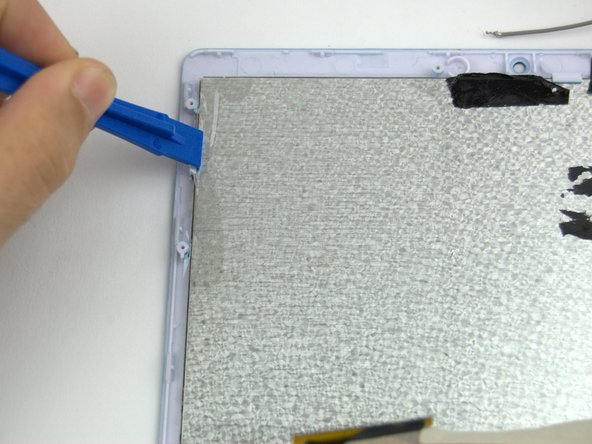
跳转到主内容

Orbo Jr. Display Replacement

你所需要的

  1. Orbo Jr. Display Replacement, Battery: 步骤 1 中的图像 1,1
    • Use your thumbs to gently pry the silicon case away from the tablet starting at one of the corners. Once the first corner is separated the other three corners should slip off easily.

  2. Orbo Jr. Display Replacement: 步骤 2 中的图像 1,3 Orbo Jr. Display Replacement: 步骤 2 中的图像 2,3 Orbo Jr. Display Replacement: 步骤 2 中的图像 3,3
    • Use the plastic opening tool to pry the back off the tablet. Work your way around the edges. Once you have one side open you can slowly unsnap the rest of the case and use the tool as needed.

    • Go slowly when you pry the back off to ensure you do not crack the case or damage the screen.

  3. Orbo Jr. Display Replacement: 步骤 3 中的图像 1,1
    • Gently pull the cables attached to the speaker to remove it from the back cover.

    • The speaker is taped in the back cover and caution should be used when pulling on the wires.

  4. Orbo Jr. Display Replacement: 步骤 4 中的图像 1,1
    • Pull back the tape to expose the wires that are attached to the battery.

  5. Orbo Jr. Display Replacement: 步骤 5 中的图像 1,2 Orbo Jr. Display Replacement: 步骤 5 中的图像 2,2
    • Do not attempt to fully remove the battery. It is still connected to the motherboard by two wires.

    • Use a nylon spudger to lift the battery from the right side of the device. Slowly remove the adhesive below the battery.

    • To avoid damage to device and battery, do not attempt to remove the battery until adhesive is completely detached.

  6. Orbo Jr. Display Replacement: 步骤 6 中的图像 1,3 Orbo Jr. Display Replacement: 步骤 6 中的图像 2,3 Orbo Jr. Display Replacement: 步骤 6 中的图像 3,3
    • Desolder the battery wires from the positive and negative connection to the motherboard. Check out iFixit's How to Solder and Desolder Connections guide for soldering help.

    • Positive and Negative battery terminals.

    • Be careful to not make contact to other components on the motherboard while using the soldering iron.

  7. Orbo Jr. Display Replacement, Speaker: 步骤 7 中的图像 1,3 Orbo Jr. Display Replacement, Speaker: 步骤 7 中的图像 2,3 Orbo Jr. Display Replacement, Speaker: 步骤 7 中的图像 3,3
    • Unsolder the positive and negative speaker wires from the connection on the motherboard.

    • Positive and Negative battery terminals.

    • Be careful to not make contact to other components on the motherboard while using the solder iron.

  8. Orbo Jr. Display Replacement, Camera: 步骤 8 中的图像 1,3 Orbo Jr. Display Replacement, Camera: 步骤 8 中的图像 2,3 Orbo Jr. Display Replacement, Camera: 步骤 8 中的图像 3,3
    • Use the pointed end of a spudger to flip up the black tab connecting the camera's ribbon cable to the motherboard.

    • Camera ribbon clip.

    • Pull lightly on the ribbon to remove the camera ribbon from the tab.

  9. Orbo Jr. Display Replacement, Motherboard: 步骤 9 中的图像 1,3 Orbo Jr. Display Replacement, Motherboard: 步骤 9 中的图像 2,3 Orbo Jr. Display Replacement, Motherboard: 步骤 9 中的图像 3,3
    • Unsolder the Wifi wire from the connection on the motherboard.

    • WiFi terminal

    • Be careful to not make contact to other components on the motherboard while using the solder iron.

  10. Orbo Jr. Display Replacement: 步骤 10 中的图像 1,3 Orbo Jr. Display Replacement: 步骤 10 中的图像 2,3 Orbo Jr. Display Replacement: 步骤 10 中的图像 3,3
    • Unsolder the display wires from the connection on the motherboard.

    • Display wires

    • Be careful to not make contact to other components on the motherboard while using the solder iron.

  11. Orbo Jr. Display Replacement: 步骤 11 中的图像 1,1
    • Use the flat end of the spudger to lift and remove the black tape covering the ribbon connection tab.

    • The tape should be removed slowly.

  12. Orbo Jr. Display Replacement: 步骤 12 中的图像 1,3 Orbo Jr. Display Replacement: 步骤 12 中的图像 2,3 Orbo Jr. Display Replacement: 步骤 12 中的图像 3,3
    • Using the tip end of the spudger, slide back the black clips on the side of the right ribbon connection.

    • Gently pull the display ribbons to remove them from the motherboard connections.

    • Repeat the same steps for the left ribbon connection.

  13. Orbo Jr. Display Replacement: 步骤 13 中的图像 1,3 Orbo Jr. Display Replacement: 步骤 13 中的图像 2,3 Orbo Jr. Display Replacement: 步骤 13 中的图像 3,3
    • Remove the following Phillips #000 screws securing the motherboard.

    • Three 3.0 mm screws

  14. Orbo Jr. Display Replacement, Display: 步骤 14 中的图像 1,3 Orbo Jr. Display Replacement, Display: 步骤 14 中的图像 2,3 Orbo Jr. Display Replacement, Display: 步骤 14 中的图像 3,3
    • Along the edge of the display, there are 7 plastic clips that connect the screen to the front of the case.

    • Plastic clips

    • Use a plastic spudger to separate the clips from the display.

    • Use caution in prying the display from device to not damage the clip or the cover of the display.

结论

To reassemble your device, follow these instructions in reverse order.

Ryan Christman

于02/10/16注册

684 声望

创作了5篇指南

团队

USF Tampa, Team 3-1, Sullivan Spring 2016 USF Tampa, Team 3-1, Sullivan Spring 2016 的会员

USFT-SULLIVAN-S16S3G1

4 名成员

创作了10篇指南

0条评论

添加评论

浏览统计数据:

过去 24 小时: 0

过去 7 天: 2

过去 30 天: 6

总计 1,140