当前版本的文档还未经巡查,您可以查看最新的已查核版本。
你所需要的
-
这个步骤还没有翻译 帮忙翻译一下
-
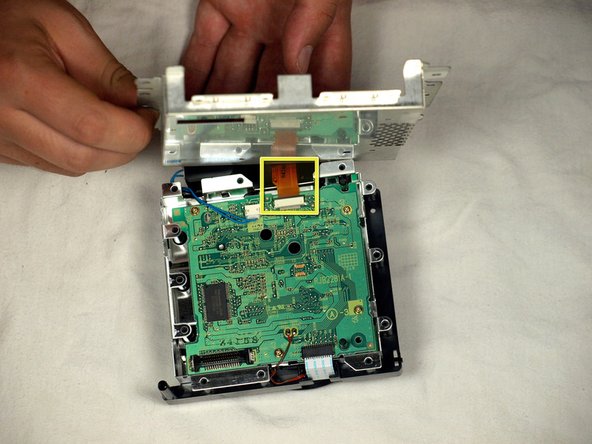
On opposite sides of the front panel you will see two (2) clips that attach the front panel to the front of the console. Remove the front panel by pressing on the two clips as shown in picture 1
-
The ribbon attaching the Gamecube to the front panel does not need to be removed, let the front panel rest at the front of the console.
-
Remove the rear panel using the same technique used for the front panel, as shown in picture two.
-
-
-
这个步骤还没有翻译 帮忙翻译一下
-
Locate and remove the twelve (12) Phillips #2 screws around the outside of the metal chassis located underneath the optical drive.
-
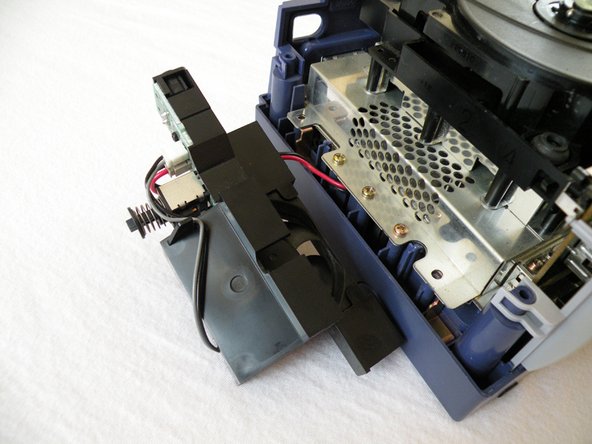
Three (3) of the twelve (12) screws are located underneath the cooling fan housing
-
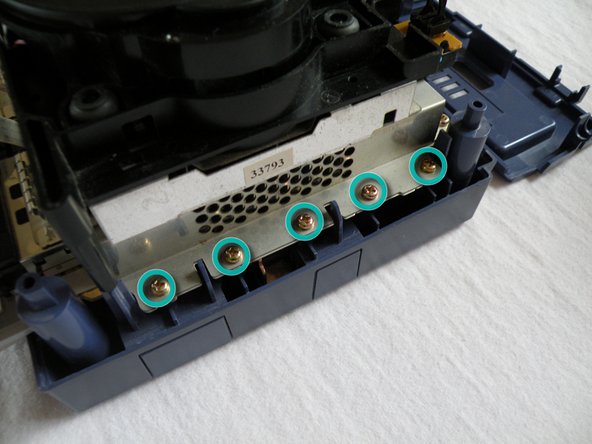
Five (5) of the twelve (12) screws are located to the right of the optical drive unit. Refer to picture 2.
-
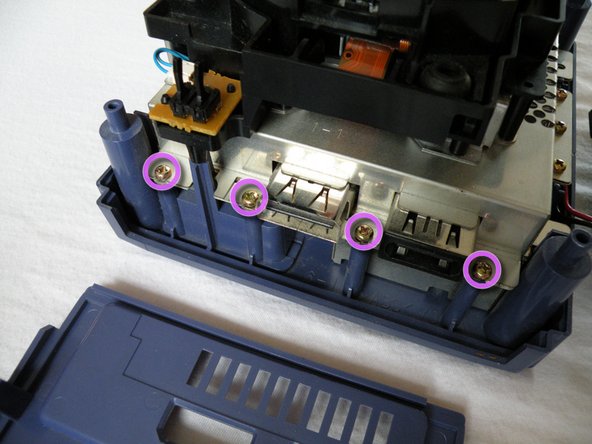
Four (4) of the twelve (12) screws are located to the rear of the unit, shown in picture 3.
-
-
这个步骤还没有翻译 帮忙翻译一下
-
To test the lens calibration reassemble the console up to the ground springs near the memory card slots.
-
If any further adjustments are necessary just turn the potentiometer no more than 1 or 2 degrees more per readjustment. Eventually you'll start to see less DRE messages.
-


10等其他人完成本指南。
5条评论
Marvellous guide! It fixed the issue of erratic messages of "No Disc inserted..." or "Insert GameCube Disc...". Now my GC is as good as new! Thanks :D
Hey, I was reading two guides, this one and another one, which says I should use a philips head, while yours says a flat head, so what should I use?
Hi Omar, I would guess that either would work, but judging on the image in the other guide (which is much bigger), it looks like it might be a Phillips screw https://d3nevzfk7ii3be.cloudfront.net/ig...
Hi, is there a different measurement than 3 degrees? Don’t want to screw anything up, but I don’t really understand.
The 3 degrees is not an official measurement for this. But just make EXTREMELY small adjustments. Think of it like turning the hands on a clock. 15 minutes would be 90 degrees or 1/4 turn. So you can imagine how small these adjustments are.