当前版本的文档还未经巡查,您可以查看最新的已查核版本。
-
-
将塑料拆机工具插入位于电池与电池仓之间的凹槽中。
-
用塑料拆机工具撬起电池。
-
抓住电池的顶部边缘,将其从电池仓中抬起。
-
-
-
Remove the nine 6.3 mm black Phillips screws from the lower case.
-
These screws will strip very easily unless you use the correct size bit. Apply pressure to the screws while turning to avoid stripping them.
-
Remove the 2.4 mm silver Phillips screw above the game cartridge slot.
-
-
Lift the bottom edge of the lower case off the rest of the 3DS.
-
There are still two ribbon cables connecting the mother board to the case, so be sure not to pull the lower case all the way off.
-
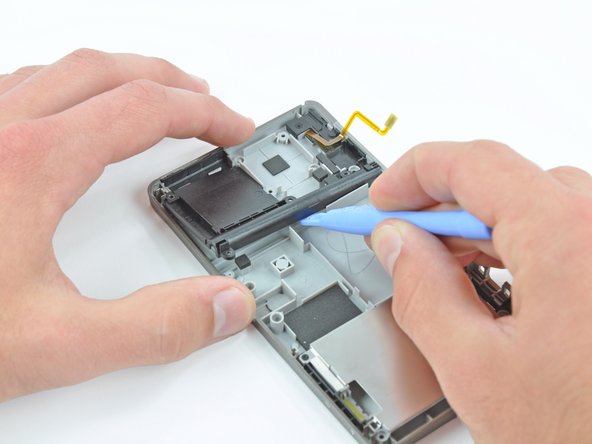
Use a plastic opening tool to pry the shoulder button ribbon cables off their sockets on the motherboard.
-
Remove the lower case from the device.
-
-
-
Remove the four 2.4 mm Phillips screws that secure the stylus housing to the lower case.
-
Use a plastic opening tool to pry the stylus housing up from the lower case.
-
Grab the stylus housing and remove it from the lower case.
嵌入本指南
选择一个尺寸并复制下面的代码,将本指南作为一个小插件嵌入到你的网站/论坛中。
预览