本指南有最近更改,您可查看未经巡查的最新版本。
简介
Outside case of your 3DS have a nasty crack in it? Replace the rear display bezel to make your Nintendo shiny again.
你所需要的
-
-
Insert a plastic opening tool into the notch in the lower case above the battery.
-
Pry the battery up with the plastic opening tool.
-
Grab the top edge of the battery and lift it out of the lower case.
-
-
-
Remove the nine 6.3 mm black Phillips screws from the lower case.
-
Remove the 2.4 mm silver Phillips screw above the game cartridge slot.
-
-
-
Remove the two 7.7 mm Phillips screws securing the back of the Circle Pad to the motherboard.
-
-
-
-
Insert the flat end of a spudger between the SD board and the motherboard.
-
Pry up slowly to loosen the SD board from the RF shield underneath it. If you pry too quickly, you may tear the shield or break its solder points.
-
Run the spudger along the sides of the SD board to free it from the adhesive holding it in place.
-
Once completely freed, lift the SD board straight off the motherboard.
-
-
-
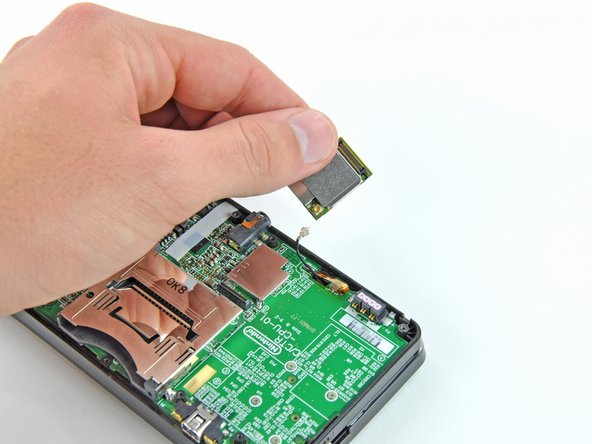
Slide the flat end of a spudger under the corner of the Wi-Fi board, and lift it away from the motherboard.
-
-
-
Grasp the microphone ribbon cable near the microphone with a pair of tweezers.
-
Pull the microphone straight up out of the upper case.
-
-
-
Before continuing with disassembly, use a pair of tweezers to remove the clear plastic diffuser for the wireless notification LED. The small piece is likely to fall out on its own, and may be difficult to find if it lands on the floor.
-
-
-
Remove the six 3.6 mm Phillips screws securing the rear display bezel to the front display bezel.
-
To reassemble your device, follow these instructions in reverse order.
To reassemble your device, follow these instructions in reverse order.
6等其他人完成本指南。


