当前版本的文档还未经巡查,您可以查看最新的已查核版本。
-
-
-
将相机放置到它的一边
-
向镜头方向扳动释放按钮,打开电池仓盖
-
这会使盖子轻轻的弹出式打开
-
-
现在,抬起电池仓盖板
-
轻推黄色的锁止按钮以释放电池
-
由于底部有弹簧,这会导致电池跳起来
-
将新电池慢慢的径直推入
-
请注意电池的插入方向
-
-
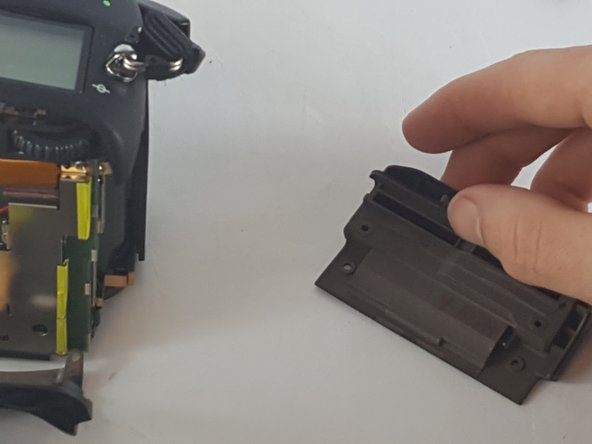
After removal of the battery. Pull the battery compartment door away from the lens.
-
There are eleven Philips head screws that hold the bottom cover on, including a few inside the battery compartment.
-
Remove all the screws and the bottom face should pop off easily.
-
-
-
Then next step is removing the seven Philips #00 screws that hold the rear face plate on.
-
There are screws hidden in three separate spots.
-
One is under the rubber doors on the left side of the camera. the next one at the eye hole.
-
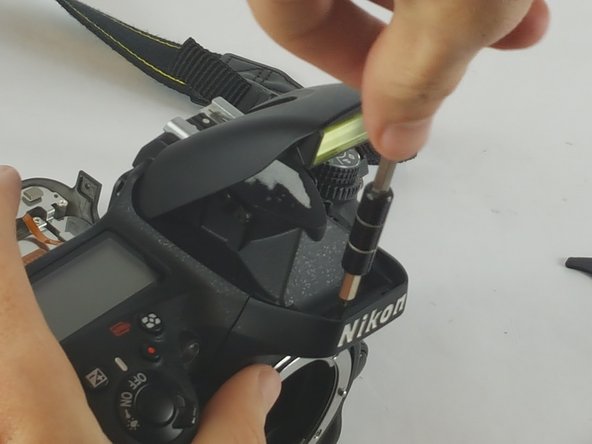
The final one involves taking off the small dial that is about half an inch to the right of the eye hole.
-
Removing this dial involves putting a spungder tool behind it and applying a gradual amount of pressure.
-
-
The rear face plate will include the LCD display it separates from the body of the camera with a small tug.
-
Do not pull to hard otherwise you risk breaking the ribbon wire that connects the controls and the screen.
-
Once there is enough space it will be possible to gently pull the ribbon cable out of their ports.
-
-
The next piece to come off is the front plate and the red grip.
-
The front plate is held on by 2 Philips #00 screws on the front and two more beneath the flash bulb.
-
Remove the two Phillips #00 screws holding on the grip and it slides off easily.
-
After removing the screws the face plate comes off by pulling it straight off to avoid damage.
-
-
It is now possible to remove the last three Philips #00 screws that are hidden under the memory card slot door.
-
The screws come out and the cover comes straight off.
-
The last cover plate is the top. The top is held on by two screws located just beneath the rim of the cover.
-
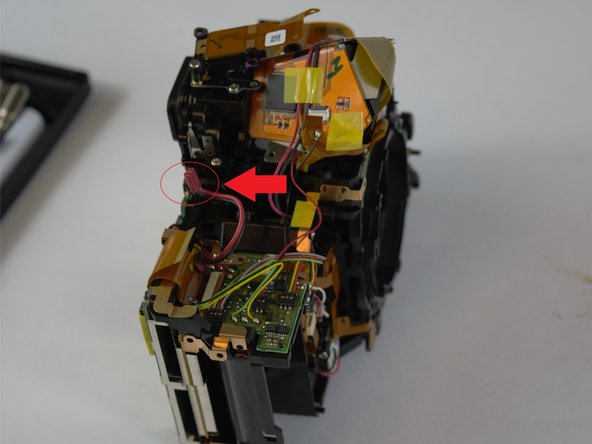
The top should be pulled off very slowly. There are several electronic components that connect between the body and the top.
-
There are three wires that need to be disconnected.
-
-
The flash capacitor will be to the right of the lens on the front of the camera.
-
There is only one connection that the flash capacitor makes but this was detached earlier.
-
The pictures shown for the flash capacitor removal is from a complete tear down.
-
-
If your flash capacitor looks damaged you can create a discharge tool with this guide. Constructing a Capacitor Discharge Tool
-
Then use the plastic opening tool to pry from underneath the capacitor from top to bottom in order to remove it.
-
Please note that there is glue holding the capacitor to the frame so it will need some coaxing to get it off.
嵌入本指南
选择一个尺寸并复制下面的代码,将本指南作为一个小插件嵌入到你的网站/论坛中。
预览