跳转到主内容

Nexus 5X Motherboard Assembly Replacement

仅作为前提条件
本指南仅用作其他指南的先决条件。不能单独食用。

你所需要的

  1. Nexus 5X Motherboard Assembly Replacement, Motherboard Assembly: 步骤 1 中的图像 1,1
    • Use an iOpener to loosen the adhesive beneath the rear facing camera. Place the iOpener across the top part of the phone for about 30 seconds.

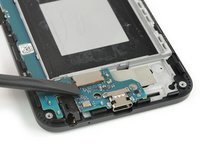
  2. Nexus 5X Motherboard Assembly Replacement: 步骤 2 中的图像 1,2 Nexus 5X Motherboard Assembly Replacement: 步骤 2 中的图像 2,2
    • Apply the flat end of a spudger to the left side of the rear facing camera and carefully lever it up. Make sure all of the adhesive underneath is loosened.

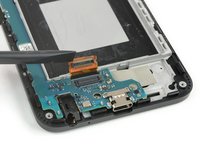
  3. Nexus 5X Motherboard Assembly Replacement: 步骤 3 中的图像 1,2 Nexus 5X Motherboard Assembly Replacement: 步骤 3 中的图像 2,2
    • Use the flat end of a spudger to pry up the display flex connector.

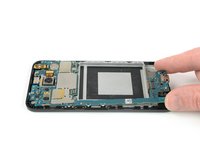
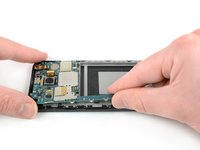
  4. Nexus 5X Motherboard Assembly Replacement: 步骤 4 中的图像 1,3 Nexus 5X Motherboard Assembly Replacement: 步骤 4 中的图像 2,3 Nexus 5X Motherboard Assembly Replacement: 步骤 4 中的图像 3,3
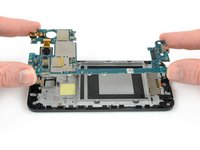
    • Grip the lower part of the motherboard with your fingers and carefully lift it upwards.

    • There's a small plastic clip next to the rear-facing camera that holds the motherboard in place.

    • Gently pull the motherboard towards the bottom edge to free it from the plastic clip next to the rear-facing camera.

    • Carefully lift the motherboard out of the frame.

    • Be careful—the two cameras are still connected to the board.

结论

To reassemble your device, follow these instructions in reverse order.

Dominik Schnabelrauch

于11/23/16注册

203,395 声望

创作了682篇指南

团队

iFixit iFixit 的会员

Staff

135 名成员

创作了16,818篇指南

0条评论

添加评论

浏览统计数据:

过去 24 小时: 0

过去 7 天: 0

过去 30 天: 0

总计 32