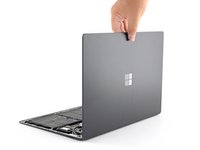
跳转到主内容

Microsoft Surface Laptop 3 15" Display Assembly Removal

仅作为前提条件
本指南仅用作其他指南的先决条件。不能单独使用。

你所需要的

  1. Microsoft Surface Laptop 3 15" Display Assembly Removal, Remove the display connector shields: 步骤 1 中的图像 1,3 Microsoft Surface Laptop 3 15" Display Assembly Removal, Remove the display connector shields: 步骤 1 中的图像 2,3 Microsoft Surface Laptop 3 15" Display Assembly Removal, Remove the display connector shields: 步骤 1 中的图像 3,3
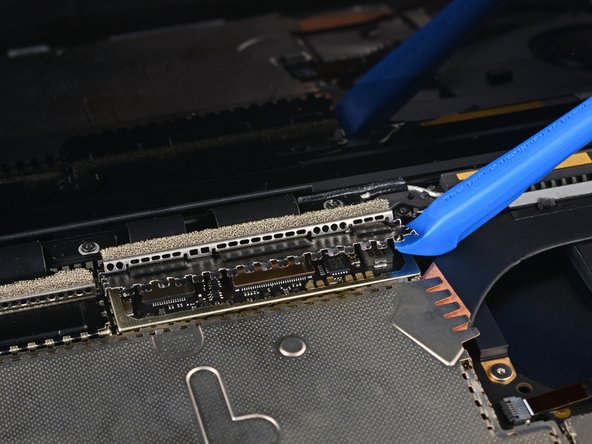
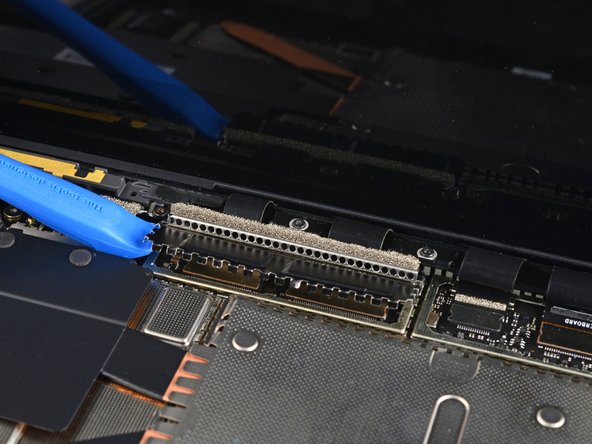
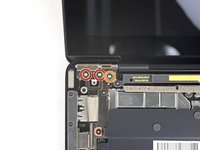
    • Use an opening tool to pry up the black shield covering the right bank of display connectors.

    • Try not to deform the shield too much—you will need to reinstall it during reassembly.

    • Repeat at different points around the shield until it becomes loose.
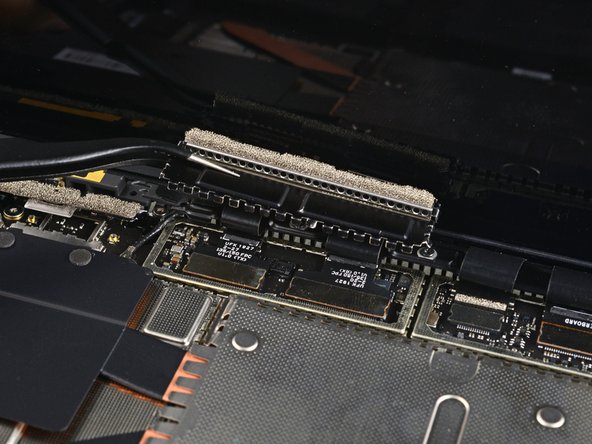
    • Remove the shield.

  2. Microsoft Surface Laptop 3 15" Display Assembly Removal: 步骤 2 中的图像 1,3 Microsoft Surface Laptop 3 15" Display Assembly Removal: 步骤 2 中的图像 2,3 Microsoft Surface Laptop 3 15" Display Assembly Removal: 步骤 2 中的图像 3,3
    • Repeat the previous step to remove the remaining shield from the left bank of display connectors.

  3. Microsoft Surface Laptop 3 15" Display Assembly Removal, Disconnect the display cables: 步骤 3 中的图像 1,2 Microsoft Surface Laptop 3 15" Display Assembly Removal, Disconnect the display cables: 步骤 3 中的图像 2,2
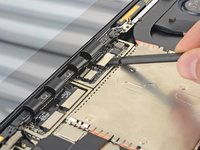
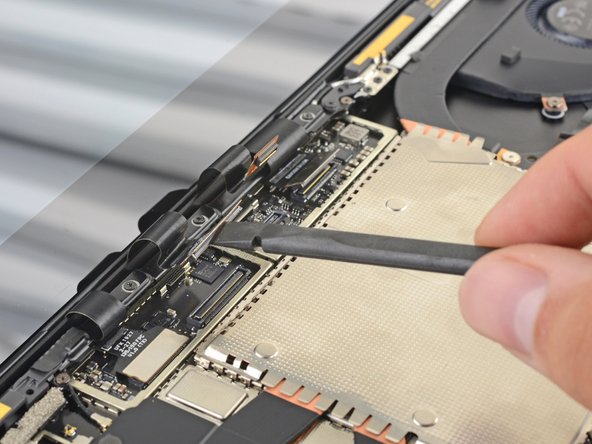
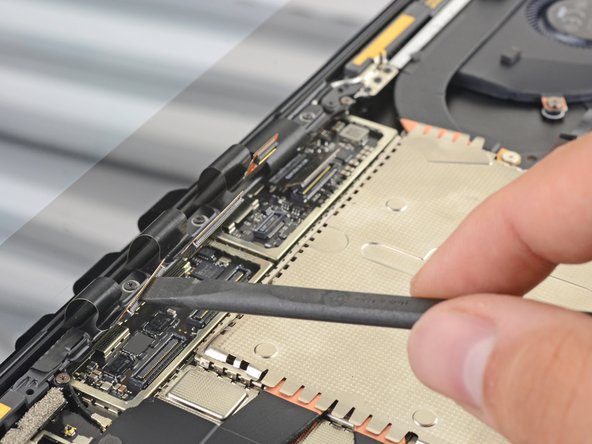
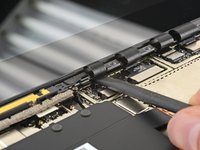
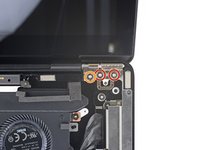
    • Use the flat end of a spudger to pry the first display cable up and out of its socket on the motherboard to disconnect it.

  4. Microsoft Surface Laptop 3 15" Display Assembly Removal: 步骤 4 中的图像 1,3 Microsoft Surface Laptop 3 15" Display Assembly Removal: 步骤 4 中的图像 2,3 Microsoft Surface Laptop 3 15" Display Assembly Removal: 步骤 4 中的图像 3,3
    • Disconnect the three remaining display connectors.

  5. Microsoft Surface Laptop 3 15" Display Assembly Removal, Reassembly tip: 步骤 5 中的图像 1,2 Microsoft Surface Laptop 3 15" Display Assembly Removal, Reassembly tip: 步骤 5 中的图像 2,2
    • During reassembly, use the flat end of a spudger to gently push the display cables back into their cavity in the lower case.

  6. Microsoft Surface Laptop 3 15" Display Assembly Removal, Tilt open the screen: 步骤 6 中的图像 1,1
    • Open the screen as far as it will go.

  7. Microsoft Surface Laptop 3 15" Display Assembly Removal, Remove four hinge screws: 步骤 7 中的图像 1,3 Microsoft Surface Laptop 3 15" Display Assembly Removal, Remove four hinge screws: 步骤 7 中的图像 2,3 Microsoft Surface Laptop 3 15" Display Assembly Removal, Remove four hinge screws: 步骤 7 中的图像 3,3
    • When removing the hinge screws, make sure to hold the screen steady as it will become more and more loose as the hinge screws are gradually removed.

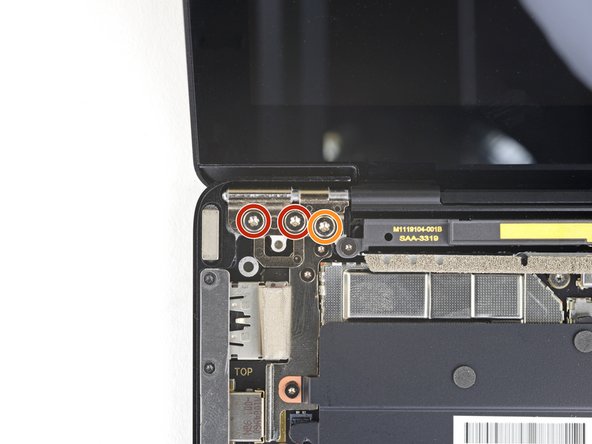
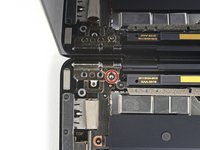
    • While holding the screen steady, use a T6 Torx driver to remove the four outermost 5.9 mm screws securing the screen, two on each side.

    • Leave the two innermost hinge screws in place for now, one on each side.

  8. Microsoft Surface Laptop 3 15" Display Assembly Removal, Tilt the screen vertical: 步骤 8 中的图像 1,1
    • Slowly tilt the screen until it's approximately vertical.

    • During reassembly, with the first two hinge screws tightened in place, the screen is free to tilt open for installation of the remaining four hinge screws.

  9. Microsoft Surface Laptop 3 15" Display Assembly Removal, Remove the final hinge screws: 步骤 9 中的图像 1,2 Microsoft Surface Laptop 3 15" Display Assembly Removal, Remove the final hinge screws: 步骤 9 中的图像 2,2
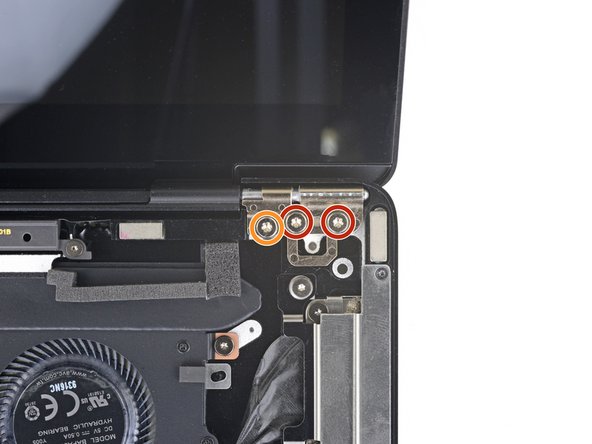
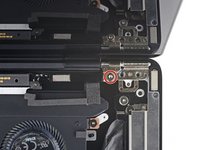
    • While holding the screen steady, use a T6 Torx driver to remove the two remaining 5.9 mm screws securing the screen, one on each side.

    • With these two final screws removed the screen will be freed from the rest of the device, so hold it steady.

    • If the screen is exactly perpendicular to the lower case, a screwdriver handle may contact the display during removal. If you're having trouble, lightly tilt the screen back enough to clear the driver.

  10. Microsoft Surface Laptop 3 15" Display Assembly Removal, Remove the screen: 步骤 10 中的图像 1,2 Microsoft Surface Laptop 3 15" Display Assembly Removal, Remove the screen: 步骤 10 中的图像 2,2
    • Lift the screen straight up and off of the lower case to remove it.

    • During reassembly, ensure the replacement screen's hinges are at a 90 degree angle with the display.

结论

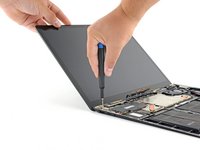
Compare your new replacement part to the original part—you may need to transfer remaining components or remove adhesive backings from the new part before installing.

To reassemble your device, follow the above steps in reverse order.

Take your e-waste to an R2 or e-Stewards certified recycler.

Repair didn’t go as planned? Try some basic troubleshooting or search our Answers community for help.

Carsten Frauenheim

于03/10/20注册

135,533 声望

创作了371篇指南

团队

iFixit iFixit 的会员

Staff

118 名成员

创作了19,416篇指南

0条评论

添加评论

浏览统计数据:

过去 24 小时: 0

过去 7 天: 2

过去 30 天: 2

总计 18