跳转到主内容

当前版本的文档还未经巡查,您可以查看最新的已查核版本

你所需要的

  1. 这个步骤还没有翻译 帮忙翻译一下

    : 步骤 1 中的图像 1,1
    在这个步骤中使用的工具:
    P5 Pentalobe Screwdriver Retina MacBook Pro and Air
    $5.99
    购买
    • Before proceeding, close your computer and lay it on a soft surface top-side down.

    • Remove the following ten screws:

    • Two 8 mm 5-point Pentalobe screws

    • Eight 2.5 mm 5-point Pentalobe screws

    • The special screwdriver needed to remove the eight 5-point Pentalobe screws can be found here.

  2. 这个步骤还没有翻译 帮忙翻译一下

    : 步骤 2 中的图像 1,1
    • Wedge your fingers between the display and the lower case and pull upward to pop the lower case off the Air.

    • Remove the lower case and set it aside.

  3. , 电池: 步骤 3 中的图像 1,2 , 电池: 步骤 3 中的图像 2,2
    • 使用撬棒的扁平端向上撬起电池接口的两个短边,将其与主板上的插座断开。

    • 将电池电缆稍微弯曲离开主板,这样接口就不会意外接触到插座。

  4. : 步骤 4 中的图像 1,1
    • 移除下列5颗将电池和顶壳固定的螺丝。

    • 2颗 5.2mm T5 Torx螺丝

    • 1颗 6mm T5 Torx螺丝

    • 2颗 2.6mm T5 Torx螺丝

  5. : 步骤 5 中的图像 1,1
    • 当你握持电池时,避免挤压或者触摸六块暴露的锂离子电池。

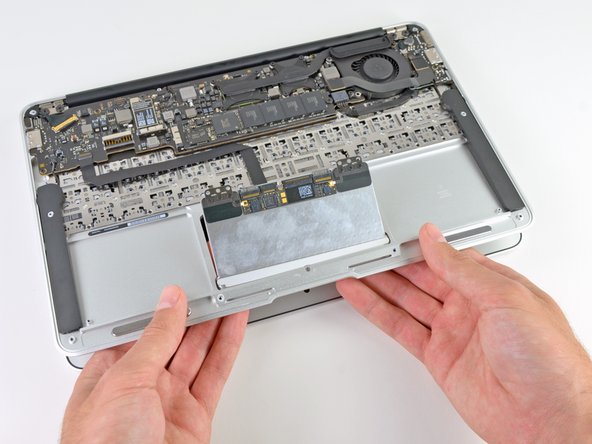
    • 从靠近主板的边缘提起电池,并将其从顶壳中取出。

    • 在你使用的电池之前先 校准 它:

    • 将其充电至100%,并继续充电至少2小时。拔下电源并正常使用以排空电池。当您看到低电量警告时,请保存您的工作,并保持笔记本电脑一直打开,直到它因电池电量不足而进入睡眠状态。等待至少5个小时,然后不间断地将笔记本电脑充电至100%。

    • 在你安装好你的新电池之后,如果你注意到任何不寻常的举动或是问题,你可能需要重置你MacBook Pro的SMC

  6. 这个步骤还没有翻译 帮忙翻译一下

    : 步骤 6 中的图像 1,2 : 步骤 6 中的图像 2,2
    • Use the tip of a spudger to pry up the retaining flap on the trackpad data cable ZIF connector.

    • Be careful to pry on the hinged flap, not the connector itself; the connector is delicate and may break.

    • Gently slide the trackpad ribbon cable out of the ZIF connector.

  7. 这个步骤还没有翻译 帮忙翻译一下

    : 步骤 7 中的图像 1,3 : 步骤 7 中的图像 2,3 : 步骤 7 中的图像 3,3
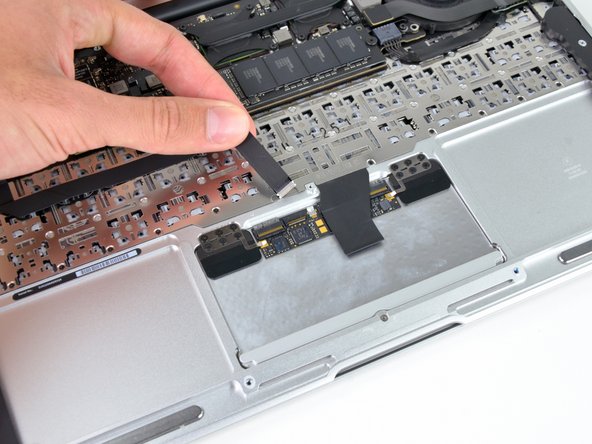
    • With one hand, lift the keyboard ribbon cable up and push it slightly away from the trackpad to access the ZIF connector underneath.

    • Use a spudger tip to pry up the retaining flap on the keyboard ribbon cable ZIF connector.

    • Be careful to pry on the hinged flap, not the connector itself; the connector is delicate and may break.

    • Gently slide the keyboard ribbon cable out of the ZIF connector.

  8. 这个步骤还没有翻译 帮忙翻译一下

    : 步骤 8 中的图像 1,1
    • Remove the six 1.5 mm Phillips #00 screws that secure the trackpad assembly to the upper case.

  9. 这个步骤还没有翻译 帮忙翻译一下

    : 步骤 9 中的图像 1,3 : 步骤 9 中的图像 2,3 : 步骤 9 中的图像 3,3
    • Open the MacBook about 10 degrees.

    • While supporting the upper case, press up on the side of the trackpad closest to the logic board.

    • Remove the trackpad.

终点

28等其他人完成本指南。

团队

iFixit iFixit 的会员

Staff

135 名成员

创作了17,243篇指南

4条评论

I did it! Replaced the trackpad after the MacBook Air took a dive from a stand, which fortunately just shattered the trackpad's glass. Thanks for the easy to use instructions!

Just one note on step 8: I had to use a PH000 (triple 0) instead of the double 0 - almost destroyed one of the screws before realising.

Best regards,

StH

Stefan - 回复

The trackpad from my macbook air would not click anymore. The pointer still worked, i could still tap and hoover around.

My guess was that something fell between the trackpad and the housing.

And I was right, it was a bread crumb or else of a little seed.

While following this guide, I saw that a little magnet underneath the unibody is lifting the trackpad up again, after being pushed down. Right in that tiny space was the little bugger :)

I'm with Stefan, about his comment by step 8. I actually did destroy one screw (there sat really, really tight) and had to use brute force with a pincer and a tip of WD-40 to loosen it. It seems like Apple took that into account, since there are enough to leave one out :)

Peter Bakker - 回复

I had the same issue, non-clicking mouse, and a dis-assembly & light clean also sorted me out. Thanks everyone!

pabz -

Replacement went well - iFixit guide marvellous as usual and replacement trackpad performs perfectly. So good to resurrect

the trusty MB Air!

Richard Cox - 回复

添加评论

浏览统计数据:

过去 24 小时: 0

过去 7 天: 8

过去 30 天: 30

总计 13,739