简介
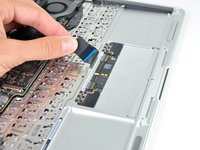
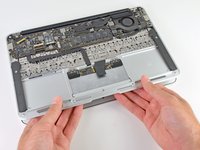
Remove the trackpad from your MacBook AIr 11" Late 2010.
你所需要的
-
在这个步骤中使用的工具:P5 Pentalobe Screwdriver Retina MacBook Pro and Air$5.99
-
Remove the following ten screws:
-
Two 8 mm 5-point Pentalobe screws
-
Eight 2.5 mm 5-point Pentalobe screws
-
-
-
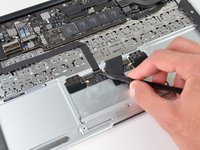
Use the flat end of a spudger to pry both short sides of the battery connector upward to disconnect it from its socket on the logic board.
-
Bend the battery cable slightly away from the logic board so the connector will not accidentally contact its socket.
-
-
-
-
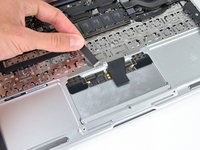
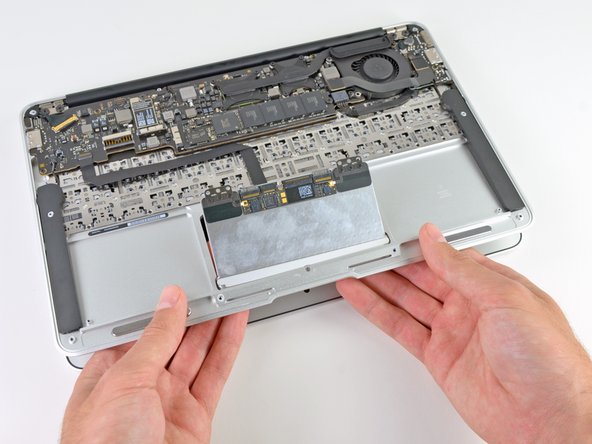
Lift the battery from its edge nearest the logic board and remove it from the upper case.
-
Charge it to 100%, and then keep charging it for at least 2 more hours. Next, unplug and use it normally to drain the battery. When you see the low battery warning, save your work, and keep your laptop on until it goes to sleep due to low battery. Wait at least 5 hours, then charge your laptop uninterrupted to 100%.
-
If you notice any unusual behavior or problems after installing your new battery, you may need to reset your MacBook's SMC.
-
-
-
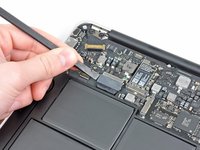
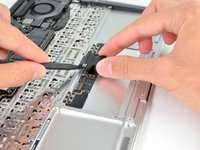
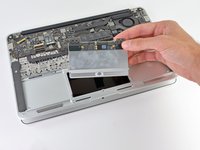
Use the tip of a spudger to pry up the retaining flap on the trackpad data cable ZIF connector.
-
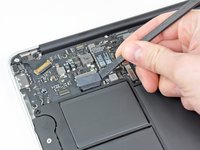
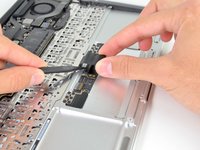
Gently slide the trackpad ribbon cable out of the ZIF connector.
-


To reassemble your device, follow these instructions in reverse order.
To reassemble your device, follow these instructions in reverse order.
28等其他人完成本指南。

4条评论
I did it! Replaced the trackpad after the MacBook Air took a dive from a stand, which fortunately just shattered the trackpad's glass. Thanks for the easy to use instructions!
Just one note on step 8: I had to use a PH000 (triple 0) instead of the double 0 - almost destroyed one of the screws before realising.
Best regards,
StH
The trackpad from my macbook air would not click anymore. The pointer still worked, i could still tap and hoover around.
My guess was that something fell between the trackpad and the housing.
And I was right, it was a bread crumb or else of a little seed.
While following this guide, I saw that a little magnet underneath the unibody is lifting the trackpad up again, after being pushed down. Right in that tiny space was the little bugger :)
I'm with Stefan, about his comment by step 8. I actually did destroy one screw (there sat really, really tight) and had to use brute force with a pincer and a tip of WD-40 to loosen it. It seems like Apple took that into account, since there are enough to leave one out :)
I had the same issue, non-clicking mouse, and a dis-assembly & light clean also sorted me out. Thanks everyone!
pabz -
Replacement went well - iFixit guide marvellous as usual and replacement trackpad performs perfectly. So good to resurrect
the trusty MB Air!