跳转到主内容

当前版本的文档还未经巡查,您可以查看最新的已查核版本

你所需要的

  1. 这个步骤还没有翻译 帮忙翻译一下

    : 步骤 1 中的图像 1,1
    在这个步骤中使用的工具:
    P5 Pentalobe Screwdriver Retina MacBook Pro and Air
    $5.99
    购买
    • Before proceeding, close your computer and lay it on a soft surface top-side down.

    • Remove the following ten screws:

    • Two 8 mm 5-point Pentalobe screws

    • Eight 2.5 mm 5-point Pentalobe screws

    • The special screwdriver needed to remove the eight 5-point Pentalobe screws can be found here.

  2. 这个步骤还没有翻译 帮忙翻译一下

    : 步骤 2 中的图像 1,1
    • Wedge your fingers between the display and the lower case and pull upward to pop the lower case off the Air.

    • Remove the lower case and set it aside.

  3. , 电池: 步骤 3 中的图像 1,2 , 电池: 步骤 3 中的图像 2,2
    • 使用撬棒的扁平端向上撬起电池接口的两个短边,将其与主板上的插座断开。

    • 将电池电缆稍微弯曲离开主板,这样接口就不会意外接触到插座。

  4. : 步骤 4 中的图像 1,1
    • 移除下列5颗将电池和顶壳固定的螺丝。

    • 2颗 5.2mm T5 Torx螺丝

    • 1颗 6mm T5 Torx螺丝

    • 2颗 2.6mm T5 Torx螺丝

  5. : 步骤 5 中的图像 1,1
    • 当你握持电池时,避免挤压或者触摸六块暴露的锂离子电池。

    • 从靠近主板的边缘提起电池,并将其从顶壳中取出。

    • 在你使用的电池之前先 校准 它:

    • 将其充电至100%,并继续充电至少2小时。拔下电源并正常使用以排空电池。当您看到低电量警告时,请保存您的工作,并保持笔记本电脑一直打开,直到它因电池电量不足而进入睡眠状态。等待至少5个小时,然后不间断地将笔记本电脑充电至100%。

    • 在你安装好你的新电池之后,如果你注意到任何不寻常的举动或是问题,你可能需要重置你MacBook Pro的SMC

  6. 这个步骤还没有翻译 帮忙翻译一下

    : 步骤 6 中的图像 1,1
    • Use the flat end of a spudger to pry the I/O board cable connector upward out of its socket on the I/O board.

  7. 这个步骤还没有翻译 帮忙翻译一下

    : 步骤 7 中的图像 1,3 : 步骤 7 中的图像 2,3 : 步骤 7 中的图像 3,3
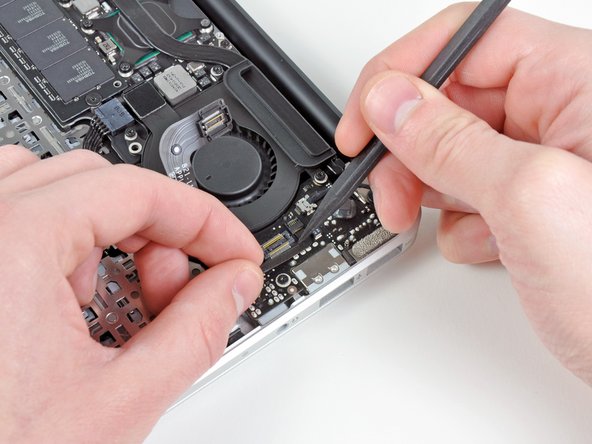
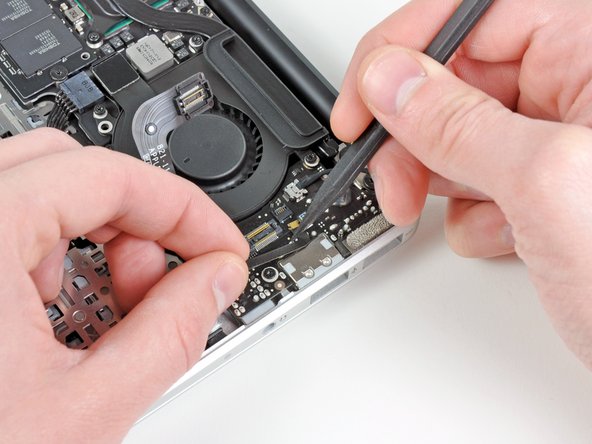
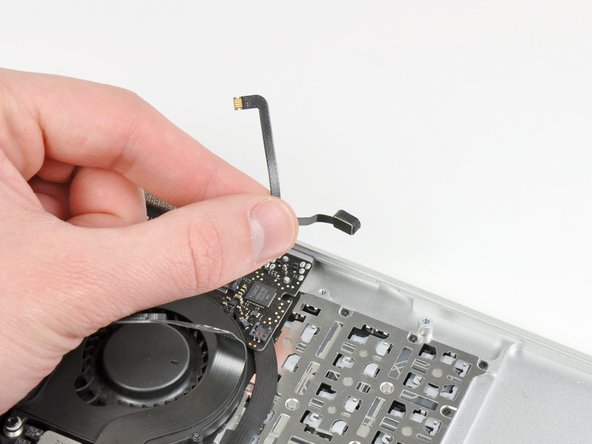
    • Use the tip of a spudger to flip up the retaining flap on the microphone ribbon cable ZIF socket.

    • Be sure you are prying up on the hinged retaining flap, not the socket itself.

    • Pull the microphone ribbon cable straight out of its socket.

  8. 这个步骤还没有翻译 帮忙翻译一下

    : 步骤 8 中的图像 1,1
    • Use the tip of a spudger to de-route the left speaker cable from the notch cut into the edge of the I/O board.

  9. 这个步骤还没有翻译 帮忙翻译一下

    : 步骤 9 中的图像 1,1
    • Use the flat end of a spudger to pry the left speaker connector up and out of its socket on the I/O board.

    • Pry upward from beneath the wires.

  10. 这个步骤还没有翻译 帮忙翻译一下

    : 步骤 10 中的图像 1,2 : 步骤 10 中的图像 2,2
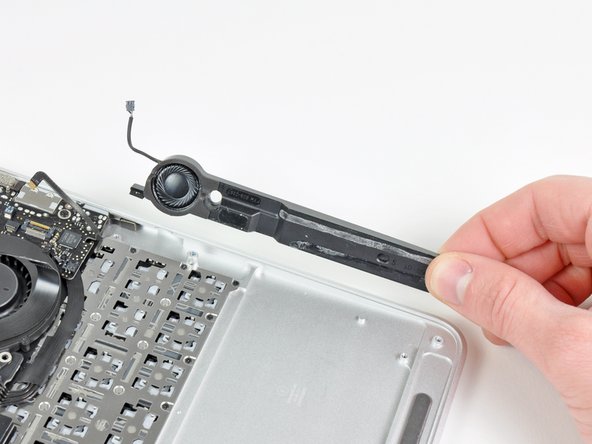
    • Use the flat end of a spudger to pry the left speaker off the adhesive securing it to the upper case.

    • Only pry up on the speaker from the areas of bare aluminum on the upper case. Prying up from the keyboard area may damage the keyboard and the speaker itself.

    • Remove the left speaker from the upper case.

  11. 这个步骤还没有翻译 帮忙翻译一下

    : 步骤 11 中的图像 1,2 : 步骤 11 中的图像 2,2
    • Use the tip of a spudger to pry the microphone away from the side of the upper case.

    • Remove the microphone from the upper case.

终点

另外一个人完成了本指南。

0条评论

添加评论

浏览统计数据:

过去 24 小时: 1

过去 7 天: 8

过去 30 天: 12

总计 4,636