跳转到主内容
Lenovo V14-IIL Camera Replacement

Lenovo V14-IIL Camera Replacement

Sydney Askins

Sydney Askins2 其他贡献者

最后更新于 June 18, 2024

1小时
中等
正在学习的学生

Impact damage, closing the laptop with excessive force, and scratches on the camera lens can cause the camera to break or develop bad image quality. This guide shows how to replace the camera within the Lenovo V14-IIL laptop. Be sure to remove small parts carefully.

Before using this guide, make sure to review the Lenovo V14-IIL troubleshooting page to review if there may be a solution that does not require component replacement.

Make sure to power off your laptop completely and disconnect from any external power source before beginning the process.

你所需要的

工具

查看更多...

  1. Lenovo V14-IIL Camera Replacement, Back Panel: 步骤 1 中的图像 1,2 Lenovo V14-IIL Camera Replacement, Back Panel: 步骤 1 中的图像 2,2
    • Make sure the laptop is powered off and unplug all cables before beginning any repair.

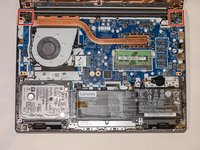
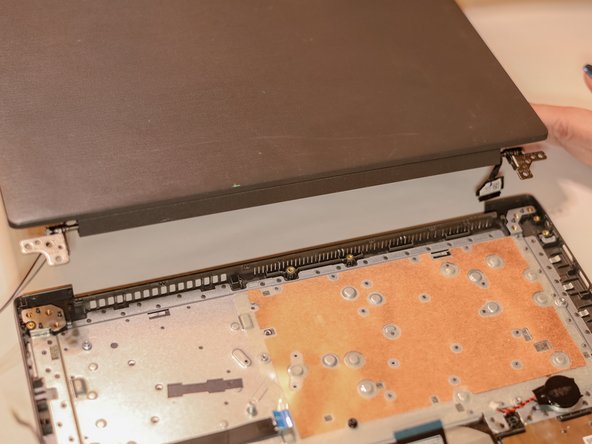
    • Flip your laptop over and place on a flat surface so you can access the screws on the base cover.

    • Remove the six 7 mm screws from the back panel of the laptop using a Phillips #0 screwdriver.

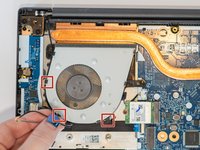
    • Remove the four 4 mm screws from the bottom edge of the laptop using a Phillips #0 screwdriver.

  2. Lenovo V14-IIL Camera Replacement: 步骤 2 中的图像 1,1
    • Use an iFixit opening tool to pry apart the case by sliding it along each side of the laptop.

    • You may need to move the tool to different locations to fully release the back cover.

  3. Lenovo V14-IIL Camera Replacement: 步骤 3 中的图像 1,1
    • Lift away the back panel and set it aside.

  4. Lenovo V14-IIL Camera Replacement, Display Assembly: 步骤 4 中的图像 1,2 Lenovo V14-IIL Camera Replacement, Display Assembly: 步骤 4 中的图像 2,2
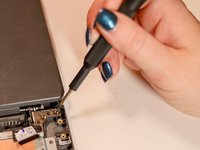
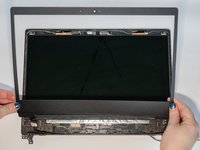
    • Using a Phillips #0 screwdriver, remove the four 5 mm screws from the hinges of the laptop.

  5. Lenovo V14-IIL Camera Replacement: 步骤 5 中的图像 1,1
    • Lift up the latch and gently pull the display cable free.

  6. Lenovo V14-IIL Camera Replacement: 步骤 6 中的图像 1,2 Lenovo V14-IIL Camera Replacement: 步骤 6 中的图像 2,2
    • Using the spudger, disconnect the two wireless LAN cables (black and gray) from the wireless LAN card.

    • Remove the LAN cables from the three brackets on the fan.

  7. Lenovo V14-IIL Camera Replacement: 步骤 7 中的图像 1,1
    • Ensure that all cables and hinges are detached.

    • Lift the display assembly away from the base.

  8. Lenovo V14-IIL Camera Replacement, Screen Bezel: 步骤 8 中的图像 1,2 Lenovo V14-IIL Camera Replacement, Screen Bezel: 步骤 8 中的图像 2,2
    • Slide the cable hinge cover to the right.

    • Pull the part away from the screen.

  9. Lenovo V14-IIL Camera Replacement: 步骤 9 中的图像 1,2 Lenovo V14-IIL Camera Replacement: 步骤 9 中的图像 2,2
    • Use the iFixit opening tool to separate the bezel panel.

    • Slide the opening tool all the way around to loosen the bezels on all sides.

    • You may need to use the tool to gently loosen the adhesive tape.

    • Lift away the bezel panel.

  10. Lenovo V14-IIL Camera Replacement, Camera: 步骤 10 中的图像 1,1
    • Gently pull out the stretch adhesive tape.

    • Make sure to pull from hinges to the top of the LCD panel.

    • You may need to use the metal spudger to help loosen the adhesive.

  11. Lenovo V14-IIL Camera Replacement: 步骤 11 中的图像 1,1
    • Disconnect the wire from the back of the integrated camera and lift the camera away.

结论

To reassemble your device, follow these instructions in reverse order.

另外一个人完成了本指南。

0条评论

添加评论

浏览统计数据:

过去 24 小时: 0

过去 7 天: 0

过去 30 天: 2

总计 95