跳转到主内容

Lenovo ThinkPad T480 Hard Drive Replacement

你所需要的

  1. Lenovo ThinkPad T480 Hard Drive Replacement, External Battery: 步骤 1 中的图像 1,2 Lenovo ThinkPad T480 Hard Drive Replacement, External Battery: 步骤 1 中的图像 2,2
    • Disable the battery, power down, and unplug your device before you begin.

    • Flip the laptop over so the bottom of the device is showing.

  2. Lenovo ThinkPad T480 Hard Drive Replacement: 步骤 2 中的图像 1,3 Lenovo ThinkPad T480 Hard Drive Replacement: 步骤 2 中的图像 2,3 Lenovo ThinkPad T480 Hard Drive Replacement: 步骤 2 中的图像 3,3
    • Using your fingers, slide the lock on each side of the battery to the unlocked position.

    • Remove the battery from the slot.

  3. Lenovo ThinkPad T480 Hard Drive Replacement, Back Cover: 步骤 3 中的图像 1,2 Lenovo ThinkPad T480 Hard Drive Replacement, Back Cover: 步骤 3 中的图像 2,2
    • Using the Phillips #1 screwdriver, loosen the six captive screws.

  4. Lenovo ThinkPad T480 Hard Drive Replacement: 步骤 4 中的图像 1,3 Lenovo ThinkPad T480 Hard Drive Replacement: 步骤 4 中的图像 2,3 Lenovo ThinkPad T480 Hard Drive Replacement: 步骤 4 中的图像 3,3
    • Insert the blue plastic opening tool into the space between the lower case and the chassis.

    • Slide the opening tool around the perimeter of the case to release the clips holding the case and the chassis together.

    • If it feels like the battery well portion of the back cover isn't loose, these clips may be holding the cover to the laptop. Use your opening tool to pry the clips loose and try removing the cover again.

    • Remove the back case.

  5. Lenovo ThinkPad T480 Hard Drive Replacement, Internal Battery: 步骤 5 中的图像 1,2 Lenovo ThinkPad T480 Hard Drive Replacement, Internal Battery: 步骤 5 中的图像 2,2
    • Using the Phillips #1 screwdriver, remove the two 4.6 mm screws securing the internal battery to the frame.

  6. Lenovo ThinkPad T480 Hard Drive Replacement: 步骤 6 中的图像 1,3 Lenovo ThinkPad T480 Hard Drive Replacement: 步骤 6 中的图像 2,3 Lenovo ThinkPad T480 Hard Drive Replacement: 步骤 6 中的图像 3,3
    • Use the spudger to slide the battery socket connector parallel to the motherboard and out of its socket on the motherboard.

  7. Lenovo ThinkPad T480 Hard Drive Replacement: 步骤 7 中的图像 1,3 Lenovo ThinkPad T480 Hard Drive Replacement: 步骤 7 中的图像 2,3 Lenovo ThinkPad T480 Hard Drive Replacement: 步骤 7 中的图像 3,3
    • Using the black nylon spudger, wedge the battery up from the case and lift it out.

  8. Lenovo ThinkPad T480 Hard Drive Replacement, Hard Drive: 步骤 8 中的图像 1,3 Lenovo ThinkPad T480 Hard Drive Replacement, Hard Drive: 步骤 8 中的图像 2,3 Lenovo ThinkPad T480 Hard Drive Replacement, Hard Drive: 步骤 8 中的图像 3,3
    • Using the black nylon spudger, lift the connector lock up.

    • Disconnect the storage cable from the motherboard.

  9. Lenovo ThinkPad T480 Hard Drive Replacement: 步骤 9 中的图像 1,3 Lenovo ThinkPad T480 Hard Drive Replacement: 步骤 9 中的图像 2,3 Lenovo ThinkPad T480 Hard Drive Replacement: 步骤 9 中的图像 3,3
    • Lift the hard drive up with a tab if it has one or with your spudger.

    • Lift the drive assembly from the system.

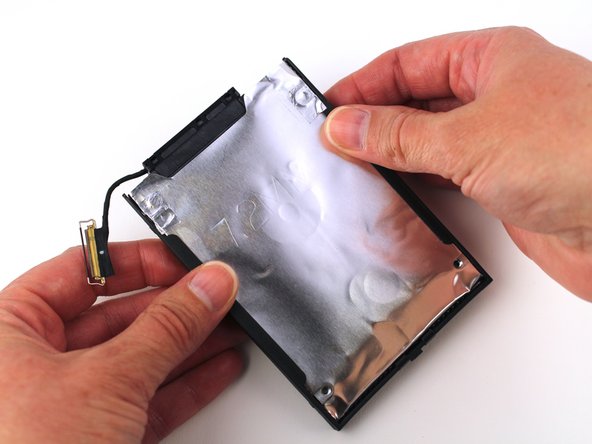
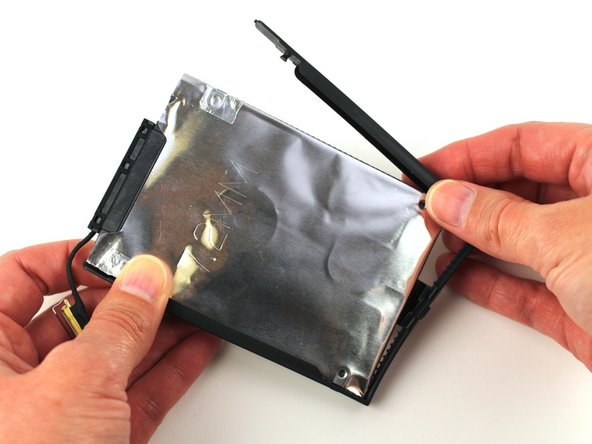
  10. Lenovo ThinkPad T480 Hard Drive Replacement: 步骤 10 中的图像 1,3 Lenovo ThinkPad T480 Hard Drive Replacement: 步骤 10 中的图像 2,3 Lenovo ThinkPad T480 Hard Drive Replacement: 步骤 10 中的图像 3,3
    • Pull the plastic drive bracket outward to remove it from the hard drive.

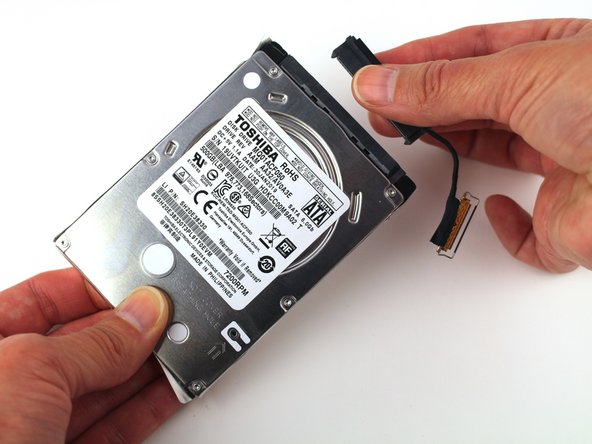
  11. Lenovo ThinkPad T480 Hard Drive Replacement: 步骤 11 中的图像 1,2 Lenovo ThinkPad T480 Hard Drive Replacement: 步骤 11 中的图像 2,2
    • Flip it over and remove the drive connector from the assembly.

结论

To reassemble your device, follow the above steps in reverse order.

Take your e-waste to an R2 or e-Stewards certified recycler.

Repair didn’t go as planned? Try some basic troubleshooting, or ask our Answers community for help.

2等其他人完成本指南。

Sarah Westberg

于03/11/19注册

23,161 声望

创作了70篇指南

团队

iFixit iFixit 的会员

Staff

135 名成员

创作了16,820篇指南

0条评论

添加评论

浏览统计数据:

过去 24 小时: 16

过去 7 天: 158

过去 30 天: 681

总计 18,856