跳转到主内容

Lenovo IdeaPad 3-15IIL05 SSD Replacement

你所需要的

  1. Lenovo IdeaPad 3-15IIL05 SSD Replacement, Prepare your laptop for disassembly: 步骤 1 中的图像 1,2 Lenovo IdeaPad 3-15IIL05 SSD Replacement, Prepare your laptop for disassembly: 步骤 1 中的图像 2,2
    • Allow your laptop's battery to drain below 25% before starting this repair—a charged battery may catch fire if damaged.

    • Unplug all cables and fully shut down your laptop.

  2. Lenovo IdeaPad 3-15IIL05 SSD Replacement, Unfasten the back cover: 步骤 2 中的图像 1,2 Lenovo IdeaPad 3-15IIL05 SSD Replacement, Unfasten the back cover: 步骤 2 中的图像 2,2
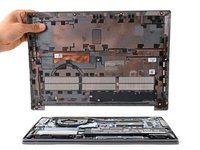
    • Use a Phillips screwdriver to remove the ten screws securing the back cover:

    • Six 7.6 mm-long screws

    • Four 4.7 mm-long screws

  3. Lenovo IdeaPad 3-15IIL05 SSD Replacement, Insert an opening pick: 步骤 3 中的图像 1,3 Lenovo IdeaPad 3-15IIL05 SSD Replacement, Insert an opening pick: 步骤 3 中的图像 2,3 Lenovo IdeaPad 3-15IIL05 SSD Replacement, Insert an opening pick: 步骤 3 中的图像 3,3
    • Plastic clips secure the back cover to the frame. You'll hear and feel the clips release.

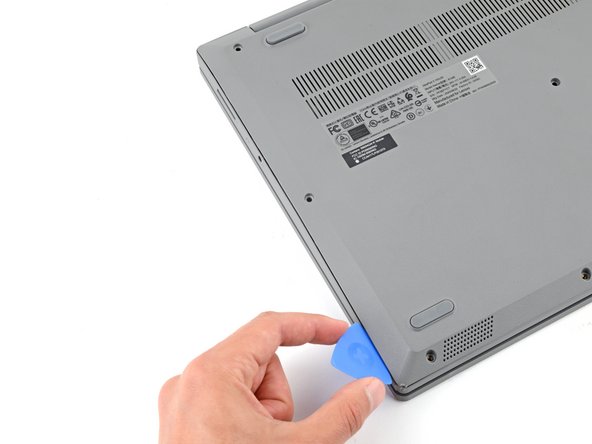
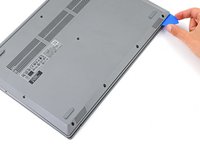
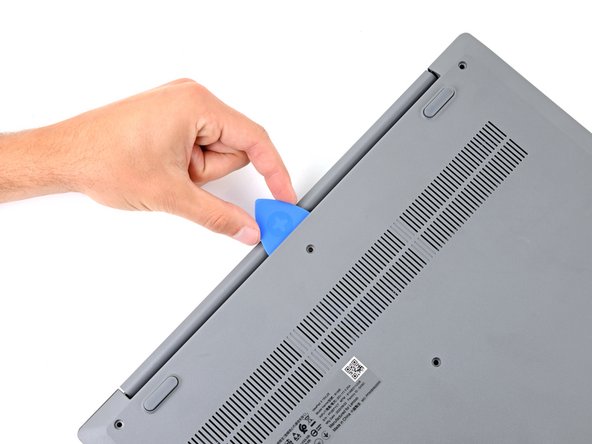
    • Insert the flat side of an opening pick between the top left corner of the back cover and frame.

    • Angle the pick down to about 45 degrees.

  4. Lenovo IdeaPad 3-15IIL05 SSD Replacement, Release the left clips: 步骤 4 中的图像 1,3 Lenovo IdeaPad 3-15IIL05 SSD Replacement, Release the left clips: 步骤 4 中的图像 2,3 Lenovo IdeaPad 3-15IIL05 SSD Replacement, Release the left clips: 步骤 4 中的图像 3,3
    • Keep the opening pick angled down at about 45 degrees while sliding it along the front and side edges to help release the clips.

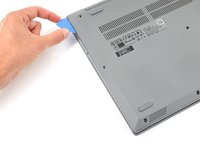
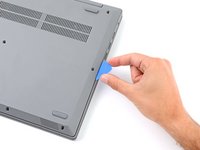
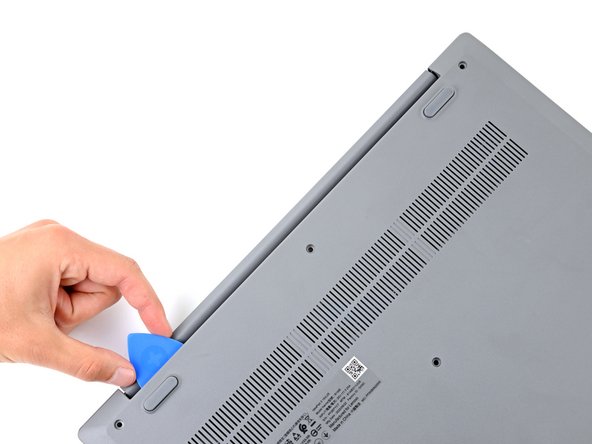
    • Slide the pick to the bottom left corner of the laptop to release the left clips.

  5. Lenovo IdeaPad 3-15IIL05 SSD Replacement, Release the bottom clips: 步骤 5 中的图像 1,3 Lenovo IdeaPad 3-15IIL05 SSD Replacement, Release the bottom clips: 步骤 5 中的图像 2,3 Lenovo IdeaPad 3-15IIL05 SSD Replacement, Release the bottom clips: 步骤 5 中的图像 3,3
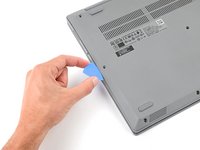
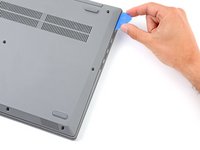
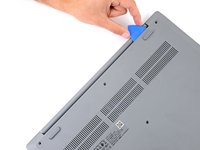
    • Slide the opening pick to the bottom right corner to release the bottom clips.

  6. Lenovo IdeaPad 3-15IIL05 SSD Replacement, Release the right clips: 步骤 6 中的图像 1,3 Lenovo IdeaPad 3-15IIL05 SSD Replacement, Release the right clips: 步骤 6 中的图像 2,3 Lenovo IdeaPad 3-15IIL05 SSD Replacement, Release the right clips: 步骤 6 中的图像 3,3
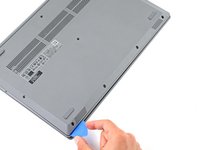
    • Slide the opening pick to the top right corner to release the right clips.

  7. Lenovo IdeaPad 3-15IIL05 SSD Replacement, Insert an opening pick: 步骤 7 中的图像 1,2 Lenovo IdeaPad 3-15IIL05 SSD Replacement, Insert an opening pick: 步骤 7 中的图像 2,2
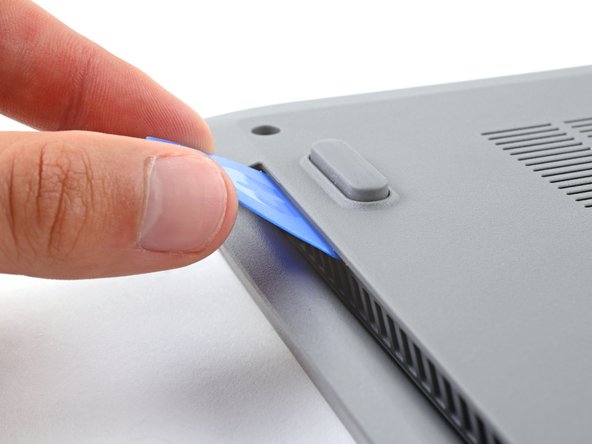
    • Insert the flat end of an opening pick between the back cover and frame, to the left of the right hinge.

    • Pry the back cover up with the pick to release the top right clips.

    • Leave the pick inserted next to the right hinge.

  8. Lenovo IdeaPad 3-15IIL05 SSD Replacement, Release the top clips: 步骤 8 中的图像 1,3 Lenovo IdeaPad 3-15IIL05 SSD Replacement, Release the top clips: 步骤 8 中的图像 2,3 Lenovo IdeaPad 3-15IIL05 SSD Replacement, Release the top clips: 步骤 8 中的图像 3,3
    • Angle the pick up to about 45 degrees.

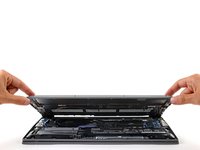
    • Slide the opening pick to the top left corner to release the remaining clips.

  9. Lenovo IdeaPad 3-15IIL05 SSD Replacement, Remove the back cover: 步骤 9 中的图像 1,3 Lenovo IdeaPad 3-15IIL05 SSD Replacement, Remove the back cover: 步骤 9 中的图像 2,3 Lenovo IdeaPad 3-15IIL05 SSD Replacement, Remove the back cover: 步骤 9 中的图像 3,3
    • Remove the back cover.

    • During reassembly, lay the back cover on the frame and press firmly around the perimeter to engage all the clips.

  10. Lenovo IdeaPad 3-15IIL05 SSD Replacement, Disconnect the battery: 步骤 10 中的图像 1,3 Lenovo IdeaPad 3-15IIL05 SSD Replacement, Disconnect the battery: 步骤 10 中的图像 2,3 Lenovo IdeaPad 3-15IIL05 SSD Replacement, Disconnect the battery: 步骤 10 中的图像 3,3
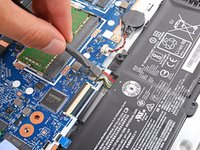
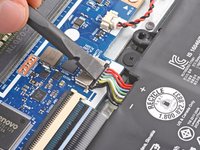
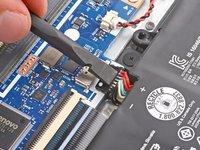
    • Use the flat end of a spudger to gently push the battery connector out of its socket on the motherboard.

  11. Lenovo IdeaPad 3-15IIL05 SSD Replacement, Remove the thermal pad: 步骤 11 中的图像 1,3 Lenovo IdeaPad 3-15IIL05 SSD Replacement, Remove the thermal pad: 步骤 11 中的图像 2,3 Lenovo IdeaPad 3-15IIL05 SSD Replacement, Remove the thermal pad: 步骤 11 中的图像 3,3
    • A delicate thermal pad covers the SSD. If you're planning on reusing it, be extra careful during this step.

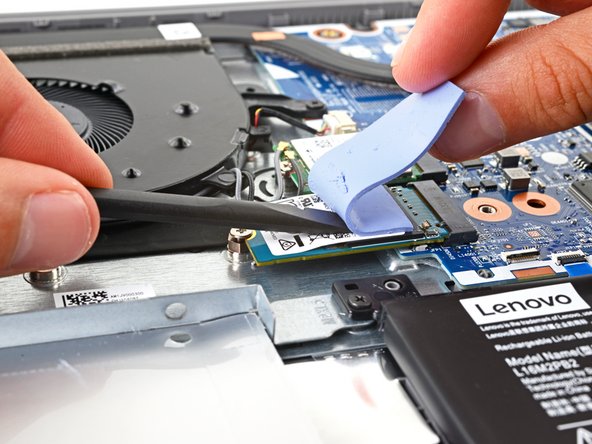
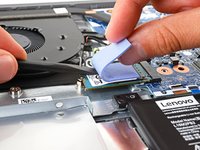
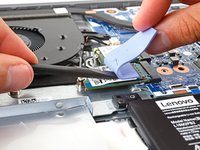
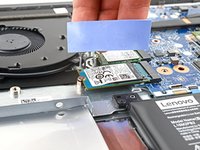
    • Gently lift the left edge of the thermal pad.

    • Carefully slide the flat end of a spudger back and forth under the pad while slowly peeling the pad back.

    • Remove the thermal pad.

    • Set the thermal pad aside and apply it to the new SSD during reassembly.

    • If you tore the thermal pad when taking it off, don’t worry—you can still reuse it.

  12. Lenovo IdeaPad 3-15IIL05 SSD Replacement, Unfasten the SSD: 步骤 12 中的图像 1,2 Lenovo IdeaPad 3-15IIL05 SSD Replacement, Unfasten the SSD: 步骤 12 中的图像 2,2
    • Use a Phillips screwdriver to remove the 3 mm-long screw securing the SSD.

    • The SSD will pop up at a slight angle with the screw removed.

  13. Lenovo IdeaPad 3-15IIL05 SSD Replacement, Remove the SSD: 步骤 13 中的图像 1,3 Lenovo IdeaPad 3-15IIL05 SSD Replacement, Remove the SSD: 步骤 13 中的图像 2,3 Lenovo IdeaPad 3-15IIL05 SSD Replacement, Remove the SSD: 步骤 13 中的图像 3,3
    • Pull the SSD out of its socket and remove it.

    • During reassembly, insert the SSD at a slight downward angle into its socket.

结论

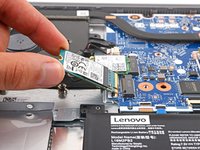
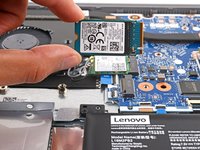
To reassemble your device, follow these instructions in reverse order.

Check your repair by running hardware tests with Lenovo Diagnostics.

Take your e-waste to an R2 or e-Stewards certified recycler.

Repair didn’t go as planned? Try some basic troubleshooting, or ask our Answers community for help.

Spencer Day

于09/14/22注册

54,914 声望

创作了407篇指南

团队

iFixit iFixit 的会员

Staff

136 名成员

创作了17,298篇指南

0条评论

添加评论

浏览统计数据:

过去 24 小时: 10

过去 7 天: 54

过去 30 天: 308

总计 1,503