跳转到主内容

Lenovo 100s Chromebook-11IBY Motherboard Replacement

你所需要的

  1. Lenovo 100s Chromebook-11IBY Motherboard Replacement, Battery: 步骤 1 中的图像 1,1
    • Ensure your device is turned off and unplugged.

  2. Lenovo 100s Chromebook-11IBY Motherboard Replacement: 步骤 2 中的图像 1,1
    • Use a Phillips #0 screwdriver to remove the nine 6mm screws from the larger back plate.

  3. Lenovo 100s Chromebook-11IBY Motherboard Replacement: 步骤 3 中的图像 1,2 Lenovo 100s Chromebook-11IBY Motherboard Replacement: 步骤 3 中的图像 2,2
    • Turn your laptop back over, open it, and use the plastic opening tool on the recessed notch to gently pry each side and lift the keyboard plate up.

    • Be careful not to pull keyboard plate out immediately because cables are attached.

  4. Lenovo 100s Chromebook-11IBY Motherboard Replacement: 步骤 4 中的图像 1,2 Lenovo 100s Chromebook-11IBY Motherboard Replacement: 步骤 4 中的图像 2,2
    • Unlock the keyboard ZIF connector to release the keyboard flex cable.

    • To unlock a ZIF connector, use an opening tool or your fingernail to flip up the small, hinged locking flap.

    • Unlock the touchpad ZIF connector to release the touchpad flex cable.

    • Carefully pull both flex cables out of the ZIF connectors.

    • Remove the keyboard plate up and place it to the side.

  5. Lenovo 100s Chromebook-11IBY Motherboard Replacement: 步骤 5 中的图像 1,1
    • Unplug the battery cable by pulling it towards the battery.

    • Pull parallel to the battery, not straight up.

  6. Lenovo 100s Chromebook-11IBY Motherboard Replacement: 步骤 6 中的图像 1,1
    • Use the Phillips #0 screwdriver to remove the three 6mm screws from the battery.

  7. Lenovo 100s Chromebook-11IBY Motherboard Replacement: 步骤 7 中的图像 1,1
    • Remove the battery.

  8. Lenovo 100s Chromebook-11IBY Motherboard Replacement, Motherboard: 步骤 8 中的图像 1,3 Lenovo 100s Chromebook-11IBY Motherboard Replacement, Motherboard: 步骤 8 中的图像 2,3 Lenovo 100s Chromebook-11IBY Motherboard Replacement, Motherboard: 步骤 8 中的图像 3,3
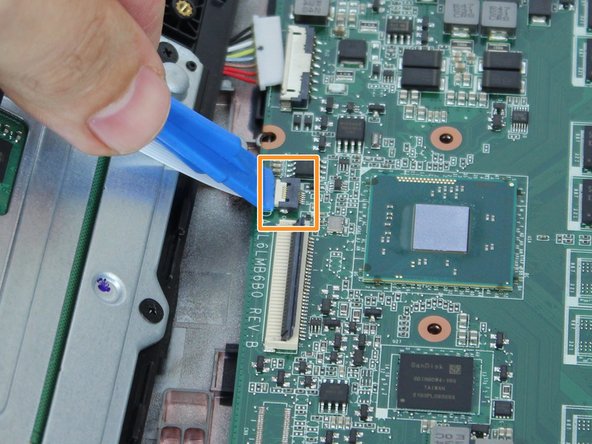
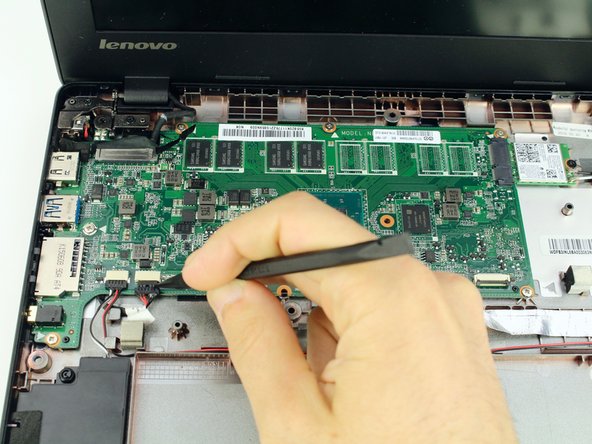
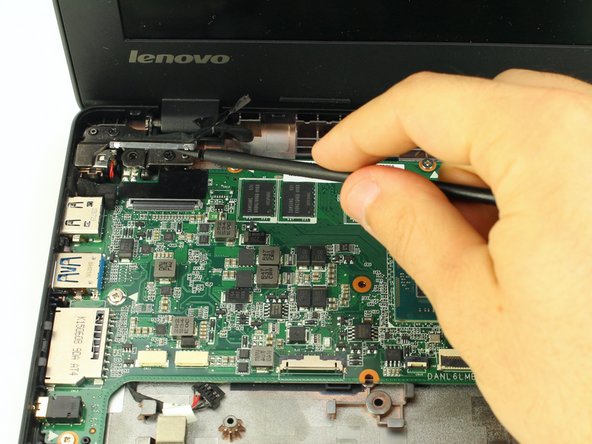
    • Using the black nylon spudger, lift up the grey bar of the ZIF connector attached to the motherboard located in the bottom right corner.

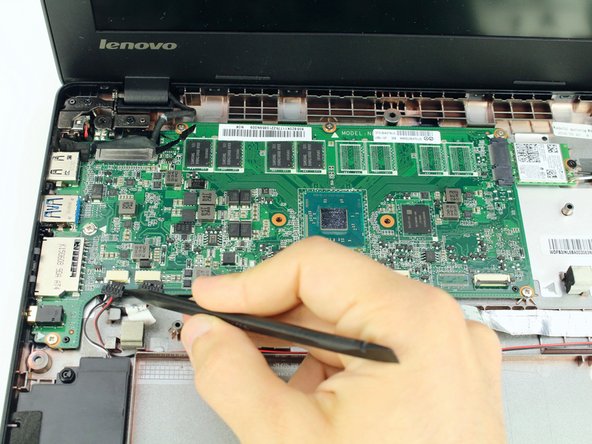
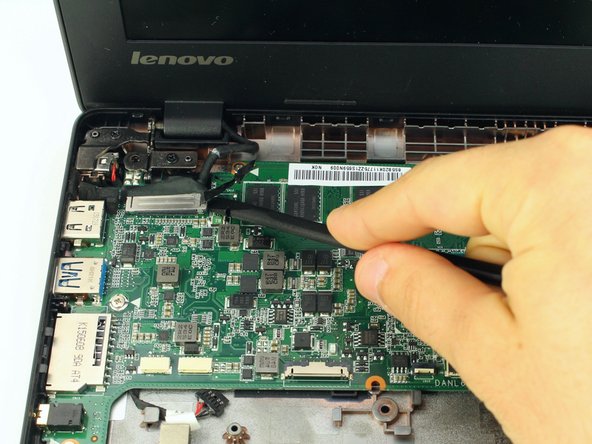
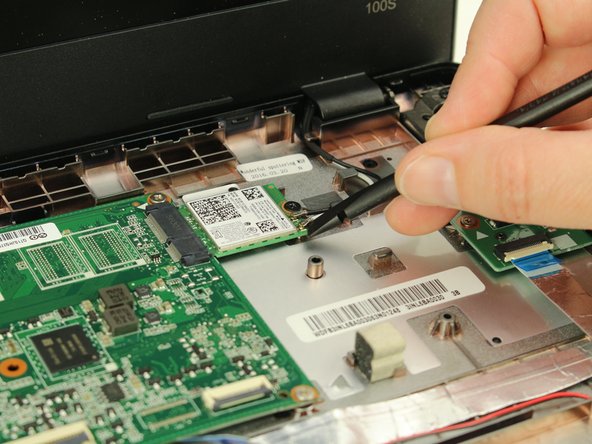
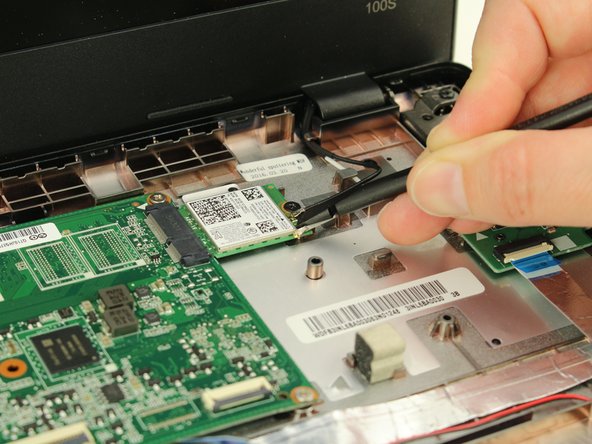
    • Pull out the ribbon cable connecting the motherboard to the daughterboard.

  9. Lenovo 100s Chromebook-11IBY Motherboard Replacement: 步骤 9 中的图像 1,3 Lenovo 100s Chromebook-11IBY Motherboard Replacement: 步骤 9 中的图像 2,3 Lenovo 100s Chromebook-11IBY Motherboard Replacement: 步骤 9 中的图像 3,3
    • Use the spudger to coax the sliding speaker cables toward you, out of the motherboard attachments.

  10. Lenovo 100s Chromebook-11IBY Motherboard Replacement: 步骤 10 中的图像 1,3 Lenovo 100s Chromebook-11IBY Motherboard Replacement: 步骤 10 中的图像 2,3 Lenovo 100s Chromebook-11IBY Motherboard Replacement: 步骤 10 中的图像 3,3
    • Use the flat end of the spudger to pop up the display cable connector from the motherboard.

  11. Lenovo 100s Chromebook-11IBY Motherboard Replacement: 步骤 11 中的图像 1,3 Lenovo 100s Chromebook-11IBY Motherboard Replacement: 步骤 11 中的图像 2,3 Lenovo 100s Chromebook-11IBY Motherboard Replacement: 步骤 11 中的图像 3,3
    • Pry up the coaxial antenna cables from the wifi card with the spudger.

  12. Lenovo 100s Chromebook-11IBY Motherboard Replacement: 步骤 12 中的图像 1,3 Lenovo 100s Chromebook-11IBY Motherboard Replacement: 步骤 12 中的图像 2,3 Lenovo 100s Chromebook-11IBY Motherboard Replacement: 步骤 12 中的图像 3,3
    • Use your Phillips #0 screwdriver to remove six 3.7mm screws from the motherboard.

    • Use the same Phillips #0 screwdriver to remove one 3.2mm screw from the wireless card.

    • Wiggle the motherboard gently out from the case. It should come out towards you and slightly to the right.

结论

To reassemble your device, follow these instructions in reverse order.

Sarah Westberg

于03/11/19注册

22,717 声望

创作了70篇指南

团队

iFixit iFixit 的会员

Staff

136 名成员

创作了16,573篇指南

0条评论

添加评论

浏览统计数据:

过去 24 小时: 0

过去 7 天: 1

过去 30 天: 5

总计 866