跳转到主内容

LG Refrigerator Flap Door Motor Testing and Replacement

你所需要的

  1. LG Refrigerator Flap Door Motor Testing and Replacement, Unplug your refrigerator: 步骤 1 中的图像 1,1
    • Unplug your refrigerator before you begin your repair.

    • If you are testing or repairing the following items, you may also need to shut off and disconnect the water supply:

    • Condenser fan motor

    • Compressor motor and thermal overload device

    • Water supply valve assembly

  2. LG Refrigerator Flap Door Motor Testing and Replacement, Loosen the left door handle set screws: 步骤 2 中的图像 1,2 LG Refrigerator Flap Door Motor Testing and Replacement, Loosen the left door handle set screws: 步骤 2 中的图像 2,2
    • To remove the left door handle, first open the right door.

    • Use a 2 1/2 mm hex wrench to loosen the set screws in the top and bottom of the left door handle.
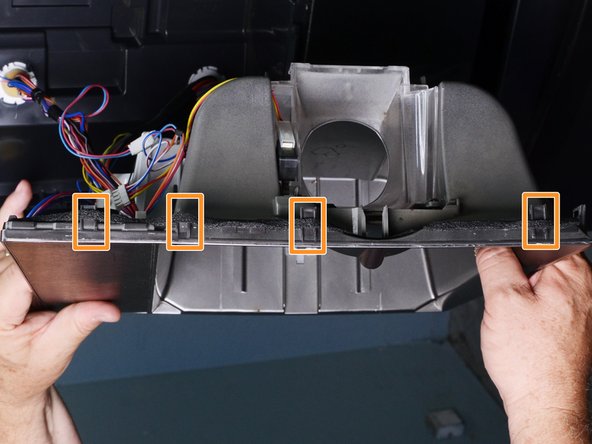
  3. LG Refrigerator Flap Door Motor Testing and Replacement, Remove the left door handle: 步骤 3 中的图像 1,2 LG Refrigerator Flap Door Motor Testing and Replacement, Remove the left door handle: 步骤 3 中的图像 2,2
    • Pull the left door handle straight off to remove it.

  4. LG Refrigerator Flap Door Motor Testing and Replacement, Retaining clip locations: 步骤 4 中的图像 1,3 LG Refrigerator Flap Door Motor Testing and Replacement, Retaining clip locations: 步骤 4 中的图像 2,3 LG Refrigerator Flap Door Motor Testing and Replacement, Retaining clip locations: 步骤 4 中的图像 3,3
    • The dispenser assembly is secured by very strong clips, making it very difficult to remove. Take note of the clip location examples shown in the photos:

    • Right side clips

    • Top clips

    • Left side clips (Note, the dispenser is being held upside down for the photo, so the upper left side clips are at the bottom of the photo.)

    • During disassembly, you may break some of these clips. If you do, don't worry; the assembly does not need all the clips to be properly secured.

  5. LG Refrigerator Flap Door Motor Testing and Replacement, Release the dispenser: 步骤 5 中的图像 1,3 LG Refrigerator Flap Door Motor Testing and Replacement, Release the dispenser: 步骤 5 中的图像 2,3 LG Refrigerator Flap Door Motor Testing and Replacement, Release the dispenser: 步骤 5 中的图像 3,3
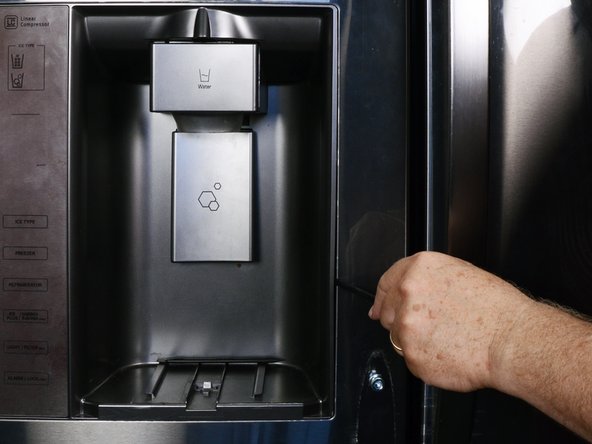
    • Use a spudger to pry out the top edge of the dispenser assembly.

    • Once you've created a gap, use your fingertips to pull the edge downward.

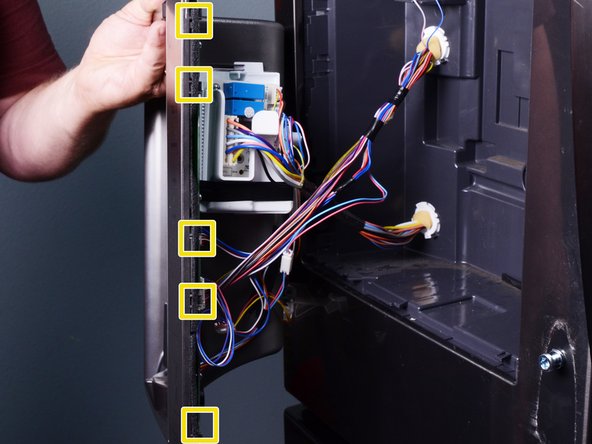
    • Use additional spudgers to unfasten the clips securing the dispenser assembly to the refrigerator door.

    • Optionally, you may use a flat-blade screwdriver to assist in this process. Be careful not to damage the door; you may scratch the door surface or dent the rim of the dispenser opening.

  6. LG Refrigerator Flap Door Motor Testing and Replacement, Reposition the dispenser: 步骤 6 中的图像 1,3 LG Refrigerator Flap Door Motor Testing and Replacement, Reposition the dispenser: 步骤 6 中的图像 2,3 LG Refrigerator Flap Door Motor Testing and Replacement, Reposition the dispenser: 步骤 6 中的图像 3,3
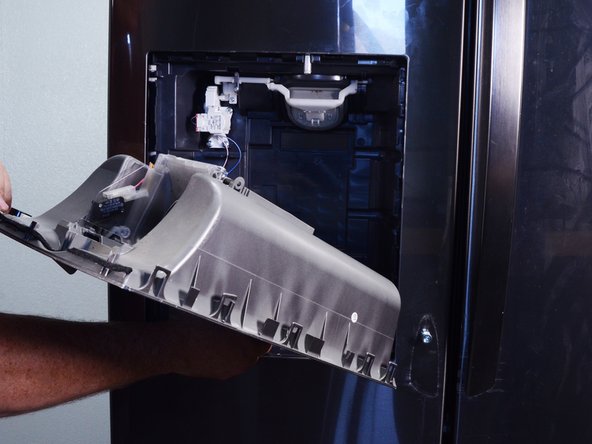
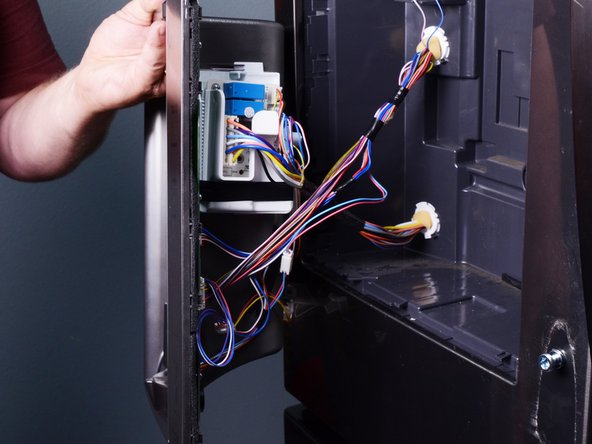
    • Grasp the top edge of the dispenser assembly in the middle and pull outwards.

    • Continue prying and pulling around the perimeter of the assembly to release it.

  7. LG Refrigerator Flap Door Motor Testing and Replacement: 步骤 7 中的图像 1,3 LG Refrigerator Flap Door Motor Testing and Replacement: 步骤 7 中的图像 2,3 LG Refrigerator Flap Door Motor Testing and Replacement: 步骤 7 中的图像 3,3
    • Grasp the assembly firmly and pull it out of the refrigerator door.

    • Don't try to pull the assembly completely off the refrigerator door. The assembly is still connected with numerous wires. These are mainly connected to the left side of the dispenser.

  8. LG Refrigerator Flap Door Motor Testing and Replacement, Disconnect the dispenser: 步骤 8 中的图像 1,1
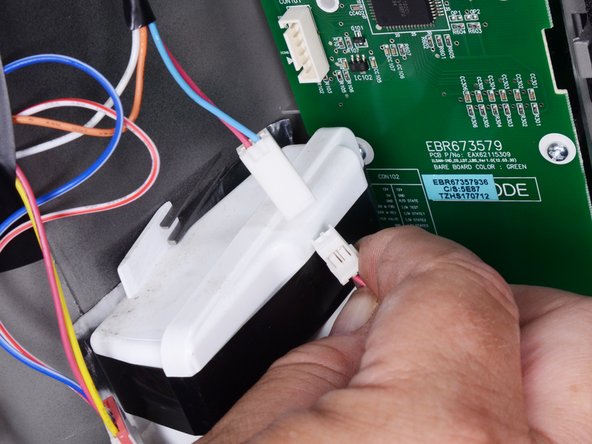
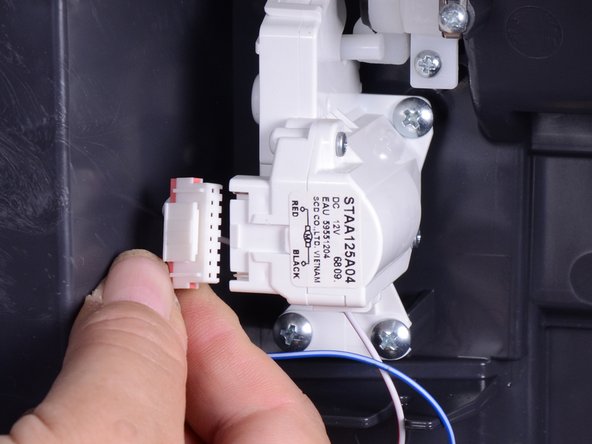
    • Squeeze the multiple wire connectors and pull them straight off to disconnect them from the various PC boards.

    • Some of the connectors may be permanently attached to the PC board and can't be removed.

  9. LG Refrigerator Flap Door Motor Testing and Replacement: 步骤 9 中的图像 1,2 LG Refrigerator Flap Door Motor Testing and Replacement: 步骤 9 中的图像 2,2
    • Squeeze and separate the various connectors in the wiring harness. The photo shows two examples.

  10. LG Refrigerator Flap Door Motor Testing and Replacement, Unfasten the circuit board holder: 步骤 10 中的图像 1,3 LG Refrigerator Flap Door Motor Testing and Replacement, Unfasten the circuit board holder: 步骤 10 中的图像 2,3 LG Refrigerator Flap Door Motor Testing and Replacement, Unfasten the circuit board holder: 步骤 10 中的图像 3,3
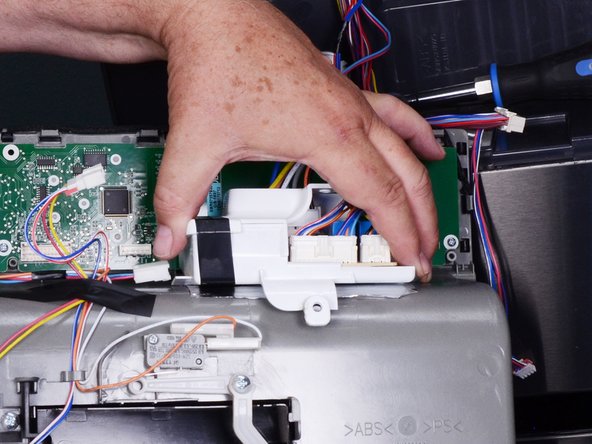
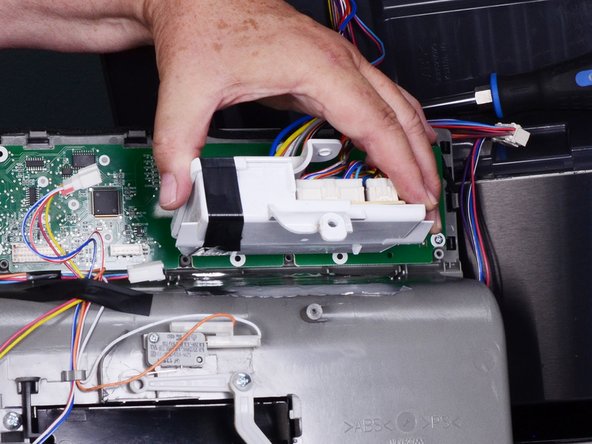
    • Use a Phillips screwdriver to remove the screw securing the circuit board holder to the dispenser assembly. Many, but not all, units will have this PC board and holder.

    • Lift and remove the circuit board holder from the dispenser assembly.

  11. LG Refrigerator Flap Door Motor Testing and Replacement, Remove the dispenser: 步骤 11 中的图像 1,1
    • You can now remove the dispenser from the refrigerator.

    • The circuit board holder, if present, can be suspended from the harness wires, as its weight is minimal.

  12. LG Refrigerator Flap Door Motor Testing and Replacement, Disconnect the flap door motor: 步骤 12 中的图像 1,2 LG Refrigerator Flap Door Motor Testing and Replacement, Disconnect the flap door motor: 步骤 12 中的图像 2,2
    • Squeeze and pull the flap motor connector to disconnect it.

  13. LG Refrigerator Flap Door Motor Testing and Replacement, Unfasten the flap door motor: 步骤 13 中的图像 1,2 LG Refrigerator Flap Door Motor Testing and Replacement, Unfasten the flap door motor: 步骤 13 中的图像 2,2
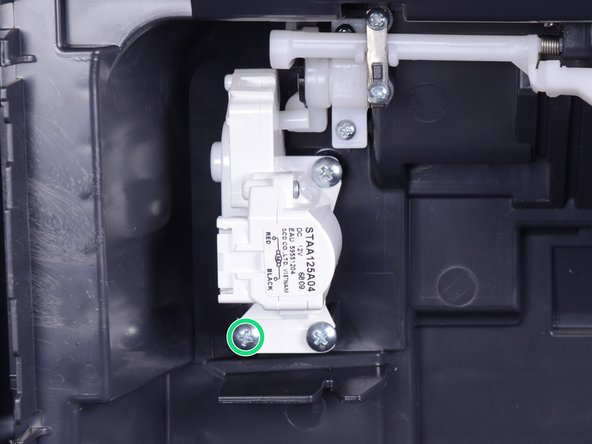
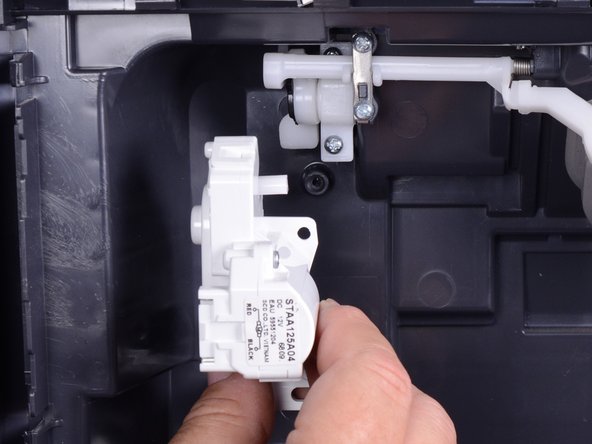
    • Use a Philips head screwdriver to remove the screws securing the motor in place.

    • During reassembly:

    • Before installing the motor, partially screw in the lower left screw to help position the motor.

  14. LG Refrigerator Flap Door Motor Testing and Replacement, Remove the flap motor: 步骤 14 中的图像 1,2 LG Refrigerator Flap Door Motor Testing and Replacement, Remove the flap motor: 步骤 14 中的图像 2,2
    • Remove the flap motor.

  15. LG Refrigerator Flap Door Motor Testing and Replacement, Test the flap door motor: 步骤 15 中的图像 1,1
    • If you have a multimeter, you can test to see if your flap door motor is good or not.

    • Set your multimeter to the resistance function.

    • Touch one probe to each of the terminals at the same time.

    • The meter should read between 9 and 14Ω.

    • If the reading is outside of this range, replace the flap door motor.

结论

To reassemble your device, follow these instructions in reverse order.

Take your e-waste to an R2 or e-Stewards certified recycler.

Repair didn’t go as planned? Try some basic troubleshooting, or ask our  Answers community for help.

Bill Gilbert

于06/30/22注册

29,887 声望

创作了213篇指南

团队

iFixit iFixit 的会员

Staff

135 名成员

创作了17,182篇指南

0条评论

添加评论

浏览统计数据:

过去 24 小时: 1

过去 7 天: 2

过去 30 天: 16

总计 61