跳转到主内容

KitchenAid KHM512ER Eject Button Spring Replacement

你所需要的

  1. KitchenAid KHM512ER Eject Button Spring Replacement, Eject Button Spring: 步骤 1 中的图像 1,2 KitchenAid KHM512ER Eject Button Spring Replacement, Eject Button Spring: 步骤 1 中的图像 2,2
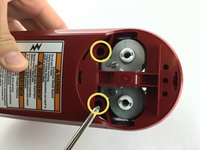
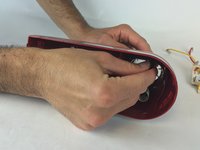
    • Insert the back of a plastic opening tool into one of the beater holes.

    • Apply force to pull the circular plastic part off.

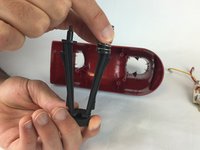
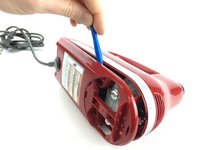
    • If necessary, use the other side of the plastic opening tool to pry the circular plastic part off.

  2. KitchenAid KHM512ER Eject Button Spring Replacement: 步骤 2 中的图像 1,3 KitchenAid KHM512ER Eject Button Spring Replacement: 步骤 2 中的图像 2,3 KitchenAid KHM512ER Eject Button Spring Replacement: 步骤 2 中的图像 3,3
    • Use a plastic opening tool to remove the speed knob.

    • Use a plastic opening tool to remove the long plastic piece

    • Use a plastic opening tool to remove the speed switch.

  3. KitchenAid KHM512ER Eject Button Spring Replacement: 步骤 3 中的图像 1,2 KitchenAid KHM512ER Eject Button Spring Replacement: 步骤 3 中的图像 2,2
    • Use a Phillips 2 screwdriver to remove the two 20.0mm screws holding the bottom plastic piece on.

    • Your screwdriver may not be long or narrow enough to reach the screws in these holes. If that's the case, use another screwdriver.

    • Remove the bottom plastic piece using a plastic opening tool.

  4. KitchenAid KHM512ER Eject Button Spring Replacement: 步骤 4 中的图像 1,3 KitchenAid KHM512ER Eject Button Spring Replacement: 步骤 4 中的图像 2,3 KitchenAid KHM512ER Eject Button Spring Replacement: 步骤 4 中的图像 3,3
    • Using a Phillips 2 screwdriver, remove the three 20.0mm screws holding the motor assembly in place.

    • Use your hands to remove the motor assembly.

    • Use your hands to hold the eject button from one side while using the other hand to remove the circuit board.

  5. KitchenAid KHM512ER Eject Button Spring Replacement: 步骤 5 中的图像 1,2 KitchenAid KHM512ER Eject Button Spring Replacement: 步骤 5 中的图像 2,2
    • Remove the eject button by pulling it from the inside of the mixer.

    • Hold the eject button firmly while pulling out the spring.

结论

To reassemble your device, follow these instructions in reverse order.

2等其他人完成本指南。

Yuriy Zaynulin

于02/10/16注册

191 声望

撰写一个指南

团队

USF Tampa, Team 2-3, Sullivan Spring 2016 USF Tampa, Team 2-3, Sullivan Spring 2016 的会员

USFT-SULLIVAN-S16S2G3

3 名成员

创作了4篇指南

0条评论

添加评论

浏览统计数据:

过去 24 小时: 0

过去 7 天: 0

过去 30 天: 6

总计 1,563