跳转到主内容

How to Fix a Stuck Button in Sharp Calculator

你所需要的

  1. How to Fix a Stuck Button in Sharp Calculator, Button Keys: 步骤 1 中的图像 1,1
    • Turn the power off by pressing a button named 2NDF located in the top-left corner.

    • Press the button named ON/C in the top-right corner.

  2. How to Fix a Stuck Button in Sharp Calculator: 步骤 2 中的图像 1,2 How to Fix a Stuck Button in Sharp Calculator: 步骤 2 中的图像 2,2
    • Flip the calculator over so that the back panel is facing upwards.

    • Remove two 5mm Phillips #0 screws from the battery cover by turning the screwdriver in a counter-clockwise direction.

    • Remove the remaining four 5mm Phillips #0 screws from the back panel cover.

  3. How to Fix a Stuck Button in Sharp Calculator: 步骤 3 中的图像 1,1
    • Remove the battery cover.

    • Insert a spudger into the slot located in the top-right corner and pry the battery out.

  4. How to Fix a Stuck Button in Sharp Calculator: 步骤 4 中的图像 1,1
    • Remove the front panel by sticking an opening tool into a small gap between front and back panel.

    • Push the tool down with force and pry open the right side carefully.

    • Detach the front panel from the back panel by lifting the front board.

    • Separate the front and back panel slowly to avoid damaging the LCD ribbon.

  5. How to Fix a Stuck Button in Sharp Calculator: 步骤 5 中的图像 1,1
    • Use a Phillips #0 screwdriver to remove the eight 5mm screws from the motherboard.

  6. How to Fix a Stuck Button in Sharp Calculator: 步骤 6 中的图像 1,2 How to Fix a Stuck Button in Sharp Calculator: 步骤 6 中的图像 2,2
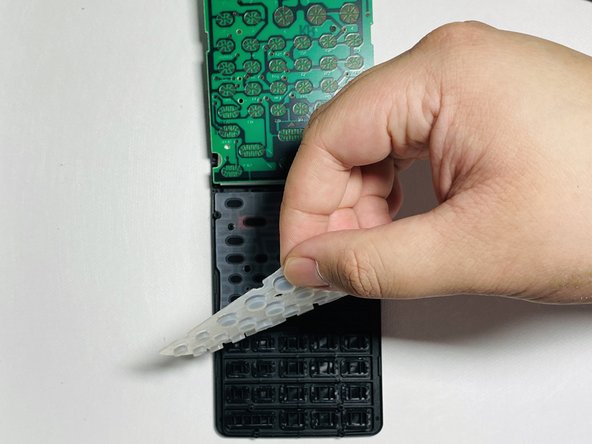
    • Lift the motherboard by holding both sides and placing it on the top panel.

    • Lift the grey padding upwards by holding any corner and place it on top of the motherboard.

    • Press the grey padding and put pressure downward to avoid sticking from physical buttons.

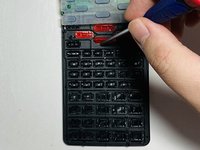
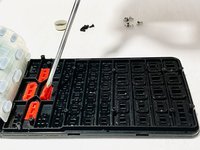
  7. How to Fix a Stuck Button in Sharp Calculator: 步骤 7 中的图像 1,2 How to Fix a Stuck Button in Sharp Calculator: 步骤 7 中的图像 2,2
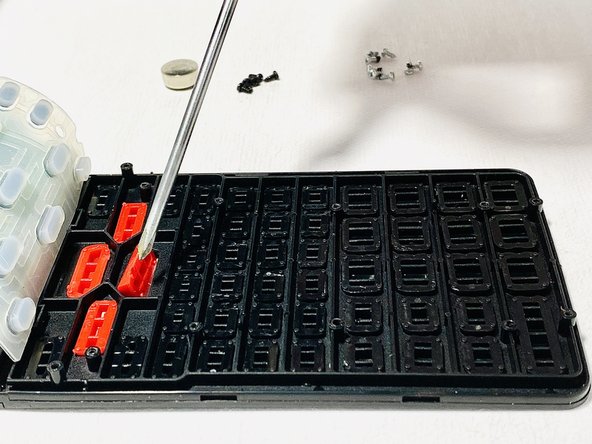
    • Use a spudger to flip, remove, and adjust the position of buttons.

    • Ensure the placement of buttons is correct. Use STEP 1 Image as a reference to the location of buttons.

结论

To reassemble your device, follow these instructions in reverse order.

2等其他人完成本指南。

团队

0条评论

添加评论

浏览统计数据:

过去 24 小时: 3

过去 7 天: 8

过去 30 天: 62

总计 4,555